
2013
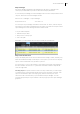

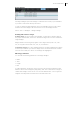
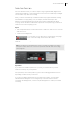


Table Of Contents
- Copyright
- Preface
- Support
- Introduction
- Tutorial
- Program desktop overview
- Functional overview
- Mouse functions and mouse modes
- Effects and effect plug-ins
- What effects are there, and how are they used?
- Saving effect parameters (preset mechanism)
- "Sound FX" (object editor, mixer channels, Mixmaster)
- Parametric equalizer (track effects, mixer channels, Mixmaster)
- MAGIX Mastering Suite
- Vintage Effects Suite (track effects, mixer channels, mix master)
- essential FX
- Vandal SE
- Analogue Modelling Suite: AM-Track SE
- Track dynamics
- Track delay/reverb (track effects)
- Elastic Audio Easy
- Automation
- Mixer
- MIDI in Samplitude Music Studio 2013
- Software / VST instruments
- Installing VST plug-ins
- Load instruments
- Loading routing settings with software instruments
- Load effects plug-ins
- Route MIDI instrument inputs
- Instruments with multi-channel outputs
- Adjust instrument parameters
- Play and monitor instruments live
- Routing VST instruments using the VSTi manager
- Preset management
- Freezing instruments (freeze)
- Tips on handling virtual instruments
- ReWire
- Tempo editing
- Synth objects
- Surround sound
- Synchronization
- Burning CDs
- Tools and wizards
- File menu
- Edit Menu
- Track menu
- Object menu
- Playback / Record menu
- Automation menu
- Effects menu
- CD menu
- Menu view
- The "Share" menu
- Help menu
- Help
- Help index
- Context help
- Open PDF manual
- Watch the introductory video
- Online tutorials
- About Samplitude Music Studio 2013
- MAGIX auto-update
- Open magix.info
- Product registration
- Download more instruments/Sounds/Soundpools
- Screen transfer - MAGIX Screenshare
- Restore original program settings
- MP3 Encoder activation
- Preset keyboard shortcuts
- General settings
- Project options
- If you still have questions
- More about MAGIX
- Index

Tools and wizards 309
Solo JamSession
This mode largely corresponds to the behavior of the "old" Auto JamSession. The aim
of this mode is to create an arrangement even while playing that can serve as a basis
for a new song.
By pressing the spacebar several times in a row, the following actions will be
triggered:
1. Playback begins. Nothing is recorded yet.
2. The first recording starts. Record your first beat(s). As a sign that the program
is recording, the action button turns red.
3. The recording ends. The recorded section is then inserted into the
arrangement as a loop and begins playing repeatedly. This serves as a grid for
the next loops.
4. The next recording starts. You'll continue to hear the previously recorded loop.
Now you can add an additional voice to it.
5. The recording ends, playback of the first and the newly recorded loop
continues.
The next times start and end other recordings (4 and 5 repeat each other). Every time
the recording is restarted, it's recorded in a new track. All loops recorded up until now
are played.
Double-clicking on the record button stops the last loop recorded. Clicking three
times ends all running loops. You can use it to separate various sections in the
arrangement from one another.
Accompaniment
There are many ways to record a song:
• Record everything by yourself. Here, the loop that was recorded first is set as a
measure for the speed of the song in BPM (beats per minute). The buttons 1-8
function as mute or solo buttons depending on their set modes (see below).
• You can choose from one of the accompaniments provided. The tempo of the
song will be determined by the template.
Metronome
The metronome is useful for users who might need some help, so they don't "lose the
beat".
You can select the tempo from the list. "--" means that the speed adapts to that of the
first recorded loop or to that of the accompaniment (if selected).
Practice speed
Speed is divided in half or quartered if you activate this button. In the list box, you can
select whether you want to play and record with 50% or 25%.