
User manual


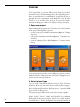
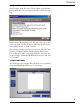
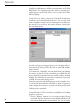
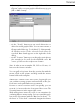

Table Of Contents

9
Tutorial
also use your own images. Simply click on “Insert
Cliparts” and access your graphics files directory (e.g. in
JPG or BMP format).
– via the ”Search” button you can search directories or
drives for usable graphics files. You can enter a name, a
file type and a folder (e.g. ”Local drive C:”). Subsequently,
all sub-directories of the selected search item are
searched. Data found appears on the right side of the
dialog.
– via the ”Scanner” button you can directly scan in photos
(for example) to be used for the CD/DVD cover. Of
course, you also need a ready-to-run scanner.
Note: In order to scan a complete CD, DVD or LP cover, it’s
best to use the Scanner Assistant
You can pull each picture from the preview list with the
mouse. Click on the picture and drag it with the mouse
button held on the template.
Arranging graphics and text fields: In principle you
can combine as many pictures and text fields as like you.
Each item can be pulled wherever you want it.
Because a concise overview can be lost quickly, you can
zoom in, i.e. increase the size of one part of the screen. The
Zooming button is in the upper right corner.
With many picture items on screen, it can sometimes be
confusing when so many overlap. You can control this prob-
lem via the View menu with the ”One level in front”, ”To
the front” or ”To the back” commands. Imagine the frames