
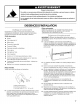
Installation guide


4.
Locate
the
gas
pressure
regulator.
IMPORTANT:
Do
not
remove
the
gas
pressure
regulator.
5.
With
a
flat-blade
screwdriver,
remove
the
brass
cap and
flip
the
brass
cap
over
so
that
“NAT”
is
visible.
A.
Brass
cap
6.
Reinstall
the
cap and
tighten
with
the
flat-blade
screwdriver.
A.
Cap
Install
Natural
gas
orifice
spuds
in
the
valves.
A.
Orifice
spuds
B.
Valves
Place
the
LP
gas
orifice
spuds
in
the
parts
bag
for
future
use
and
keep
with
the
bag
containing
literature.
10.
Push back
on
the
side
support
rods
and
slowly
lower
the
cooktop
until
it
snaps
into
position.
11.
Replace
grates.
To
Convert
Oven
Burner
To
Convert
Surface
Burners
1.
Remove
grates
from
cooktop
2.
Lift
the
cooktop
by
both
front
corners
until
the
side
support
rods
snap
into
position.
3.
Remove
the
screws
that
hold
each
dual
burner.
A.
Dual
burner
screws
4.
Lift
each
burner
and
slip
it
back
to
remove
it.
Set
them
aside.
v1
6.
Locate
Natural
gas
orifice
spuds
for
top
burners
in
the
bag
containing
literature
included
with
the
range.
Four
Natural
gas
spuds
are
stamped
“1.42.”
7.
Remove
the
LP
gas
orifice
spuds
from
the
valve
using
a
¥%8"
(0.95
cm)
combination
wrench.
14
9
:
Open
the
oven
door
and
remove
oven
racks,
oven
tray,
flame
spreader
and
set
aside.
Lift
oven
burner.
The
orifice
spud
is
behind
the
oven
burner
air
shutter.
A.
Air
shutter
Locate
Natural gas
orifice
spud
stamped
“48”
in
the
bag
containing
literature
supplied
with
the
range.
Use
a
¥%"
combination
wrench
and
remove
the
Natural
gas
orifice
spud.
A.
LP
oven
orifice
spud
stamped
with
“48”
Install
the
number
“48”
Natural
gas
spud.
IMPORTANT:
Do
not
overtighten.
Place
LP
gas
oven
burner
spud
in
plastic
parts
bag
along
with
Natural
gas
cooktop
burner
spuds
for
future
use
and
keep
with
the
bag
containing
literature.
Reinstall
oven
burner.
Reinstall
oven
racks,
oven
tray
and
flame
spreader.