
Specifications


159
1. Creating a Multi-leg Route
- Press MENU and tap Routes. The Route List screen is now
displayed.
- Tap the first Empty route in the list.
- Press MENU and tap Create New Rte. The Create Route
screen is now displayed and the first line on this screen is
highlighted.
- Press MENU and tap Insert WPT. The Insert WPT screen is
now displayed.
- Press the Left or Right arrow to select Alphabetical at the
bottom of the screen.
- Tap User Waypoint
- Browse the list of available waypoints and tap the name of
the waypoint you want to define as the first waypoint in
the route. You are then prompted to define the second
waypoint in the route.
- Resume the previous 4 steps to define the next waypoints
in the route.
- When the last point of the route is defined, tap the Save
Route button on the Create Route screen.
2. Activating/deactivating a Multi-Leg Route
- Press MENU and tap Routes.
- In the Route List screen now displayed, tap the route you
want to activate.
- Press MENU and tap Activate Route. ProMark3 comes back
to the Route List screen where the activated route now
appears in bold characters. Press NAV to navigate along
this route.
To deactivate this route:
- Press MENU and tap Routes,
- Tap the activated route in the list
- Press MENU and tap Deactivate Route. The route is now
deactivated.
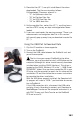
Create Route screen
Route List screen