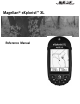
Magellan® eXplorist™ XL Reference Manual
***WARNINGS*** IN THE INTEREST OF SAFETY, DO NOT USE THIS NAVIGATION DEVICE WHILE DRIVING A VEHICLE. Please do not try and change any settings on the Magellan eXplorist while driving. Come to a complete stop or have a passenger make any changes. Taking your eyes off the road is dangerous and can result in an accident in which you or others could be injured. USE GOOD JUDGEMENT This product is an excellent navigation aid, but does not replace the need for careful orienteering and good judgement.
Table of Contents eXplorist XL GPS Receiver Features of the Magellan eXplorist GPS receiver: Button Descriptions: Installing the Batteries Installing an Optional SD Card Connecting to a Personal Computer Starting Up Turning the eXplorist On Turning the eXplorist Off Turning the Display Backlight On/Off Using the eXplorist for the First Time Conclusion Using the eXplorist XL Going to a Destination Saving Your Position Tracing Your Steps Additional Features Navigation Screens Accessing the Navigation Scree
Table of Contents Marking a Position by Entering Coordinates Marking a Position using the Map Cursor Marking a Position from a Map Object The POI Database Searching for a User-Entered POI Searching for a Preloaded POI using Nearest Searching for a Preloaded POI using Alphabetical Editing a User-Created POI Deleting a User-Created POI Viewing a User-Created POI on the Map Screen Copying a Preloaded POI Viewing a Preloaded POI on the Map Screen Showing or Hiding a User-Entered POI on the Map Screen Routes 3
Table of Contents Displaying Sun and Moon Information Accessing the Sun/Moon Function Changing the Position Changing the Date Viewing the Vertical Profile Using the Simulator Simulating on a Saved Route Communicating with a Personal Computer Connecting to a Personal Computer Changing Modes Working with Files on the Personal Computer Magellan Geocache Manager Magellan Geocache Manager What is Geocaching? What is the Magellan Geocache Manager? How Do I Install the Magellan Geocache Manager? Using the Magella
Table of Contents Setting the Time & Format Setting Daylight Savings Time Specifications Performance Physical Power Memory Coordinate Systems Routes Track Logs Points of Interest Navigation Screens Alarms 81 82 83 83 83 84 84 84 84 84 85 85 85 Accessories 86 Contacting Magellan Support 87 Contacting Magellan Support Contacting Magellan in North America Technical Support Warranty Service Contacting Magellan in Europe Technical support and warranty service 87 87 87 87 88 88
Table of Contents eXplorist XL GPS Receiver Features of the Magellan eXplorist GPS receiver: Button Descriptions: Installing the Batteries Installing an Optional SD Card Connecting to a Personal Computer Starting Up Turning the eXplorist On Turning the eXplorist Off Turning the Display Backlight On/Off Using the eXplorist for the First Time Conclusion Using the eXplorist XL Going to a Destination Saving Your Position Tracing Your Steps Additional Features Navigation Screens Accessing the Navigation Scree
Table of Contents Marking a Position by Entering Coordinates Marking a Position using the Map Cursor Marking a Position from a Map Object The POI Database Searching for a User-Entered POI Searching for a Preloaded POI using Nearest Searching for a Preloaded POI using Alphabetical Editing a User-Created POI Deleting a User-Created POI Viewing a User-Created POI on the Map Screen Copying a Preloaded POI Viewing a Preloaded POI on the Map Screen Showing or Hiding a User-Entered POI on the Map Screen Routes 3
Table of Contents Displaying Sun and Moon Information Accessing the Sun/Moon Function Changing the Date Viewing the Vertical Profile Using the Simulator Simulating on a Saved Route Communicating with a Personal Computer Connecting to a Personal Computer Changing Modes Working with Files on the Personal Computer Magellan Geocache Manager Magellan Geocache Manager What is Geocaching? What is the Magellan Geocache Manager? How Do I Install the Magellan Geocache Manager? Using the Magellan Geocache Manager Mag
Table of Contents Setting Daylight Savings Time Specifications Performance Physical Power Memory Coordinate Systems Routes Track Logs Points of Interest Navigation Screens Alarms 82 83 83 83 84 84 84 84 84 85 85 85 Accessories 86 Contacting Magellan Support 87 Contacting Magellan Support Contacting Magellan in North America Technical Support Warranty Service Contacting Magellan in Europe Technical support and warranty service 87 87 87 87 88 88
eXplorist XL GPS Receiver 1 Features of the Magellan eXplorist GPS receiver: • Built-in background map (28 MB) • TrueFix™ GPS technology • High-definition color display • 3 meter accuracy (WAAS/EGNOS) • Preloaded points of interest • Multiple track logs • Rugged design, rubber-protected • Pocket-sized and water resistant • 28 MB of usable memory • Unlimited storage of data using SD cards • Superior tracking with 14 parallel channels Antenna On/Off Button Display Backlight Button EN
eXplorist XL GPS Receiver 2 Button Descriptions: On/Off Turns the eXplorist on or off. Backlight Turns the display backlight on. Sequences from off to low to high intensity. ENTER Used to access highlighted menu items or accept highlighted buttons. ESC Cancels data inputs. Closes the accessed function and goes back to the last viewed screen. Steps backwards through the navigation screens. ZOOM IN Used on the Map screen to zoom in the map displayed. The map display can be zoomed in to 100 ft. (35.
eXplorist XL GPS Receiver 3 Installing the Batteries Remove the battery cover by turning the silver latch on the back of the unit one quarter turn. The eXplorist XL uses four AA batteries that are installed as shown in the accompanying diagram. Be sure to observe the proper polarity when installing the batteries. Under normal operating conditions you can expect to get more than 19 hours of battery life when using fresh batteries. Tips on conserving battery life: • Turn the eXplorist off when not in use.
eXplorist XL GPS Receiver 4 Installing an Optional SD Card Install the SD card as shown here. Connecting to a Personal Computer Turn your eXplorist off and connect the connector of the eXplorist data cable to the back of your eXplorist and tighten the locking screw. There are alignment tabs on the connector to make sure that the connector is installed properly. It is recommended that you connect the eXplorist to external power using the external AC power adapter.
Starting Up 5 Turning the eXplorist On To turn the eXplorist on, press the POWER button on the top right side. Turning the eXplorist Off To turn the eXplorist off, press the POWER button on the top right side. There is a 5 second countdown after you press the POWER button. If you change your mind and decide to leave the eXplorist on, just press the ESC button. If you press the POWER button during this countdown period, the eXplorist will immediately turn off.
Starting Up 6 Using the eXplorist for the First Time Turn the eXplorist on. Press the Power button. When the Startup screen is displayed, press ENTER. Select Language. When you turn on the eXplorist for the first time you are given the option of selecting one of the ten languages that will be used. You can change the language selection at any time by accessing Menu > Preferences > Languages.
Starting Up The Satellite Status screen will continuously update and you will be able to graphically see how well your eXplorist is performing. When the eXplorist has enough information to compute a position fix, the Satellite Status screen is replaced with the Map screen. The arrow cursor in the center of the Map screen represents your position. As you move, the arrow will point in the direction you are traveling.
Starting Up 8 If the eXplorist is unable to compute your initial fix in a few minutes: If the eXplorist determines that it is unable to track the satellites within two minutes, it will present you with the following screens in an effort to better determine its approximate location. Select Region. Use the arrow joystick to highlight the region that you are located in. With the region highlighted, press the ENTER button. Select Area. This displays a list of areas for the region you selected.
Starting Up Enter the Date. Use the arrow joystick to set the date displayed to the current date. Arrow Joystick Up: Increases the highlighted number Arrow Joystick Down: Decreases the highlighted number Arrow Joystick Right: Moves the highlight one character to the right Arrow Joystick Left: Moves the highlight one character to the left When the month is highlighted, use the arrow joystick up or down to scroll through the list of months. When you have entered the correct date, press ENTER.
Starting Up 10 Cold vs. Warm Start. When the eXplorist is turned on, one of the first things it does is to find out what satellites are overhead, along with their relative position. It does this by using a built-in satellite almanac. This almanac, when given the current date, time and approximate position, can provide the eXplorist with information on what satellites are overhead and their approximate relationship to the eXplorist.
Using the eXplorist XL 11 The eXplorist XL uses information from the GPS satellites orbiting the earth to provide you with detailed information about your exact location. This is the foundation that your eXplorist will use to provide you with the necessary information to arrive at your destination. Going to a Destination The most common use of your eXplorist will be to provide you with the navigation tools you’ll need to arrive at your chosen destination.
Using the eXplorist XL 12 Step Two: Where Do You Want To Go? Now that the eXplorist knows where you are, you need to tell it where you want to go. There are many different ways you can do this, but the simplest and most commonly used is a “GOTO” route. This is a one-leg route with a beginning (where you are now) and a destination (where you want to go). The destination is selected by using the Points of Interest database.
Using the eXplorist XL 13 Tracing Your Steps Hikers, mountain bikers and outdoor enthusiasts often need the option of leaving a trail of breadcrumbs that they can follow back to where they started. The eXplorist has a feature called BackTrack that enables you to do just that. It was mentioned earlier that your eXplorist is constantly computing your present position and that you can save your position by using the MARK button.
Navigation Screens 14 Accessing the Navigation Screens The eXplorist has three navigation screens as well as a Satellite Status screen that can be accessed by pressing the NAV button. Each screen provides the same information in a different format giving you the choice of choosing the screen that best suits your needs. NAV ESC ESC NAV NAV ESC ESC NAV Tip: The ESC button will also set through the navigation screens, just like the NAV button but in the reverse order.
15 Navigation Screens • Press MENU and select Customize page to change the information displayed at the bottom of the screen. • Press MENU and select Map Setup to change the orientation of the screen as well as the primary usage (land or marine).
16 Navigation Screens In the Cursor mode, you have a cursor icon displayed that you can use to pan around the map. The information displayed at the bottom of the screen provide you with the heading and distance the cursor is at from your present position.
Navigation Screens 17 Customizing the Map Information The information displayed at the bottom of the screen can be customized to change what is shown in the two map information fields.
Navigation Screens 18 Displaying Street Information You can choose to display information about the street you are on instead of displaying the two data fields at the bottom of the display. To display street information: 1. While viewing the Map screen, press MENU. 2. Use the Arrow joystick to highlight Customize page. 3. Press ENTER. 4. Use the Arrow joystick to highlight Street info. 5. Press ENTER. Changing the Map Orientation The default orientation for the Map screen is North Up.
Navigation Screens 19 Changing the Primary Usage The Map screen can be changed to be primarily used on land (default) or marine. When in land usage, land areas are displayed as white areas on the display and water is displayed as blue. When set for marine usage, water is blue and land areas are displayed as yellow. This option provides the ability to view the text and map details easier, depending on where you are navigating. To change the primary usage: 1. While viewing the Map screen, press MENU. 2.
Navigation Screens 20 Changing the Track Recording Intervals As you move, your eXplorist is recording your journey (track). You can select how often the track points are recorded. In Auto mode, the eXplorist doesn’t save track points when you are traveling in a straight line and only a few as you make turns. This saves memory and provides a track log that, while slightly jagged, is suitable for most applications.
21 Navigation Screens Compass Screen The Compass screen provides an easy-to-use graphical compass that should be familiar to most GPS users. Highlights of the Compass screen: • With an active route, the top of the Compass screen displays the name of the destination. • Press MENU and select Customize page to change the information displayed at the top of the screen.
Navigation Screens 22 Customizing the Information Fields The information displayed at the top of the screen can be customized to information important to you. You can select from: • Bearing • Distance to Next (Next leg in multi-leg routes) [default] • Distance to End • Speed [default] • Heading • ETA (Estimated Time of Arrival) • Time to Next (Next leg in multi-leg routes) • Time to End • Off Course • Direction • Elevation • Time • Date • Accuracy • Avg. Speed • Max.
23 Navigation Screens Position Screen The Position screen provides detailed position information in a text format that is familiar to seasoned navigators. Highlights of the Position screen: • Position is displayed in textual format using the coordinate system selected. (See Setting Coordinate System for information on how to select the coordinate system.) • Elevation information is displayed. (Accurate when four or more satellites are being used to compute the position.
24 Navigation Screens Resetting the Trip Odometer Whenever you begin a trip that you want to record how far you have travelled, you will want to reset the trip odometer to zero. To reset the trip odometer: 1. While viewing the Position screen, press MENU. 2. Use the Arrow joystick to highlight Reset Trip. 3. Press ENTER. 4. Use the Arrow joystick to highlight Yes. 5. Press ENTER. Warning page offers you the opportunity to change your mind.
eXplorist XL GPS File Structure 25 Basic File Structure The eXplorist has a file structure system that is unlike any other filing system used before on a GPS receiver. It is based on the file system that you are probably familiar with from using your personal computer. File Structure Overview This graphic displays the basic layout of the file structure that is internal to the eXplorist. When you insert a new SD card, a similar file structure is created but without any of the default files.
eXplorist XL GPS File Structure 26 Using the Filing System with POIs • When retrieving or saving a POI, the eXplorist automatically saves the POI to the default POI file. You can select the location to save the POI, by choosing Save As when creating a file. NOTE: The default file is set at the factory but you can change the default file to be used by accessing Preferences > Active Setup.
eXplorist XL GPS File Structure 27 Using the Filing System with Track Logs • Track logs are saved differently from POIs and routes in that there is only one track log per file. Also, you can’t set a default file for track logs. The eXplorist automatically accesses the internal Tracklog folder. • Creating a new Track Log File: Use the Arrow joystick to highlight Active Track and press ENTER. Use the Arrow joystick to highlight Save and press ENTER.
Points of Interest 28 Whether driving in a car, hiking on the trail or out for an afternoon sail, you are going to want to save places you’ve been in your eXplorist so you can go back to them in the future. This is the fundamental starting point for any GPS navigator. Saving these places is called “Marking you position” or just MARK for short. The saved positions are called points of interest, or just POI’s. (You may have heard the term “waypoints” to describe marked positions.
Points of Interest 29 Marking Your Position (Personalized) Normally, marking you position is simply a two button process, MARK and ENTER. However, sometimes you will want to personalize the POI you are marking to make it easier to identify later. You are able to change the icon, change the name, and create a message. (You are also able to change the location coordinates as well as the elevation. This changes the position that is being saved and is discussed in a following section. 1. Press MARK. 2.
Points of Interest 30 Making POIs for Locations other then your Present Position Sometimes you may want to save a position that is not your present position. The eXplorist offers you two ways of doing that. You can modify the coordinates of your present position or you can use the Cursor mode of the Map screen to pan to the location you want to mark.
Points of Interest 31 Marking a Position using the Map Cursor This gives you a way of marking a position, other then your present position, by moving the cursor around the map to a place you want to create a POI. 1. While viewing the Map screen, use the Arrow joystick to put the eXplorist into Cursor mode. 2. Continue moving the crosshair cursor until you are over the location where you want to add a POI. 3. Press MARK. 4. Optional: Use the Arrow joystick to highlight fields (icon, name, etc.
32 Points of Interest The POI Database All of the POI’s that you have saved as well as background map POI’s that came with your eXplorist can be accessed using the POI database. Once the database has been accessed and the POI selected you can view or edit the POI. Highlights of the POI database are: • Searching for POI’s you have saved, nearest to your position or in alphabetical order. • Searching for POI’s that have been preloaded into the eXplorist, nearest to your position or in alphabetical order.
Points of Interest 33 Searching for a Preloaded POI using Nearest Searching for a preloaded POI using the Nearest option is similar to searching for user-entered POI’s with an additional step. Preloaded POI’s have been categorized into five categories (Cities, Highways, Airports, Waterways and Parks) and you need to select the category that the POI will be found in. 1. Press MENU. 2. Use the Arrow joystick to highlight POI List. 3. Press ENTER. 4.
Points of Interest 34 Editing a User-Created POI POI’s that you have saved can be edited to change the icon, name, elevation and message. You can also change the location but keep in mind that this effectively is creating a new POI in a new location. 1. Press MENU. 2. Use the Arrow joystick to highlight POI List. 3. Press ENTER. 4. Use the Arrow joystick up/down to highlight POIs. 5. Use the Arrow joystick left/right to select Nearest or Alphabetical. 6. Press ENTER. 7.
Points of Interest 35 Deleting a User-Created POI POI’s that you have saved can be deleted using this operation. You may want to delete a POI to make it easier to search for a POI you created if you have a lot of them. POI’s that have been deleted cannot be restored. You will need to input the information for a POI you delete if you want it back. To prevent accidental deletion, a confirmation window will be displayed, confirming the delete. 1. Press MENU. 2.
Points of Interest 36 Copying a Preloaded POI POI’s that have been preloaded as part of the background map can be saved as a user-entered POI. This does not delete a preloaded POI (preloaded POI’s can not be deleted) it just copies it to the POIs portion of the database. 1. Press MENU. 2. Use the Arrow joystick to highlight POI List. 3. Press ENTER. 4. Use the Arrow joystick up/down to highlight Background Map. 5. Use the Arrow joystick left/right to select Nearest or Alphabetical. 6.
Points of Interest 37 Viewing a Preloaded POI on the Map Screen POI’s that have been preloaded as part of the background map can be viewed on the Map screen to assist you in locating the POI. 1. Press MENU. 2. Use the Arrow joystick to highlight POI List. 3. Press ENTER. 4. Use the Arrow joystick up/down to highlight Background Map. 5. Use the Arrow joystick left/right to select Nearest or Alphabetical. 6. Press ENTER. 7. Select a category of your choice and press ENTER. 8.
Points of Interest 38 Showing or Hiding a User-Entered POI on the Map Screen You can select whether a user-entered POI is displayed or hidden while viewing the Map screen. In the upper left corner of the POI Save screen (next to the icon field) is a checkbox that indicated if the POI will be visible on the map. When it is checked, the POI is visible. The instructions here describe how to toggle the visible state of a saved POI, but the same steps can be followed while you are creating a new POI. 1.
Routes 39 Routes are the least understood and one of the most important functions of a GPS receiver. The better you understand routes and how to use them, the more enjoyment you will receive from using your eXplorist. The easiest, and most common form of a route is a GOTO route. A GOTO route is a one-leg route with a starting point (your present position) and a destination (a POI you select). This route is useful when you want to go to a specific preloaded or user-entered POI.
Routes 40 As you are moving you will notice a second line appearing that points to your destination if you go off the planned course. The double solid line is the original, computed route. The new, dashed line is an updated route, pointing towards your destination. So even if you can’t follow the computed route, you will be updated with a new course to follow. This updating of your route will also occur during multi-leg routes so you always know which way you need to go.
Routes 41 Multi-Leg Routes Multi-leg routes can be used to navigate to a final destination using multiple legs. An example would be leaving the dock, motoring over to buoy 1, then the bait boat and finally to a fishing hot spot. This route would go from Dock to Buoy 1,Buoy 1 to Bait, Bait to Fish. Features of a multi-leg route: • Multi-leg routes can be saved in internal memory or to an SD card. • Multi-leg routes remain active even after the eXplorist has been turned off.
Routes 42 11. Press ENTER. 12. Use the Arrow joystick and the ENTER button to input a name, up to ten characters, for the route. 13. Highlight OK. 14. Press ENTER. Activating/Deactivating a Route An active route is the route you are presently navigating on. Anytime you activate a route, it will remain the active route until you either turn it off (deactivate) or activate a new route. GOTO’s are automatically activated when they are created while multi-leg routes need to be activated manually. 1.
Routes 43 Changing the Destination Leg of an Active Route When a route is created it can have many different legs to the route, each leg with its own destination. If during your travels you wanted to skip some of the legs you can select the leg that you want to proceed to next. An example would be your planned route starts at your campsite. The first leg goes to the bridge. The second leg goes across the bridge to the stone marker. Leg 3 leaves the stone marker and takes you to the ranger station.
Routes 44 Editing a Saved Route Saved routes can be edited to add a new leg at the end of the route () remove a leg (Delete POI), insert a new leg (Insert POI) or change the destination from one POI to another (Replace POI). 1. Press MENU. 2. Use the Arrow joystick to highlight Routes. 3. Press ENTER. 4. Locate the file that contains the route you want to edit. (The eXplorist will automatically open the default file.) 5. With the file highlighted press ENTER. 6.
Routes 45 Reversing a Route Reversing a route takes a saved route and recreates it in reverse order. The sample route that was discussed earlier, Camp > Bridge > Marker > Ranger > Swim, would now be Swim > Ranger > Marker > Bridge > Camp. 1. Press MENU. 2. Use the Arrow joystick to highlight Routes. 3. Press ENTER. 4. Locate the file that contains the route you want to reverse. (The eXplorist will automatically open the default file.) 5. Press ENTER. 6.
Routes 46 Moving a Route This provides you with a means of moving a route from one file to another. 1. Press MENU. 2. Use the Arrow joystick to highlight Routes. 3. Press ENTER. 4. Locate the file that contains the route you want to move. (The eXplorist will automatically open the default file.) 5. Press ENTER. 6. Highlight the name of the route. 7. Press ENTER. 8. Use the Arrow joystick to highlight Move Route. 9. Press ENTER. 10. Locate the file or create a new file for the route.
Routes 47 Viewing a Route on the Map Viewing the route on the map gives you a way of graphically seeing the legs of the route as they appear on the map. 1. Press MENU. 2. Use the Arrow joystick to highlight Routes. 3. Press ENTER. 4. Locate the file that contains the route. 5. Press ENTER. 6. Highlight the name of the route. 7. Press ENTER. 8. Use the Arrow joystick to highlight View on Map. 9. Press ENTER. The route is displayed with the map scaled to display the entire route.
Track Logs 48 As you are moving, the eXplorist continuously records your track. Much like leaving breadcrumbs on the trail that you can use later to find your way back, the eXplorist leaves “electronic breadcrumbs” on the map. The advantage here is that you don’t have to worry about animals coming along and eating your return route markers. This provides you with just another tool to make your eXplorist more valuable to you out in the field or on the waters.
Track Logs 49 Starting a New Active Track Log Before you can start a new active track log, you need to stop the one that is presently recording. 1. Press MENU. 2. Use the Arrow joystick to highlight Track Log. 3. Press ENTER. 4. Use the Arrow joystick to highlight Active Track. 5. Press ENTER. 6. Highlight Stop Logging. (If Resume Logging is displayed, the Track Log has already been stopped. Go to step 10.) 7. Press ENTER. 8. Use the Arrow joystick to highlight Active Track. 9.
Track Logs 50 Creating a BackTrack Route BackTrack routes use your active track to create a route back to where you started, turning around and following the electronic breadcrumb trail that the eXplorist dropped. 1. Press MENU. 2. Use the Arrow joystick to highlight Track Log. 3. Press ENTER. 4. Use the Arrow joystick to highlight Active Track. 5. Press ENTER. 6. Highlight BackTrack. 7. Press ENTER. 8. [Track logging is turned off alert status] Press ENTER.
Track Logs 51 Converting the Track Log to a Route This function takes the track log and turns it into a multi-leg route that is saved in your route list. From here, the route can be edited if necessary. Note: Convert to Route is available for both active track logs and track logs you have saved. 1. Press MENU. 2. Use the Arrow joystick to highlight Track Log. 3. Press ENTER. 4. Use the Arrow joystick to highlight Active Track or any track log you have previously saved. 5. Press ENTER. 6.
52 Track Logs Working with Saved Track Logs It has been mentioned before that you can convert saved track logs to a route and view saved track logs on the map. There are three functions unique to saved track logs that you can perform: following, reversing, and deleting the track. Following Saved Track Logs This function provides you with a means to use a saved track as a multi-leg route. Once this function has been activated, the eXplorist will navigate you along your saved track. 1. Press MENU. 2.
Track Logs Deleting a Saved Track Log Use this function to remove track logs that have been previously saved and are no longer needed. 1. Press MENU. 2. Use the Arrow joystick to highlight Track Log. 3. Press ENTER. 4. Use the Arrow joystick to highlight any track log you have previously saved. 5. Press ENTER. 6. Highlight Delete Track. 7. Press ENTER. The saved track log is deleted, and you are returned to the Track Log screen.
Advanced Features 54 The eXplorist has a set of advanced features that provides you with additional features to enhance the use of your eXplorist. The advanced features are accessed from the Main Menu and include: • Area Calculation: This will compute the area and the perimeter of a region that you define. • Fish/Hunt: This will display the best hunting and fishing times for a position and date that you enter.
Advanced Features 55 Deleting All POIs from the Area Calculation List 1. While viewing the Area Calculation screen, press MENU. 2. Highlight Delete All Points. 3. Press ENTER. 4. All of the POIs in the list are removed and you can now create a new region to be calculated. Editing the POI List in Area Calculation You can insert, delete, or replace a POI in the area calculation list. 1.
Advanced Features 56 Changing the Position 1. With the Fish/Hunt screen displayed, highlight the At field. 2. Press ENTER. 3. Select a POI from the POI database. Changing the Date 1. With the Fish/Hunt screen displayed, highlight the On field. 2. Press ENTER. 3. Use the Arrow joystick to change the date. Up/Down changes the data at the cursor position; Left/Right moves the cursor. 4. When the date is correct, press ENTER.
Advanced Features 57 Changing the Date 1. With the Sun/Moon screen displayed, highlight the On field. 2. Press ENTER. 3. Use the Arrow joystick to change the date. Up/Down changes the data at the cursor position; Left/Right moves the cursor. 4. When the date is correct, press ENTER. Viewing the Vertical Profile Vertical Profile will graphically display the elevation for a track log that you select. This can be your active track log or one you have saved.
Advanced Features 58 Using the Simulator When the eXplorist is placed in the simulator mode, it simulates movement along a predefined or saved route. 1. Press MENU. 2. Use the Arrow joystick to highlight Adv. Features. 3. Press ENTER. 4. Use the Arrow joystick to highlight Simulate. 5. Press ENTER. 6. Highlight the desired option: Off - Turns the simulator off Auto - Uses a predefined route. (This is a 3-leg route in the shape of a triangle with your present position as the starting point.
Advanced Features 59 Communicating with a Personal Computer For this feature to operate properly, you must have your eXplorist connected to a personal computer through the computer USB port Connecting to a Personal Computer 1. Turn the eXplorist off. 2. First connect the PC interface cable to the connector on the back of the eXplorist. 3. Insert the USB connector on the PC interface cable to any of the USB ports on a personal computer. 4. Turn the eXplorist on. 5.
Advanced Features 60 Working with Files on the Personal Computer You can work with the files saved in your eXplorist or files located on an SD card in the eXplorist (optional). Using the personal computer, you have complete access to moving, renaming, modifying, or deleting any of the saved files. Special care should be taken whenever working with saved files as unwanted results may occur. It is advised that you backup any files that you plan on editing in case something unexpected happens.
Magellan Geocache Manager 61 Magellan Geocache Manager What is Geocaching? Very simply, geocaching is a fun, recreational game that you can play using your eXplorist receiver. It’s been referred to as “electronic treasure hunting” and is just that. Caches are hidden all over the world and your task is to find them, armed only with the coordinates of the cache and your Magellan eXplorist.
Magellan Geocache Manager Using the Magellan Geocache Manager 1. Access the Magellan Geocache Manager by using the Start button on the Windows toolbar. 2. Under “Programs” select ‘Magellan > eXplorist XL > Magellan Geocache Manager’. 3. The Magellan Geocache Manager will open and an empty list of geocache points is displayed. 4. The common tools are displayed as icons at the top of the display.
63 Magellan Geocache Manager Magellan Geocache Manager Tools Using the icons at the top of the window is the easiest way of accessing the most common functions. The following lists the icons, their hotkey equivalent, and their usage. Icon Name Hotkey Description New Ctrl+N Creates a new database for saving geocache points. This closes the active database, with the option of saving if you have made any changes. Open Ctrl+O Opens previously saved geocaching databases.
Magellan Geocache Manager 64 Working with Geocache Files This is a picture of a sample geocache file with a list of geocache points. You can modify this list by editing, deleting, or adding points to it. You can also add other downloaded geocache point files to this list but you will need to follow the instructions provided below. Finally, instructions will be shown as to how to select files and upload them to your eXplorist.
Magellan Geocache Manager 65 Uploading to the Magellan eXplorist 1. Turn the eXplorist off and connect it to the USB port on your computer. 2. Turn the eXplorist on. If connected correctly, it will begin in the USB File Transfer mode or the Communications menu is displayed. (If the Communications menu is shown, select USB File Transfer and press ENTER.) If neither of these screens is displayed there maybe a bad connection. Turn the eXplorist off and check the connections and try again.
Using the eXplorist with MapSend 66 Using the eXplorist with MapSend What is MapSend? MapSend® is the Magellan line of detailed digital maps for Magellan hand-held GPS receivers. The core MapSend product line includes street maps for driving, topographic maps for hiking, camping, and hunting, and fresh/salt water maps for fishing and boating. MapSend maps will transform your eXplorist into an amazingly powerful solution for outdoor recreation and travel.
Using the eXplorist with MapSend 67 Notice that in the lower right corner the size of the region is displayed. You may choose to put large regions on an SD card to save internal memory. Saving Map Regions. Before saving the region, review the documentation that came with MapSend to set what information will be saved with the region. In this example, Topo information and POIs are wanted, so in the region list make sure that the “T” and “P” boxes to the left of the region name are bolded.
Using the eXplorist with MapSend 68 Transfer the Files using the Magellan Conversion Manager: Launch the Magellan Conversion Manager (installed from the Magellan Wizard). It can be found under the ‘Start’ menu - Start > Programs > Magellan > eXplorist XL > Magellan Conversion Manager. When first opened, on the Welcome window select ‘Transfer Map Regions’ and click Next. A reminder to connect the Magellan eXplorist to the computer is presented. Click Next.
Using the eXplorist with MapSend 69 Transferring POIs, Routes, and Track Between MapSend and eXplorist You can transfer POIs, routes and track logs to and from MapSend and the eXplorist using the Magellan Conversion Manager. Since the eXplorist stores these data items in a more accessible manner than previous GPS receivers, you must use the Magellan Conversion Manager instead of transferring the files directly in MapSend.
Using the eXplorist with MapSend 70 Transferring Waypoints, Routes, and Tracks from MapSend The process for transferring from from MapSend to the eXplorist is similar to the one described above. 1. Open the MapSend software program. This procedure will discuss sending waypoints to the eXplorist. Use similar steps for transferring routes and tracks. 2. Click the Place Waypoint icon at the top of the MapSend display to bring up the Waypoint List. 3.
Preferences 71 The Preferences portion of the eXplorist provides the tools to personalize the eXplorist to your usage and needs. There are tools that are designed to give you full flexibility over its use as well as performing maintanence on the internal memory should the need arise. Features found in Preferences: • Restarting the GPS (Initializing) to give the eXplorist its approximate location if it has been moved a large distance while turned off.
Preferences 72 When to use Restart GPS: • When the eXplorist has been moved more then 500 miles (804.67 km) while turned off. • When the eXplorist is sluggish and takes more then a few minutes to compute its first position fix when turned on. (This really isn’t an option that you need to be concerned about. The eXplorist has a builtin feature that when it has trouble computing its first position fix, it automatically asks you to supply the approximate position.) Restarting the GPS: 1. Press MENU. 2.
Preferences 12. 73 Date. Use the Arrow joystick to enter the present date. Push the Arrow joystick up or down to change the value and left or right to move the cursor. Note: Date is also sent by the satellites and may already be correct as well. 13. Press ENTER. 14. Use the Arrow joystick to highlight Done. 15. Press ENTER. 16. The last viewed navigation screen is displayed and the eXplorist will begin tracking satellites.
Preferences 74 Selecting the Background or Detail Map The eXplorist comes with a basemap already installed but you may use MapSend Worldwide software (purchased separately) to define your own basemap. You can use Active Setup to select the background map you want to use if you have stored a new one. Also, you can use one of the other MapSend software packages to define and save detailed maps to your eXplorist.
75 Preferences Selecting the North Reference You can set the North Reference used by the eXplorist to be either magnetic north or True North. 1. Press MENU. 2. Use the Arrow joystick to highlight Preferences. 3. Press ENTER. 4. Use the Arrow joystick to highlight Map Units. 5. Press ENTER. 6. Use the Arrow joystick to highlight the data field for North Reference. 7. Press ENTER. 8. Use the Arrow joystick to highlight Magnetic or TRUE. 9. Press ENTER.
Preferences 76 Selecting the Map Datum When using the eXplorist in conjunction with a map or chart, you should make sure that the map datum in the eXplorist matches the map datum that the map or chart uses. This can usually be found in the legend block on the map or chart. The default map datum for the eXplorist is WGS84 and should be used when in doubt. 1. Press MENU. 2. Use the Arrow joystick to highlight Preferences. 3. Press ENTER. 4. Use the Arrow joystick to highlight Map Units. 5.
Preferences 77 Setting the Light Timer As has been mentioned before, the display backlight makes the display easier to read in low light situations but it also is the largest drain on the batteries. The 1. Press MENU. 2. Use the Arrow joystick to highlight Preferences. 3. Press ENTER. 4. Use the Arrow joystick to highlight Pwr Management. 5. Press ENTER. 6. Use the Arrow joystick to highlight the data field for Light Timer. 7. Press ENTER. 8.
Preferences 78 Selecting Languages The eXplorist can be set to display information from any one of ten different langauges. You can select from English, Français (French), Deutsch (German), Nederlands (Dutch), Suomi (Finnish), Español (Spanish), Italiano (Italian), Português (Portuguese), Svenska (Swedish) and Norsk (Norwegian). Selecting the Language for Your eXplorist 1. Press MENU. 2. Use the Arrow joystick to highlight Preferences. 3. Press ENTER. 4.
79 Preferences Clearing User-Entered POIs and Routes 1. Press MENU. 2. Use the Arrow joystick to highlight Preferences. 3. Press ENTER. 4. Use the Arrow joystick to highlight Clear Memory. 5. Press ENTER. 6. Use the Arrow joystick to highlight POIs/Routes. 7. Confirm. Use the Arrow joystick to highlight Yes to confirm or 8. Press ENTER. No to cancel. Clearing Routes This will clear all of the routes you have entered that are saved in the default files used internally to the eXplorist.
Preferences 80 Resetting the eXplorist to Factory Defaults 1. Press MENU. 2. Use the Arrow joystick to highlight Preferences. 3. Press ENTER. 4. Use the Arrow joystick to highlight Reset Default. 5. Press ENTER. 6. Use the Arrow joystick to highlight All. 7. Confirm. Use the Arrow joystick to highlight Yes to confirm or No to cancel. 8. Press ENTER.
Preferences 81 Setting Alarms 1. Press MENU. 2. Use the Arrow joystick to highlight Preferences. 3. Press ENTER. 4. Use the Arrow joystick to highlight Alarms. 5. Press ENTER. 6. Use the Arrow joystick to highlight the alarm field that you want to turn off or set. 7. Press ENTER. 8. Select from the list of available distances the distance that you want the alarm alert to come on or select Off to turn off the alarm. Note that the GPS Fix alarm does not offer any distance, just On or Off. 9.
Preferences 82 Setting Daylight Savings Time 1. Press MENU. 2. Use the Arrow joystick to highlight Preferences. 3. Press ENTER. 4. Use the Arrow joystick to highlight Clock. 5. Press ENTER. 6. Use the Arrow joystick to highlight the Daylight Savings field. 7. Press ENTER. 8. Use the Arrow joystick to highlight the Region field. 9. Press ENTER. Select United States, European Union, Custom, or Disable. Press ENTER. 10.
Specifications 83 . Performance Receiver 14 parallel-channel technology, tracks up to 14 satellites to compute and update information Antenna Patch Acquisition Times (optimal conditions) Update Rate Warm less than 1 minute Cold less than 2 minutes 1 second continuous Accuracy Position 7 meters, 95% 2D RMS w/WAAS/EGNOS <3 meters, 95% 2D RMS Velocity 0.1 knot RMS steady state Speed 951 MPH - 1530.5 KM/H Altitude 60,000 ft.
Specifications Power Source 4 AA Batteries Battery Life Up to 19 hours with backlight display on low Memory 64 MB internal memory Coordinate Systems Available 11 plus 1 user grid.
Specifications Points of Interest User-entered Total Unlimited saved Points of Interest (using SD cards) Name Length 20 characters (including spaces) Built-in (included with background map) Cateogies Cities, highways, airports, waterways and parks.
Accessories 86 Expand the use of your Magellan eXplorist with accessories from the Magellan Online Store for all of your adventures. Carrying Case Swivel Mount Bike Mounting Bracket Vehicle Mount Specially designed for your Magellan eXplorist, this rugged black canvas carrying case attaches conveniently to our belt or pack strap. It features handy pockets for carrying extra batteries. Protect your Magellan eXplorist while traveling or being stored.
Contacting Magellan Support 87 Contacting Magellan Support The following information is provided so that if you need support for your Magellan eXplorist, you can direct your questions/comments to the proper person at Thales Navigation. Contacting Magellan in North America Technical Support If you need technical assistance, "how-to" help, or if you have a technical question about the functionality of your Magellan product, please contact us on the internet at www.magellangps.
Contacting Magellan Support 88 Contacting Magellan in Europe Technical support and warranty service For Magellan product support and warranty service information in English, French, German, Spanish, Portuguese, Dutch, Norwegian, Finnish and Danish please dial FREE PHONE: 00800MAGELLAN* ( 00800 62435526) from 9 AM to 6 PM GMT & GMT+1 or send an e-mail in English, French, German, Spanish, Portuguese, Dutch, Norwegian, Finnish and Danish to: magellansupportfr@thalesnavigation.