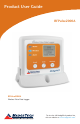
Product User Guide RFPulse2000A RFPulse2000A Wireless Pulse Data Logger To view the full MadgeTech product line, visit our website at www.madgetech.com.
Product User Guide Table of Contents RFPulse2000A Data Logger Quick Start Steps ............................................ 1 Product Overview ........................................... 2 Additional Features & Operation ..................... 3 Mounting Instructions .................................... 4 Product Maintenance...................................... 5 General Specifications................................... 6-7 RFC1000 Transceiver Product Overview ...........................................
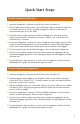
Quick Start Steps Product Operation (Wireless) 1. Install the MadgeTech 4 Software and USB Drivers onto a Windows PC. 2. The RFC1000 interface device comes with a USB cable. Plug one end of the cable into an available USB port on the PC and plug the opposite end of the cable into the communication port on the RFC1000. 3. Push and hold the wireless button on the RFPulse2000A for 5 seconds to activate wireless communication.
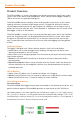
Product User Guide Product Overview The RFPulse2000A is a wireless data logger that records pulse output signals from various sensors such as flow meters and anemometers. When started, the data logger samples at 100 Hz and at the user specified reading rate. The RFPulse2000A features a display screen which provides instant access to the current reading, minimum, maximum and average statistics.
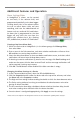
RFPulse2000A Additional Features and Operation Alarm Settings/Rules In MadgeTech 4, alarms can be created on two levels; in the software itself, and programmed specifically to the data logger. Creating alarm rules in the software allows the user to utilize alarms while real time recording, and have the added benefit of features such as e-mail and SMS notification.
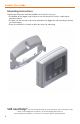
Product User Guide Mounting Instructions The base provided with the RFPulse2000A can be used in two ways. • The bottom of the logger snaps in place to use and mount the unit on a table top or horizontal surface. • The base can also securely snap to the backside of the logger for wall mounting if desired (as shown below). • There are two holes in the base to allow for screws for mounting.
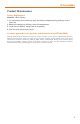
RFPulse2000A Product Maintenance Battery Replacement Materials: U9VL-J Battery 1. On the bottom of the enclosure, open the battery compartment by pulling in on the cover tab. 2. Remove the battery by pulling it from the compartment. 3. Install the new battery, taking note of the polarity. 4. Push the cover closed until it clicks.
Product User Guide RFPulse2000A General Specifications Reading Rate Memory LED Functionality Wrap Around 1 reading every second up to 1 reading every 24 hours 16,128 readings • Green LED blinks every 5 seconds to indicate unit is logging • Blue LED blinks every 15 seconds to indicate unit is in wireless mode • Red LED blinks every 1 second to indicate alarm condition Yes Start Modes Immediate Start & Delay Start Battery Type Ultralife 9V lithium battery included; user replaceable Battery Life 5 year
RFPulse2000A Measurement Sensor Type Response Time Input Range Channel 1: Ambient; Pulse Detection Circuit Channel 2: Mathematic; Phantom Total Channel 10 microseconds 0 to 4,294,967,295 Pulses Wireless RF Frequency Band 2.45 GHz IEEE 802.15.4 ultra-low power wireless transceiver with fully bi-directional communication ISM band 2.405-2.475 GHz Operation (channels 11 through 25) @ 250 kbps Maximum Output Power +0 dBm typical Receiver Sensitivity (RFC1000) -95 dBm typical Range 2000 ft max.
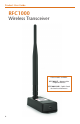
Product User Guide RFC1000 Wireless Transceiver Other models available: RFC1000-CE - Approved for European markets RFC1000-IP69K - Splash Proof for harsh environments 8
RFC1000 Product Overview MadgeTech has designed the RFC1000, a high powered transceiver that has a substantially long transmission range, providing enhanced performance in occluded environments (ovens, refrigerators, etc.). The RFC1000 also features an external antenna, allowing more flexibility with mounting positions in both orientation and proximity to metal walls. The device may be used as a repeater, or directly plugged into the Windows PC.
Product User Guide Mounting Instructions For best wireless performance, both the RFC1000 and the MadgeTech data loggers should be mounted in the same orientation. This usually means that the external antenna should be pointing straight up. The antenna can pivot to accommodate either a wall mount or a desk mount.
RFC1000 Channel Programming The RFC1000 transmits data on the 2.4 GHz band and is programmed by default on channel 11. Each MadgeTech Wireless Data Logger and RFC1000 has a set of dip switches with which the channel may be programmed. Different wireless channels may be used to create multiple networks in one area, or to avoid wireless interference from other devices. Any MadgeTech data logger or RFC1000 that is on the same network is required to use the same channel.
Product User Guide RFPulse2000A: To program the channel on the RFPulse2000A data logger, start by switching the wireless mode to OFF by holding down the Wireless button on the data logger for 5 seconds. Step 1: Use the USB Cable, plug the USB end of the cable into an available USB port on the PC. Step 2: Plug the opposite end of the cable into the communication port on the RFPulse2000A. Step 3: Open the MadgeTech Software. Locate and select the RFPulse2000A in the Connected Devices panel.
RFC1000 Compliance Information • “This device complies with Part 15 of the FCC Rules. Operation is subject to the following two conditions: (1) this device may not cause harmful interference, and (2) this device must accept any interference received, including interference that may cause undesired operation.
Troubleshooting Tips Why is the wireless data logger not appearing in the software? If the RFPulse2000A doesn’t appear in the Connected Devices panel, or an error message is received while using the RFPulse2000A, try the following: • Check that the RFC1000 is properly connected. For more information, see Troubleshooting Interface Cable problems (below). • Ensure that the battery is not discharged. For best voltage accuracy, use a voltage meter connected to the battery of the device.