
User Manual

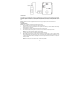
Table Of Contents
20
b. Unit needs to be re-calibrated (go through recalibration and re-test).
c. Detector is in need of servicing (return unit to factory for servicing).
d. Detector has 4-20 mA option set to “OFF”. Set 4-20 mA option to “On” and repeat the test.
6. Remove the gas from the sensor. Re-assemble the GD-12 (make sure the LED is aligned with the hole on the front of the
case).
Quick Gas Test
A butane cigarette lighter can be used to perform a functionality test of the GD-12. This test allows installers to do a quick functionality
test of the gas sensor.
1. Units to be tested must be powered continuously for a minimum of 3 minutes before proceeding.
2. For optimum test results, the unit should be in clean air and be in a low ambient air flow.
3. Check that the GD-12 status indicator light is illuminated, green continuously. If not, do not proceed with tests. See GD-12
Trouble Indicator section in these User Instructions.
4. The display option should be set to “On” and reading 0% LEL in clean air.
5. With the GD-12 cover on, aim the lighter into the sensor grate area (under “DO NOT PAINT”) on the front cover and release the
gas (without igniting the flame) for 1 second or less.
6. Wait for a few seconds. The digital display should climb indicating the increased gas concentration at the sensor confirming a
pass of the quick test.
NOTE: If the Display does not change within 10 seconds, consider these possibilities:
a. Lighter is empty.
b. Unit needs to be re-calibrated (go through the Field Calibration Procedure in these User Instructions
and re-test).
c. Detector is in need of servicing (return unit to factory for servicing).
7. Wait for the display to return to 0% LEL and configure options to desired settings.
FIELD CALIBRATION PROCEDURE
NOTE: For optimum calibration results the unit should be in clean air and be in a low ambient air flow.
Zero the Sensor
1. Remove the Philips screw on the front of the GD-12. Pull the front cover of the unit off.
2. To select Calibration Zero Mode (000), from normal mode, press the Next button four times to get to CAL or Calibration Mode.
3. Then press the Enter button to get to “000” - Calibration Zero Mode.
4. Press the Enter button and the display will read 0 alternating with 000 (blinking) indicating zero calibration in progress (max
165 sec).
5. If the process is successful, the display will read __0 alternating with PAS (blinking) Zero Calibration complete.
6. If the process was not successful the display will read __1 alternating with Fail (blinking) Zero Failed. If this occurs, repeat
steps 2 through 4. If the sensor fails to zero twice contact Technical Assistance: 1-877-367-7891.
7. To return to Normal Mode press Enter and then press Next until “End” is displayed. Press Enter to return to Normal Mode.