User manual SMART EDIT 5 2nd edition
Legal notices To avoid making mistakes during operation, we recommend that you carefully follow the instructions provided in this manual. We have taken a great deal of care whilst programming and checking this software. Nevertheless, since it is not possible to guarantee totally error-free software applications in all environments and at any time, we unfortunately cannot rule out the possibility that some errors may have crept in.
Table of contents Chapter 1: Introduction ........................................................................................................... 5 1.1 Congratulations!.............................................................................................. 5 1.2 What is SMART EDIT?..................................................................................... 6 1.3 HDV Video material......................................................................................... 6 1.
The operating system VxWorks ® is used in license from Wind River Systems, Inc. For the IEEE 1394 interface (Firewire®, MiniDV®) a Firewire Stack from Intoto, Inc. is used. The module for converting graphics data in PNG format is the PNG Reference Library. The versions 0.97 - 1.0.5 are copyright © 1998, 1999 Glenn Randers-Pehrson. For JPEG conversion the library of the Independent JPEG Group is used, copyright © 1991 - 1998, Thomas G. Lane.
Chapter 1: Introduction E-Mail info@macrosystem.de info@macrosystem.us (Germany) (North America) 1.1 Congratulations! Fax 0 +49 (0)2335/960-100 303-440-5322 (Germany) (North America) Congratulations on the purchase of the software SMART EDIT! We thank you for the confidence and trust you have shown us, and we hope that it will meet your expectations.
1.2 What is SMART EDIT? The software is a non-linear editor. All video and audio data is stored on the system hard drive and can then be separated into individual scenes. These scenes can be trimmed as desired and added to a storyboard. It is possible to add many different transitions between the scenes. You can mix with six stereo tracks, mixing original sound, various pieces of music, and commentary. A large selection of fonts and effects makes our Titler powerful, yet easy to use.
The first part of this manual guides the user through Installation (Chapter 2), then through the Basics of device use (Chapter 3) and then through five Tutorials (Chapter 4). These sections are designed to help new owners to begin editing right away. In the second main part, all screens, buttons and their functions are explained in a complete Reference section (Chapter 5). There you will find useful hints that will make your work easier.
Chapter 2: Installation 2.1 Registration/Update service 2.1.1 Registration Please take the time to register with us. There is a registration card in the package. When you register, your information will be put into our database. Your info will not be given to third parties, but it will allow us to give you better customer service. Please register, even if you are already registered as the owner of another MacroSystem product! This registration allows us to offer you a better service. 2.
8 (4) Large right button (cancel button) This button returns you to the previous state, canceling or stopping the current operation. Pressing this button without having selected anything will return you to the previous screen. Pressing the cancel button when you are making settings cancels anything you have just set and reinstates the prior settings. If you are playing or recording video, then clicking the cancel button will cause playback or recording to stop.
9 and (after recording out your film to another device) install the new software afterwards.) 2.3.1 Installing from CD/DVD (The installation from CD requires SMART EDIT 2.4 or higher and DVD-Arabesk 1.3 or higher) If your system software is on a CD/DVD, insert it into the drive (DVD burner), click on “Install Product” in the “System Settings” menu and select the relevant software (Smart Edit).
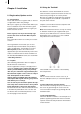
pressing the power switch on the front of the unit. If you insert an invalid SmartMedia card (a card other than the installation SmartMedia card), then the SmartMedia symbol appears (shown below), indicating that the correct installation SmartMedia card should be inserted. EDIT 4.0), once you have selected a language, a message appears informing you that your projects will remain intact during and after the installation. You will be asked whether you want to carry out the installation.
2.4 Unlocking software You have the option of "unlocking" the bonus effects contained on the installation SmartMedia card or (if your system is provided with a DVDwriter) on the installation CD/DVD. To do this you must register with MacroSystem. (Please read the earlier section 2.1.1 Registration). Additional software (more effects, fonts, supplemental software packages, etc.) is available from your dealer.
Chapter 3: Basics of video without affecting the original audio). 3.1 Editing philosophy 5. Selection and use of Transition effects (e.g. crossfade, double exposure, etc.), many in realtime (no rendering is required) Your system operates in a non-linear fashion. This means that every recorded scene can be accessed instantly. The system does not have to spool tape to access the desired scene. Direct access is achieved by recording the video onto a hard drive and not onto tape.
ton on the "Delete" button causes the selected scene to be deleted.) Name field Selection buttons These buttons are indicated with three small, white horizontal bars in the upper right corner. Clicking with the left trackball button opens a list of different options. You then scroll through the options with the trackball, stopping on the desired option, which is highlighted in blue. Clicking on the left trackball button then activates the selected option.
not displayed until you select the letter. When the keyboard is displayed you will see that the entire current name of the scene is highlighted. This allows you to immediately delete the entire name. A new name can then be quickly entered. If you only want to change one letter within the word, click on the letter just after the letter to be changed or move the cursor (vertical bar) by using the arrow buttons to the right of the scene name. Press the delete key and then the key for the new letter.
Both of these buttons have a triple function. Fast rewind and fast forward are achieved while the DV source is in stop mode, viewable slow rewind and slow forward in playback mode, and frame-by-frame backward and forward in pause mode. The color box The color box enables you to select a color. Clicking on the palette arrow (1) enables you to choose a specific color. Scroll through the color palette (2) until your desired color is displayed in the color window below (3).
You can use the Archive function (8) to save the colors you specify for later use (see „Archive function“). When you have finished making all the settings you want, click on "Ok" to confirm and to exit the color box. Note: If you are not using a professional video system (e.g. Betacom SP), avoid using high saturation values. Otherwise "color drain" or "jaggedness" might occur that is only visible after recording out to tape.
Archive function You will see the "Archive" button in various menus and screens (e.g. titling, color box). Clicking on this button opens a screen in which there are four buttons: "Load", "Save", "Delete", and "Cancel". Clicking on "Load" displays a list of the titles, effects, or settings that have previously been saved. You can then directly select or scroll to an entry in this list and confirm. A click on "Save" displays the same list. There are now two possible courses of action: 1.
tended to be used as background for DVD titles, the pictures can also be used elsewhere in the system. You'll find "SMART EDIT" under “Product“. From here, you can also find logos of the single systems as well as the MacroSystem logo. These can be used as background pictures when creating your own text panel in the titling screen and are therefore very useful for credits. In addition, you will find many pictures provided here (e.g. stars) – they have many uses particularly when creating titles.
You can customize the settings for your mask still further by using the “Brightness”, “Contrast” and “Color” buttons that are located in the bottom area of the window. For simple, soft shifts, it is recommended that you use the “Linear H” (horizontal shift), “Linear V” (vertical shift) and “Linear D” (diagonal shift). The direction of the color shift can be altered using the “Mode” button.
specify how big the distance between the stylus and the tablet can be for the system to still react. A distance of 0 only allows for a very close proximity to the tablet. A value of 100 allows for a large distance. It is best if you simply try out values to find the one that suits you. another computer monitor so that you can “feed through” the video picture and thus work on a total of three monitors.
no longer displayed. Press “Calibrate” and you will see a requester, prompting you to “Please click into the center of the cross in the top left corner”. Having done this, you will have to repeat it for center of the cross in the lower right corner of the tablet. The coordinates of the tablet now correspond to the screen.
Chapter 4: Tutorials We recommend working through the five tutorials in the order given here. This offers you an introduction to video editing followed by the more specialized techniques of SMART EDIT (insert editing, audio mixing, titling, etc.). For these tutorials we assume you are using only one monitor (video mode). If you are working in VGA mode, then you can read about eventual changes to the user interface in chapter 6: VGA Mode.
Step 3: Settings Before you begin editing, you should make your own personal settings. System settings Click on the "System Settings" button to view the System Settings screen. Here you can select the "Trackball Speed" appropriate for you. There is a choice of three different speeds. Now exit this menu either by clicking the right trackball button or by clicking on the Main menu symbol (bottom right) with the left trackball button: Project settings Now you can make the settings for your project.
Step 4: Recording and editing ding because of the changing recording time. Recording Now select "Record" to enter the Record screen. In the background you will see your video. An operating panel in the foreground displays (after the recording is stopped) the name of the scene, the recording time, and the approximate remaining time available on the hard drive. Now record a few minutes of video, preferably containing 4 or 5 different scenes. Then press the stop symbol.
Now click on the button below the scene to call up the keyboard. Each scene can now be viewed or edited from this menu as soon as it has been brought to the middle of the Scene bin. Once there it is the selected scene, and it is slightly larger than the other scenes in the Scene Bin. Click on the play symbol (next to the slider) to begin playing the video. Playback can be halted at any time with the stop button, pause button, or with the right trackball button.
Trim screen. In the background you see the first frame of your video. The trim panel is in the foreground and covers one third of the picture. The name of the scene appears in the upper line, and next to that its length is displayed. For this tutorial a time between 3 and 10 seconds is suitable. (If the currently selected scene is shorter than that, exit the Trim screen and select another scene.
the first scene). All scenes are played in the order you have defined, from left to right through the storyboard. If your system does not support real-time effects, all effects must therefore be rendered. The blue symbol will appear after rendering. If you want to change the sequence, (for example move a scene from the end of the storyboard to the beginning), select the scene in the Scene bin. Now click in the storyboard on the scene after which the selected scene is to appear. Click on "Add".
the effect can be viewed by clicking on the Play symbol. One second before the effect, the effect itself, and one second after the effect is played. If the effect appears to you to be too fast or too slow, then you can change its speed by changing its duration. The default setting is 1 second, but you can click to the left above on the button displaying the effect duration. This opens a screen in which you can set the effect duration exactly with a slider. The effect must then be recreated.
video with SMART EDIT"). Next, record some music of your choice into the machine. This can come from any audio source than can be connected via RCA cables. Direct audio conversion from CD. To quickly load in music from a cd, open the DVD writer tray and put in a cd and close the tray. Go to the Audio Record, Edit screen and click "CD Import" . You will now see the CD Audio menu. Click on the "CD Contents" button, and a list of the songs on the CD will appear to the left.
ding to the length of a scene in the storyboard). A red band means over-modulation, a yellow band means "must be created" and a blue band means the audio has already been created, and it is ready to play. Activate the commentary audio track by clicking either on the microphone symbol or on the track itself. The track turns from gray to blue when selected. Then click on the "Add" button and select the commentary that you have spoken and named from the audio list now displayed.
After the calculation is finished you may click on "Choose Range" so that the Range menu is opened and – in case you don‘t want to record out the entire storyboard – you can use the IN and OUT buttons to specify the segment to be recorded. Finally, click on the Play button next to the "Analog" button. You are requested to switch the video recorder to recording mode. Clicking on "Ok" activates recording out. or a film created using DVD Arabesk.
Trim these Insert scenes so that each one is about 5 seconds in length. For three inserts you will need at least 30 seconds of original video. Step 2: Edit Now go to the "Edit" menu. Put the background scene from the scene bin into the storyboard with "Add". Select the first short scene to insert from the scene bin and click on the "Insert" button.
2. the first insert 3. the background scene between the first and second insert 4. the second insert 5. and finally the rest of the background scene after the second insert. Now you can add the third insert to the remaining segment at the end of the storyboard. Use the procedure described above. Click on the last scene in the storyboard, select the third insert scene in the scene bin, then click on "Insert", and finally shift the starting point appropriately. The music video is now practically finished.
Step 2: Recording In the audio section go to the Record, Edit screen. At the above-right you can specify the input for your audio source. You can choose several options, depending on the audio source. Note: If you connect a mono microphone keep in mind to select the option Mono under Mode so that you can still hear the sound in stereo. You need some music to add to the video mentioned in step 1 (e.g. from a CD or from a music TV channel), and you need several commentaries.
select "Create". The system computes the audio tracks affected by the commentary. When the calculation is finished, replay the storyboard (Play symbol to the right of the scroll bar). Pay close attention to the volumes of commentary, original sound, and background music in relation to each other. It is highly likely that there is a mismatch. Often the commentary is not loud enough and is masked by the background music. You can now match the volumes to obtain the proper audio relationship.
the unwanted noise and drag it at the same time vertically downwards to dampen the sound. The third point marks the end of the unwanted noise: it should therefore also be at the same level horizontally as the first, but beyond the noise. Click on "Create" to reduce the volume of the unwanted noise substantially without changing the remainder of the audio sample. Audio mixing is now finished. Play the entire film from the Finish screen. If necessary, you can make further corrections. 4.
can see the video screen in the top right corner – with an enlarged part of your title. In the top left corner, you can first decide if the letters appear as “Color” (single color) or as a "Pattern". If you choose “Color”, the color box opens so that you can choose the color, for example yellow. After you have confirmed your color box settings by clicking "OK", you can decide to add an outline.
transitions between the pages. Using the duration value you can extend the text to other scenes or shorten it (e.g. limit it to one second at the beginning or at the end). Now you can check your title by clicking on "Full size", if your system is provided with this button. In the window that appears you can use the control next to "Frame" to scroll through the entire range of the title effect. Finally, create the title so that you can view it in the finished video.
There you see your video. Delete the given text (as explained in the previous exercise) and any other available pages by clicking on the ">" button in the upper panel of the "Pages" operation panel and then choosing "Delete". Repeat this procedure until only one page is left. Now enter the two words "You see" so that these appear on top of the video. Then click on the button "Font" in the "Text" menu to select the typeface "Lynn" in size 90. Now click onto “Style” and choose “Pattern”.
Chapter 5: Reference This part of the manual serves as a reference to the individual menus. Look here for information on individual functions or menu items you may be unsure about, as well as additional features not explained in earlier tutorials. Please note that depending on the system model, the functions explained in this text may vary slightly or may be missing. VIDEO 5.1 System settings This menu is used to make general settings.
play" button beneath is activated and you can use it to choose the format for playback: "Video" or "Field" are the two options. The "Field"“ option has an advantage in that unlike "Video", there are no movement artefacts -- however, the resolution is lower. (5) The button "Set time" offers the possibility to set date and time of your machine. This function is required in order to let the system start recording automatically (item (10)).
time is too long, a warning will be displayed. By clicking on "delete" you can remove the recording time activated in the upper list. Be careful, no warning appears! If you want to correct the times, you can enter the time setting anew by activating the buttons "change start" or "Change end". The button for "Input" in this menu allows you to comfortably select the source for your system. For example, you could have different sources for different recordings. load.
on "P 1" (or "P 2", etc.). The on-screen keyboard appears so that you can enter another project name. The chosen project name is also displayed in the edit screen above the scene bin. Only the currently active project can be edited! Exchanging video data between different projects is possible using the Clipboard feature in the Edit screen. You always have access to archived titles and colors. (4) Under "Image size" you have the choice among Small, Normal, and Large.
If you set the button “Audio tracks” to “normal”, then the buttons positioned below are disabled. In the gray fields you can see whether the corresponding soundtracks are free or fixed to the scene. If you select the option “Selection” under “Audio tracks”, then the original audio is fixed to the scene and the behavior of the other soundtracks can be set at will. Note: Some systems automatically select the best audio sampling frequency (48 KHz).
(4) In case you want to check your video material and don't intend to change settings at the same time, then you can use the button to reduce the menu to a much smaller panel. In this reduced menu only the buttons described under item (3) and the button ("video settings" menu symbol) to redisplay the entire menu are visible. (5) Clicking on these menu symbols takes you to the Recording menu or to the Main menu. 5.
you to give scenes the name you choose. 5.5 Editing (6) This fields shows you how long the recorded scene is. This screen is used for most of your editing work, and for sequencing of trimmed scenes. This is the most important menu. (7) The field Rem. shows you how much time remains, meaning how much video can still be recorded. This is not displayed during recording; it is switched to a smaller display. This amount is an estimate.
(3) The buttons next to the slider can be used to move from one scene to the next in the storyboard one scene at a time. (4) The buttons "|<" and ">|" move you to the beginning or end of the storyboard. (5) You can use the Play button to the right of the slider to play the storyboard beginning with the selected scene until the end of the storyboard (or until you stop playing either by pressing the Stop button which is now visible, or by clicking the right trackball button.
the end ("Start" button). To do this, you have to select “Position”. Now you can see the background scene. To trim the insert-scene either from the front or from behind, switch the selection button to “Trim” so that you can see the “IN” and “OUT” buttons. During this setting, you can see the background scene. Set the selection button to “Trim E” so that you can see the insert-scene instead. The so-called “background scene”, in other words the story board, can be split in three parts: 1.
or split. (This cannot be done to a scene in the storyboard). Finally, the scene in the storyboard can be replaced with the newly trimmed scene. If you have deleted the scene from the scene bin, then after you click on "Search" the message "The scene was not found. Should it be re-created?" appears. If you then click on "Yes" and the scene will again appear in the scene bin. This function can be activated at any time, even after restart, after which a deleted scene cannot normally be re-created.
with the button located above it. To the right of the preview buttons is the scene duration, which you can set for up to 1 minute. Clicking on "OK" returns you to the Edit menu. The new scene, (named after the effect chosen), is now available in the Scene bin. The selection button displayed underneath the "Preview" button offers three settings. The function "All" shows all possible "New scenes", which can be found in the system.
– Clipboard (availability depends on system used) This is a function for temporary storage that allows you to move scenes to tother projects. If you click here, you see on the right of the window the four buttons: "Clipboard -> Project", "Scene -> Clipboard", "Remove scene" and "Scene from project --> Clipboard". If you click on "Scene -> Clipboard", the scene previously selected in the scene bin is automatically inserted onto the clipboard.
– Jitter Have no fear – SMART EDIT processes your best and most detailed material without jitter. But sometimes a jitter or stroboscope effect is desired to attain a change of pace or to give your video an artistic note. Simply pick a scene, select "Special", click on "Jitter", then set the Still time (still time 000.00: 04 = one image remains as it is for a length of time corresponding to four frames), and in "Type" select between "Half frame" and "Full frame".
results and a very calm still by choosing “Frame”. In some rare cases, it may be better to use the “field” option. There is no audio for still images. The remaining effects in the Special menu are the same as the Image Processing effects (The individual Image Processing effects are explained in chapter 5.8). (20) In general, you will record scenes that have more than one camera setting (take). These scenes must usually be split up in order to make the video you intend.
appears again. You proceed in the same manner with the Out point. You can carry out fine editing by using the arrow keys (below the "IN" and "OUT" buttons) to step through the individual frames one at a time. You can play the trimmed scene to check it by clicking on the Play symbol (all the way to the right). You can display the audio wave form and use audio scrubbing (section 3.2). This procedure simplifies the creation of clean splits.
(1) The counter at the upper right displays the length of the storyboard, which is the total length of your video project. The total length includes not only the scenes you have taken from the scene bin but also all additions such as color scenes, black intro scenes, etc. You now know how much storage capacity you will need for your output media (VHS, DV, etc.). (2) This field indicates whether the effects and audio samples are "Created" or still "Unrendered".
edition" manual, chapter 5.6 for the relevant description. The programs "DVD-Arabesk 2" and "DVD-Arabesk 3" come with a separate manual. Note: The DVD-Arabesk software may differ slightly from the description below on some systems. In the “Image quality” section, you may see the “Rendering” button, which provides you with three options, namely, “fast”, “normal” and “intensive”. These options allow you to influence the picture quality of the computed film.
just to see only one effect type in the list. (5) Clicking on the "i" button, you’ll get information about the transition effect activated in the effect list. If it is an additional effect, the window "product information" appears, which offers a description of the effect. Is the effect to be found a standard effect, the product information refers to the manual. (6) You use the "Add" button to apply the selected and defined effect between the scenes in the storyboard middle.
the screen into two parts. Your new scene is displayed in the right half of the screen. In the left half of the screen a scene is displayed that you can freely choose from the scene bin with the button "Choose scene" positioned below. This comparison function lets you, for example, adjust the color to correspond to an existing scene. You can also change the effect options to directly compare different colors or directions. Here you’ll also get a real-time preview, too.
3. Bars: The new picture either pushes ("Type" "Push") the old with from 2 to 200 "Bars" out of view or superimposes itself ("Type" "Inset"). Under "Direction" you have a choice of six. Two are interlocked (come from two sides). Recommended duration: 0.5 to 2 seconds. 4. Blue box: With this effect you can remove undesirable elements from a foreground scene and place the remaining motif on another background.
movement. 10. Gate: With this effect you can call up the color box with the button "Color" in order to specify which color the gate should have. The gate closes from opposite sides of the screen over the first scene. Under "Direction" you specify whether the opposite sides are top and bottom, or left and right. After the bars have met at screen center, they reverse direction, moving out of the picture and revealing the second scene. 11.
effect is applied to a particular segment of the storyboard. In the Image Processing effects screen only one scene is selected. The selected scene represents the approximate range for the intended effect. You can process just one image, or an entire scene, or in the extreme case the entire storyboard. effects, which are to be found in the system.
ping between long-term effects and titling is not possible. (However, you can do this by using the Special function in the Edit screen to create new scenes with included IP effects.) You can also choose between the "Trim“ and "Position“ functions here as well. For further information, please refer to the notes regarding "Insert“ (Chapter 5.5, Point (12)) When you have set the range of your choice, return to the "Image Processing" screen (click on the right button).
fects, you at first insert an effect into a scene and create it. Then you convert the scene with the inserted effect into a separate scene. To do this click on the button "Scene". A window appears in which you can select the range for the new scene. The name of the effect applied appears under "Name" as default name for the new scene. You can change this name by clicking on it and calling up the keyboard. You also have the three options "Effect", "Effect + Scene(s)", and "Range".
edge shimmer which sometimes arises when using an CVBS (RCA) connection. This shimmer can appear at very fine, high-contrast edges arises to a much lesser extent or not at all when using a S-Video connection. Using the filter causes a weak blurring of the image. The filter should therefore only be used when absolutely necessary. You can set the "Strength" from 1-3. Tip: With a CVBS connection the signals for brightness and color, which are normally separate, are mixed.
17. Out of focus: With this effect you can make a scene appear blurred. You can set the blur "Intensity" from 2-20. Under "In" and "Out" you set the start and end points of the effect (up to 12 seconds). 18. Rectangle: A rectangle is inserted into your video. You can set the "Position/Size" and the "Color". 19. Relief: The video image is transformed into a sort of 3-dimensional relief. It looks as if it has been chiseled in stone – a single gray tone with light and shadow at the edges.
(1) In the background you see the first frame of your video scene. This full frame display serves as orientation for adding text. This lets you immediately see how the text looks overlaid on the particular scene you are editing. At the vertical or horizontal edge of the window you may see - according to effect - a scroll bar, with which you can scroll through the text box.
box or “Pattern” to open the “Select pattern” screen. In this screen you can select a pattern of your choice, just as described in section 3.2 under "Image pool". The mode (positive/negative) and alpha value can also be specified. Clicking on "OK" in "Select pattern" confirms your settings and you are returned to the "Style" menu. Now you can see the “Outline” button. With the aid of the slider next to it, define the strength of the outline with values between 0 (not active) and 6 (strong).
lected line. The lines below the moved line are moved along with it, but keep their respective distances. You can also make several settings together in the "Line" window before clicking on "OK". Note that the settings always apply to the line selected beforehand! The percent values you have set are retained. You can view the settings and changes for the line you have selected by activating the "Line" window. Here you can also modify the percent values.
a diagonal arrow symbol appears. Click on the left trackball key and then roll the trackball to change box height and width simultaneously. • Clicking on the button “Extended” calls up a display in which you have several options: The "Grid" slider allows you to set the size of the invisible grid. The box edges are aligned with this grid so that positioning is easier. With the "Border" slider you set the distance of the text box to the screen edge.
trackball pointer will display a little cross when trying to press “Preview”. • At first you can decide whether your text box should be provided with a background. Next to the function “Choose background” there is a checkbox. If you see a checkmark in the checkbox then the background for the active text box is transparent. If you activate the checkbox so that a checkmark appears, then the active text box is filled with a background.
hand, as is done with the "Image processing” effects screen. The title effects in detail the top through the picture. The scroll speed depends on the scene length and the text length. The text scrolls at a speed so that it scrolls entirely over the screen within the duration of the scene. Several pages can be inserted. The title effects can be selected in the effect list. This list contains several effect options.
• Video transition effects are also displayed in the Storyboard display of the Audio-Mix menu in the form of an intermediate scene. • Audio splitting by the bar. Audio samples can be split at the touch of a button during play. Audio mixing employs the same principle as video editing: 1. Recording of the raw (audio) data. 2. Splitting of the audio sample into a number of discrete passages (if desired). 3. Trimming of these data, i.e.
in the audio list, and their length displayed. If you have added an audio sample to one of the sound tracks of the Audio-Mix menu, it is marked with a small white point next to the length. (7) The New Sample button opens a dialog in which the Silence and Sine Wave Sound functions can be configured and launched by means of the respective buttons.
channels and the front left-hand channel, creating an effect which is similar but not as clear. • rear right Rear right functions in a similar manner to rear left, but for the right-hand rear channel. In all cases, a mono audio sample is first generated from the original stereo sample, as playback is ultimately through a single loudspeaker only. - Sample -> Scene Clicking on the Sample -> Scene button creates a video sequence with black background from your audio sample.
audio sample will be split at this point without playback being stopped. If you whish to copy the split audio pieces into the Storyboard in the Edit screen, you need to first activate the "Insert as scenes in storyboard" by marking the little box. After splitting the sample and confirming with "Ok" or waiting until the end of the sound, the video data will be created. The sample parts are automatically copied in the form of empty scenes, containing the respective parts of the sound.
which title in the list has already been selected. If you cancel the operation while the titles are being read, then all titles that have been successfully read are displayed in the list. The window “CD Import” closes automatically after the audio titles have been read and you then see the titles displayed in the list of sound clips. of the Edit menu, transition effects are however displayed as discrete scenes in the storyboard.
on the track itself (selected track turns blue). • Select the scene in the storyboard approximately at which the audio sample is to begin. • Click on the Add button and select an audio sample from the list displayed. • The sample now appears in the track provided for it exactly at the beginning of the active scene in the storyboard. 2. Moving and trimming audio samples To define the starting point exactly, select Range.
The method of volume control employed in each case is therefore determined primarily by the task concerned: • If the volume of a complete audio sample is simply to be increased or reduced, direct volume control is the solution. Using the wave form for this purpose would be to use a sledgehammer to crack a nut.
to move very quickly through the storyboard scene by scene. Use the arrow buttons to click either through the video scene by scene, or from one audio sample to another when there are several audio samples below a single video scene. The audio samples of the currently activated sound track are selected in this case. This function is very helpful when a large number of audio samples are located below a single video scene, as the samples are displayed only very briefly during normal playback.
(7) Hit the Remove button to delete the active audio sample. This function has no effect upon the original track, as only audio samples from the supplementary tracks can be deleted. Remember that removing a audio sample may necessitate recreation. (8) Clicking on "Replace" opens the list of sound clips and you can select a clip that now replaces the previously active clip on the soundtrack. (9) The Range function is used for adjusting the position and the IN and OUT points of a audio sample.
If you then trim a sample or move it, the fade in and fade out times remain. (13) The Effects button calls up the Audio Effects menu. Audio effects can be applied to either a single audio sample or a complete sound track. • To add an audio effect to an audio sample, first select the desired audio sample, which is then highlighted in blue. Then click on Effects.
(c) Using the Add button, insert an editing point after the currently selected (green) point in the volume display. Note that a point cannot be inserted between two points located very close to each other. (d) Use the Remove button to delete the selected editing point from the volume display. (e) The Range button can be used to group several adjacent editing points to form a range, i.e.
•Audio effects may be inserted into wave form audio samples. • The sample envelope remains if you have trimmed or moved the audio sample. (15) Use the Volume button to adjust the volume of the active video scene. You can reduce the volume of the scene (negative dB value), mute it (slider fully to the left), or increase the volume (positive values up to 30 dB). Use this control for example to prevent a soft sound from being drowned by another sound which is too loud (e.g.
Chapter 6: VGA Mode It is possible to connect a VGA screen to your system. In the System Settings, you can use the "Screen" button to select the required mode – there are several modes available, depending on the hardware you are using (single-monitor use or dual-monitor use). 6.1 Dual-monitor use (VGA as extra monitor to the video monitor) Please read this chapter carefully if you have connected a VGA (computer) monitor to your system in addition to your TV monitor.
VGA 2 (800 x 600, 75 Hz): If your VGA monitor supports this setting then you can also use it with SMART EDIT. The only difference to the setting above is the frequency. The picture flickers less. VGA 3 (1024 x 768, 70 Hz): This setting also enables rendering of more scenes and entries. In addition, flicker is as little as with VGA 2. 6.2 Single-monitor use (VGA as an alternative) Instead of using a television you can use the VGA port to connect a computer monitor (also a flat screen).
Chapter 7: Tips & Error Handling CONNECTION OPTIONS Problem: Can I connect other input devices? This collection "Tips and Error Handling" will continue to grow. We are always happy to receive your ideas and suggestions! In the following pages you will find some of the most frequently occurring problems and tips for handling them. Please become familiar with the following tips and help on errors. If you can't find the solution to your problem here, then contact your dealer.
Problem: There is no picture when I record from the video input device. The message "No video signal" appears. Solution: Read the corresponding information in the hardware manual. Problem: When recording the video material I hear no sound. Solution: Set the correct input in menu "Audio recording/editing" so that the volume level is visible. Read the information in section 4.3, step 2 (recording). Problem: The audio is distorted.
chapter 5: chapter 5.1, item (10) chapter 5.5, item (24) ERROR MESSAGES Problem: I have a lot of scenes in the Scene bin and am having trouble finding the scenes that I am looking for. Solution: This symbol means that you should insert the installation SmartMedia card, because the card currently in the drive is invalid. Solution: Be sure to rename the scenes in chapters and sections when splitting or recording. You can also sort the scenes in the scene bin.
program receives no message from the machine, it will turn the machine off, but only after several seconds. Problem: I have a problem not contained in this list. Solution: If you have access to the Internet, check out the following Web site: http://www.macrosystem.de (Germany) http://www.macrosystem.us (North America) Here ("Support", "FAQ") you will find an updated list of FAQs (Frequently Asked Questions) that may help you.
Chapter 8: HD Backup-System 8.1 What is a backup used for? Some hardware variants support the backup functionality: In addition to the exchangeable system hard drive, the system is supplied with an integrated hard drive, found in the inside of the unit. This backup hard drive allows you to save your current project. It offers the same capacity as your system hard drive. You can also make use of the HD Backup-System on other systems by upgrading your system.
Chapter 9: Ethernet-Transfer 9.1 General information Since the installation of version 4 of SMART EDIT, Ethernet Transfer software is automatically installed on many SMART EDIT compatible hardware systems. This program enables you to connect your device to a TCP/IP network. You can then exchange video data (incl. original soundtrack) at high speed with PCs on the network and use other programs installed on the PCs to edit your video data, print images, send footage via email, etc.
9.3.1 Manual configuration In the “IP” field, specify a free (!) IP address on your network for your machine (e.g. 192.168.1.10). The check mark for the DHCP setting must remain deactivated –the name, in this case, also remains deactivated. 192.168.1.10 192.168.1.20 Direct connection between a PC and system (via a crossover Ethernet cable) 192.168.1.10 192.168.1.20 192.168.1.40 192.168.1.
9.3.2 Automatic configuration via DHCP Via DHCP Via DHCP DHCP Server / DNS Server Via DHCP Via DHCP In the “DHCP” section, you can first of all decide whether your system should be assigned a network address automatically. This function can only be used if a DHCP server exists on the network. If this is the case, activate the check box so that a check mark appears. You will then see a window appear for a while that indicates that a network connection is being started.
“Solitaire”= Solitaire.mynet.com PC.mynet.com The PC being used must also use the same domain server or be logged on to the same domain. (Manual login via: Control Panel->System->Computer Name->Change) Access via “http://solitaire”. 9.4 Ethernet Transfer on the PC Now, on your PC, start the “Internet Explorer” browser (at least version 6.0 or higher). Once you have entered the IP address of your system (e.g. 192.168.1.10) or the configured hostname (e.g. “Solitaire.mynet.
1.) PC -> System If you want to transfer your video data from the PC to the system, click on the “PC --> Casablanca” button. A window opens in which you can first of all specify the name that you want the scene to have in the SMART EDIT scene bin after it is transferred. If you do not choose a name here, the system will call the scene “New Scene”. Beneath this is a little check box that you can activate if you want to overwrite an old scene that already has the same scene name.
If you want to transfer video footage from the systemto the PC, click on the “Casablanca --> PC” menu item. You will see a list of all the scenes that are available in the SMART EDIT scene bin. Fifteen scenes are displayed per page. There is a bar at the bottom edge of the window that you can use to display the subsequent pages (“Jump to...”). The scenes are displayed with their names and the first frame of the scene.
3.) Info If you click on the “Info” button you will be provided with information on both transfer directions (“PC --> Casablanca” and “Casablanca --> PC”). 9.5 Background knowledge DHCP stands for “Dynamic Host Configuration Protocol” -> Automatic connection to the network through a DHCP server (e.g. present in the local DSL router) upon request by the DHCP client (system, PC) Basic functioning: when a network connection is initialized and DHCP is activated, the client (i.e.
classes that are differentiated by way of the first segment of the address. For a “normal home network” all you need to know is that there are private address ranges that are not and cannot be used on the internet and are therefore “free to use”). Under normal circumstances, it is sufficient if you assign, for instance, the IP address 192.168.0.1 to the PC and the IP address 192.168.0.2 to the system. Further PCs, devices, etc.
274-06/06