
User Guide


Drawing 79
Drawing spirals and arcs
With the Spiral and Arc tools, you can easily draw spirals and arcs. Options let you customize the
way each tool works.
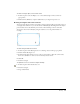
To set Spiral tool options:
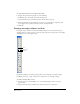
1 In the Tools panel, if the Spiral tool is not showing, select it from its pop-up menu.
2 Double-click the Spiral tool.
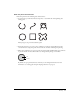
3 In the Spiral dialog box, select a Spiral Type option:
• Click the left button to create a spiral with a concentric, evenly spaced radius.
• Click the right button to create an expanding-radius spiral that opens up farther with
each rotation. In the Expansion text box, enter a value or drag the slider to adjust the
expansion rate.
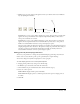
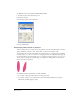
4 Select a Draw By option:
Rotations specifies the number of rotations in the spiral, regardless of its size. Set the number
by entering a value in the Number of Rotations text box or by adjusting the slider.
Increments adds more rotations as the spiral grows bigger. Set the spacing between each
rotation by entering a value in the Increment Width text box or by adjusting the slider. For
expanding spirals, enter a value in the Starting Radius text box.
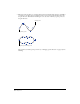
5 Select a Draw From option:
Center lets you click to set the center point of the spiral and drag to place the end point.
Edge lets you click to place the end point of a spiral and drag to place the center point.
Corner lets you click to place one end point of a spiral and drag to place the other end point.
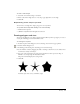
6 Click a Direction button to specify whether a spiral turns clockwise or counterclockwise. This
does not change the path direction of a spiral.
7 Click OK.
To draw a spiral:
1 In the Tools panel, select the Spiral tool from its pop-up menu.
2 Drag to draw a spiral.
3 To modify the spiral as you draw, use any of the following keys:
• Press Shift to constrain the placement of the final point.
• Press Alt (Windows) or Option (Macintosh) to draw from the center regardless of the selected
drawing option.