
User Guide

Setting Up Your Document 63
6 Double-click the filename.
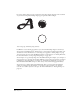
The import pointer appears.
7 Position the import pointer where you want the graphic or text block’s upper left corner to
appear.
8 Place the graphic by doing one of the following:
• Click to place the graphic at its default size.
• To resize an image while importing, drag the import pointer to create a marquee. Release the
mouse button when the marquee is the correct size.
To always embed graphics:
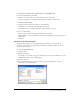
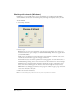
1 Display import preferences by doing one of the following:
• In Windows, press Control+U, then click the Import tab.
• On the Macintosh, press Command+U, then click the Import category.
2 Select the Embed Images and EPS upon Import option.
3 Deselect the Convert Editable EPS when Imported option.
4 Click OK.
Managing links
When linking or embedding a graphic, FreeHand records the graphic’s filename and location.
When you open, export, or print the illustration containing a link, FreeHand looks for the linked
graphic by its filename. If the source graphic is not in its original folder, FreeHand looks for it in
the same folder as the FreeHand document.
When moving a document to another computer or to a storage device for transport, follow these
guidelines:
• Save the linked graphics in the same folder as the document or embed all the graphics in
the document.
• When preparing a document to send to a service bureau, use the Collect for Output command
to gather all needed components, including linked graphic files. For more information, see
“Printing” on page 375.
• Use the Search for Missing Links feature (Macintosh). For more information, see “Updating
and fixing broken links upon opening a document” on page 65.
Import pointer