
User Guide

Using Layers, Symbols, and Styles 295
Locking and unlocking layers
You can lock layers to protect the objects on those layers from changes while keeping them visible.
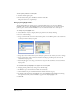
A closed padlock icon next to the layer name in the Layers panel indicates that a layer is locked;
an open padlock icon indicates that it’s unlocked.
To lock or unlock a layer, do one of the following:
• In the Layers panel, click the padlock icon to the left of the layer name.
• To lock or unlock a range of contiguous layers, drag through the padlock column.
• To lock all layers, Control-click (Windows) or Option-click (Macintosh) a padlock icon to the
left of any layer name.
Using the Guides layer and guide paths
Using the Guides layer, you can turn a simple path into a guide. Guide paths help you to trace,
position, and place objects more accurately.
You can hide, lock, move, or change the color of the Guides layer, but you cannot merge, rename,
or remove it.
For more information on guides, see “Using guides” on page 55.
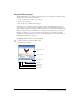
To show or hide the Guides layer:
In the Layers panel, click in the far left column of the Guides layer.
A check mark indicates that the layer is visible.
To change the color of the Guides layer:
1 Display colors preferences by doing one of the following:
• In Windows, press Control+H, then click the Colors tab.
• On the Macintosh, press Command+H, then click the Colors category.
2 Click the Guide Color box and select a color.
3 Click OK twice.
To toggle between viewing guides in black (Keyline mode) or in color:
Click the circle icon in the Guides layer.
To position guides in front of your artwork:
In the Layers panel, drag the Guides layer above the other layers.
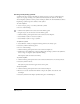
To turn a path into a guide:
1 Select the path.
2 In the Layers panel, click the Guides layer.
The path appears in the guide color. Any path moved to the Guides layer becomes a guide.