
User Guide

Special Effects 227
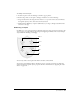
6 If you selected the Expert option, select the point of projection, or vanishing point.
Mouse Click makes the projection extend to the location you click with your mouse.
Center of Selection makes the projection center behind the selected object.
Center of Gravity makes the projection center behind the visual center of the object.
Origin makes the projection begin at the lower left corner of the object.
X/Y coordinates lets you enter x and y coordinates for the projection. The value defaults to the
last mouse coordinates.
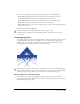
To rotate a selected object in 3D space:
1 In the Tools panel, select the 3D Rotation tool from its pop-up menu.
2 Click the object, and drag to rotate it. Hold down Shift to constrain the rotation to 45°
increments.
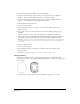
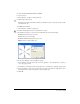
Creating perspective
You can add perspective to objects by attaching them to a perspective grid. The perspective grid is
a nonprinting array of lines that lets you define one-, two-, or three-point perspective with
vanishing points, a horizon line, and grid lines for each plane. The perspective grid creates
envelopes that adjust automatically as they’re moved on the grid.
The Perspective tool lets you attach objects to the grid and move objects around the grid. Objects
moved with the Perspective tool take on a new appearance as you move them around the grid. If
you move an object using the Pointer tool or arrow keys, it is detached from the grid.
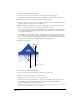
Attaching objects to a perspective grid
To attach objects to a perspective grid and give the object a 3D appearance, you display a
perspective grid and then use the Perspective tool. The object retains the perspective even after it’s
released from the perspective grid.