
User Guide

Chapter 7222
To emboss a selected object:
1 Do one of the following:
• Select Xtras > Create > Emboss.
Note: To apply the effect without opening the dialog box, hold down Control (Windows) or Command
(Macintosh), and click the Emboss button.
• Select Window > Toolbars > Xtra Operations to display the Xtra Operations toolbar, and click
the Emboss button.
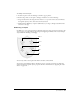
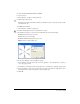
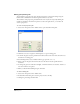
2 In the Emboss dialog box, click a button at the top to select an effect: Emboss, Deboss, Chisel,
Ridge, or Quilt.
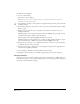
3 From the Vary list, select an option to specify the relief and how an object’s colors create
highlight and shadow:
Contrast specifies a tint of the path’s original colors for the highlight and percentages of black
combined with the path’s original color for the shadow.
Colors specifies colors using the Highlight and Shadow color boxes.
The Emboss Xtra creates incremental colors to achieve an effect. Applying the effect to objects
with spot, Hexachrome, or RGB colors yields incremental CMYK process colors.
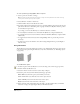
4 For Depth, enter a value up to 72 or drag the slider between 1 and 20 to control the distance
by which the effect is raised or impressed.
5 For Angle, enter a value or drag the dial to set the angle for the light source. Angle affects the
direction of the highlight and shadow.
6 Select Soft Edge to blend the relief for the Emboss or Deboss effect.
Click Apply to preview the effect, or click OK to apply the effect and close the dialog box.
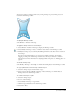
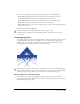
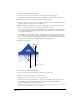
Creating envelopes
Envelopes let you warp and distort graphics and text blocks. An envelope is a hidden wrapper or
enclosure that warps one or more objects. Changes made to an envelope’s shape affect the shape of
the objects contained within the envelope.