
User Guide

Special Effects 217
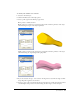
To roughen a selected path or object precisely:
1 In the Tools panel, if the Roughen tool is not showing, select it from its pop-up menu.
2 Double-click the Roughen tool.
3 For Amount, enter the number of points added per inch, from 0 to 100.
4 For Edge, select Rough to use corner points to create a jagged edge, or select Smooth to use
curve points to create a smooth, hand-drawn distorted edge.
5 Click OK.
6 Click anywhere on the path and drag. Dragging farther from the path makes the path rougher.
Note: To apply this effect to text, first select the text and then select Text > Convert to Paths.
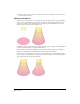
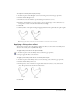
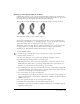
Applying a fisheye lens effect
You can alter a path or object by applying a fisheye lens effect. Concave and convex fisheye lens
effects are most easily seen on symmetrical shapes.
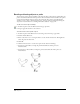
To apply a fisheye lens effect to an object manually:
1 In the Tools panel, select the Fisheye Lens tool from its pop-up menu.
2 Drag to apply the effect to the selection.
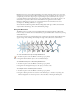
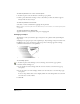
To apply a precise fisheye lens effect to a selected path or object:
1 In the Tools panel, if the Fisheye Lens tool is not showing, select it from its pop-up menu.
2 Double-click the Fisheye Lens tool.
3 For Perspective, enter an amount or drag the slider between Concave (–100) and Convex
(100). The preview shows the amount of distortion.
4 Click OK.