
User Guide


Chapter 7194
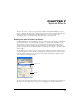
To add a special effect to an object, fill, or stroke:
• Select the object in the Document window, or select the fill or stroke in the Object panel’s
Properties list.
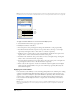
• Click the Add Effect button in the Object panel and select the effect you want from the
pop-up menu.
To delete a special effect from a selected object:
1 Select the special effect in the Object panel.
2 Click the Remove Item button in the Object panel.
To move a special effect up or down in an object’s hierarchical Properties list:
Drag the special effect up or down within the Properties list in the Object panel.
Applying live vector effects
Live vector effects work similarly to some of the other object manipulation capabilities of
FreeHand, except that they act as properties of the object they are applied to, and do not modify
the object itself. Like the objects they affect, live vector effects produce vector graphics. Therefore,
vector effects are independent of display or printer resolution, and scale smoothly to any size.
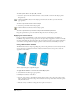
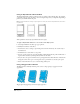
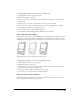
Using a Bend effect attribute
The Bend effect distorts a shape by pulling the points on the perimeter toward or away from the
center point. You can adjust the amount of distortion and move the center point to alter the
appearance of the effect.
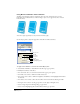
Positive (left) and negative (right) Bend effects
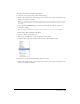
To apply a Bend attribute to a selected effect in the Object panel:
1 Select Bend in the effect type pop-up menu.
2 Modify the attributes of the effect:
• For Size, enter a value to determine how far from the center point to move the points on the
shape. A negative value moves the points toward the center. A positive value moves the points
away from the center.
• Edit the x and y coordinates or drag the center point to relocate it.