
User Guide


Using Strokes and Fills 177
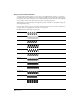
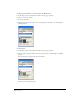
3 Click one pixel at a time or drag in the left preview. Clicking a pixel toggles between black
(opaque, in the selected color) and white (transparent).
4 Select Clear to remove a pattern from the preview window.
5 Click Invert to reverse pixel color—from color to white or from white to color.
Using PostScript stroke attributes
PostScript applies a stroke with a unique pattern and shape that you create in the PostScript Code
text box. FreeHand sends the PostScript code to the PostScript interpreter in your printer’s Raster
Image Processor (RIP). If your code is incorrect, you will receive a PostScript error message when
printing.
PostScript stroke attributes do not appear onscreen, but appear when you print to a
PostScript printer.
Note: PostScript programming is beyond the scope of this document. For more information, refer to a PostScript
language manual.
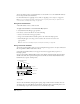
To apply a PostScript attribute to a selected stroke in the Object panel:
1 Select PostScript from the stroke type pop-up menu.
2 Enter up to 255 characters of code in the PostScript Code text box. You can type the code
directly or paste it from another source.
Separate commands with a space, and allow them to wrap on their own.
3 Press Enter (Windows) or Return (Macintosh) to apply the stroke.
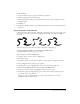
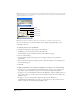
Object panel and PostScript random stroke attribute applied to centerline
Applying attributes to fills
You can apply eight different fill attributes to fills—Basic, Custom, Gradient, Lens, Pattern,
PostScript, Textured, and Tiled.
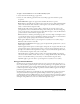
A fill is defined by the boundaries of a path. If the path is open, the fill is contained within the
boundaries drawn by an imaginary line between the beginning and ending points.