
User Guide


Chapter 4136
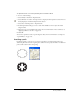
To create an inset path of a selected path:
1 Do one of the following:
• Select Xtras > Path Operations > Inset Path.
• Select Modify > Alter Path > Inset Path.
• Select Windows > Toolbars > Xtra Operations to display the Xtra Operations toolbar if it’s not
already displayed, and click the Inset Path button.
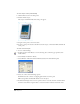
2 In the Inset Path dialog box, enter the number of paths to create in the Steps text box. A value
of 1 replaces the selected object; a larger value creates the specified number of paths. Inset paths
are created as grouped objects.
3 For steps greater than 1, select the spacing for the inset paths:
Uniform spaces the inset paths evenly.
Farther creates more space between the paths closer to the original and less space between paths
farther away.
Nearer creates less space between the paths nearer to the original and more space between paths
farther away.
4 Enter an inset value in the units of measurement for your drawing, or adjust the inset using the
slider. Positive numbers place the new objects inside the original. Negative numbers place the
new objects outside the original.
5 Adjust the Join and Miter Limit settings. For more information on these attributes, see
“Applying attributes to strokes” on page 166.
6 Click OK.
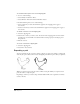
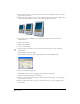
Transforming objects
You can transform objects or points by rotating, scaling, skewing, reflecting, and moving them.
You can make transformations using the transformation tools, the Transform panel, or an object’s
transform handles.
You can also apply transformations to objects as editable effects. After a transform effect has been
applied, it is always live, so you can modify the scale and skew percentage, rotation angle, and
move distance at any time. For more information on applying transformations as live effects, see
“Using a Transform effect attribute” on page 197.
Note: Extruded objects are rotated differently than other objects. For more information, see “Extruding objects” on
page 205.