
User Guide


Chapter 162
Note: You can resize or delete the print area; print area attributes save with the
document. For more information, see “Defining a print area” on page 412.
4 Click inside the print area to open the Print Area dialog box.
5 In the Printer pop-up menu, select the printer you wish to print to.
6 Verify that Printer is in the Destination field (Macintosh).
7 In the Options pop-up menu, select FreeHand 10 (Macintosh).
8 In the Scale % pop-up menu, select Fit on paper, then click OK (Windows) or
Print (Macintosh) to print the area that you specified.
Note: By default, the RGB colors in your document print as CMYK colors. For more
information on using color, see “Color Management” on page 301
9 To exit Print Area mode, click outside the print area.
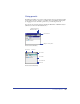
Add navigation to buttons
With FreeHand 10, you can add buttons to your document that link to other
pages or URLs after export to a Web-based format. You use the Navigation panel
to assign links, and you can preview the document as a Macromedia Flash movie
inside FreeHand.
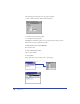
1 Set the magnification on page 1 to 100%. Select the Next button and choose
Window > Panels > Navigation.
2 In the Name text box, type Hieroglyphics.