
User Guide


Tutorial 41
Work with objects in layers
Using layers, as you learned in the Working with Layers lesson, is an integral part
of working in FreeHand. Layers are analogous to transparent sheets of acetate, or
tracing paper, stacked on top of each other. Layers offer a logical way to organize
objects—for instance, you might place all text on one layer and all navigation
buttons on another. Each object in your FreeHand document resides on a layer,
and it can be edited only when its layer is visible and unlocked.
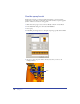
View and hide layers
The FreeHand tutorial document has 12 layers, including the default Foreground,
Guides, and Background layers. Objects on the Foreground layer, as the name
suggests, appear by default in front of objects on the Guides and Background
layers. To manage layers in your document, as you learned in the Working with
Layers lesson, you use the Layers panel.
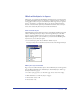
1 To view the Layers panel, choose Window > Panels > Layers.
The objects that you’ve created in the tutorial so far are on the Foreground Layer.
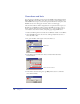
Move your layered artwork
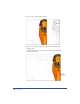
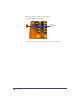
Page 3 of your document includes objects on four different layers: the Foreground
layer, the Head and hands layer, the Beads layer, and the Body layer. You’ll copy
the layered artwork to page 1.
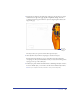
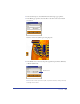
1 To reduce your page view to see the entire page, choose View > Fit to Page.
2 With the Pointer tool, click any object on page 3.
3 Choose Edit > Select > All.
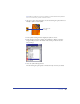
4 Choose Edit > Cut.