
User Guide


Transforming and Distorting Objects 209
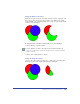
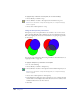
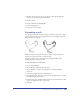
To adjust a blend:
1 Select one of the original objects using the Subselect tool.
2 Do one of the following:
• Change the object’s shape.
• Change the object’s path direction.
• Change the object’s stroke or fill color.
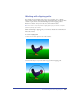
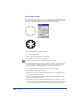
Joining a blend to a path
You can join a blend to a path to control the shape and orientation of the blend.
When you join a blend to a path, the center point of the first object in the blend is
placed over the path’s start point, and the center point of the last object is placed
over the end point. The rest of the blend is distributed along the path.
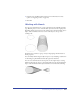
By default, the blend is rotated on the path so that the orientation of each blend
objects changes to follow the path. You can subselect the path and reverse its
direction to make the blend flow in the opposite direction.
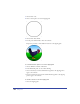
To join a selected blend to a selected path:
1 Choose Modify > Combine > Join Blend to Path.
2 To modify the way in which a blend fits its joined path, select Show Path in the
Object inspector to show the path.
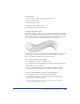
3 To rotate the blend around the path, select Rotate on Path in the Object
inspector. Deselect the option to position the blend parallel to the path.
To remove a selected blend from a path, do one of the following:
• Choose Modify > Split to create a separate blend and path.
• Choose Modify > Ungroup to separate the path and the original objects.
Intermediate objects remain grouped.
Note: Exporting blends along a path from FreeHand 10 to versions earlier than
FreeHand 7 converts the blend to groups.