
User Guide
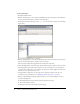


Table Of Contents
- Contents
- Working with Flash MX 2004
- Creating Basic Components in Flash MX 2004
- Creating Advanced Components in Flash MX 2004
- Contents
- About Creating components
- Writing the component’s ActionScript code
- Simple example of a class file
- General process for writing a class file
- Selecting a parent class
- Identifying the class, symbol, and owner names
- About the component instantiation life cycle
- Writing the constructor
- Specifying clip parameters
- Implementing the constructObject2() method
- Implementing the init() method
- Implementing the createChildren() method
- Implementing the commitProperties() method
- Implementing the measure() method
- Implementing the layoutChildren() method
- Implementing the draw() method
- Defining getters and setters
- Component metadata
- Defining component parameters
- Handling events
- Using the Event metadata
- About invalidation
- Skinning custom controls
- Adding styles
- Making components accessible
- Improving component usability
- Best practices when designing a component
- Using the ModalText example
- Troubleshooting
- Index
14 Chapter 1: Working with Flash MX 2004
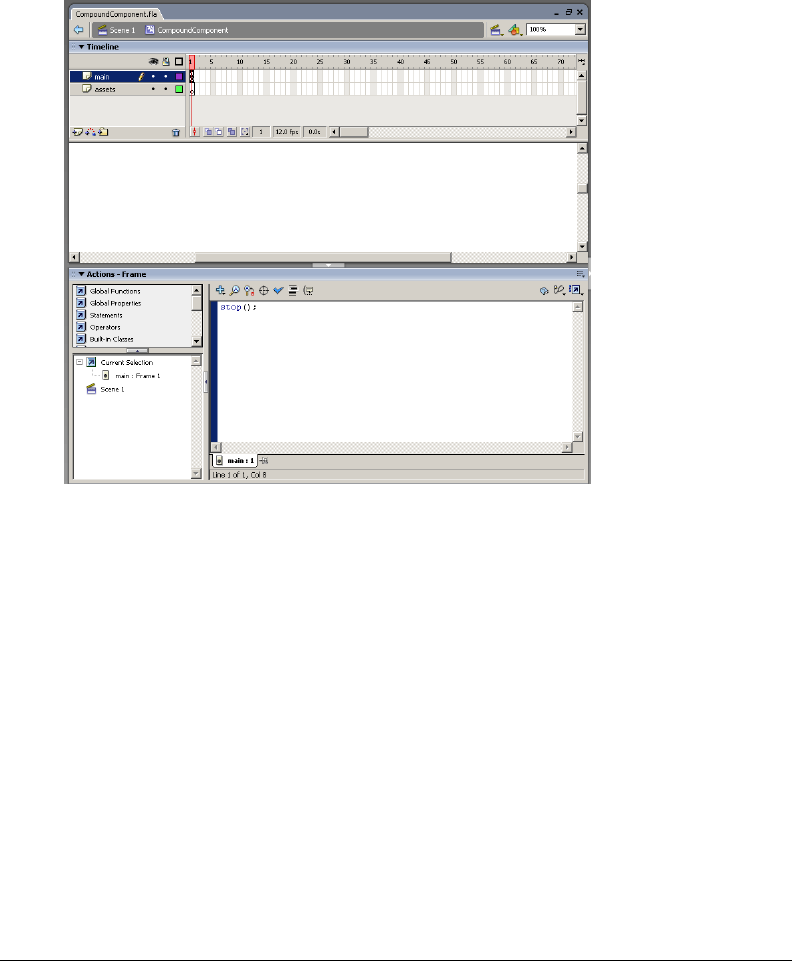
To edit symbol layers:
1.
Enter Edit Symbols mode.
2.
Rename an empty layer, or create a layer called main. You can use any name for the main layer;
however, this document refers to this layer as the main layer.
3.
In the first frame of the main layer, add a stop() action in the Actions panel, as the following
figure shows:
Do not add any graphical assets to this layer.
4.
Rename an empty layer, or create a layer called assets. You can use any name for the assets layer;
however, this document refers to this layer as the assets layer.
The assets layer includes all the graphical assets used by this component.
5.
Insert a blank Keyframe on the assets layer. You should now have two frames on the assets layer.
6.
Add any graphical assets used by this component on the second frame of your component’s
assets layer. For example, if you are creating a custom button, add the graphics that represent
the button’s states (up, down, and so on).
7.
Drag dependent components onto the Stage of the component symbol’s assets layer, if
necessary. For more information, see “Adding dependent components” on page 15.
8.
When you have finished creating the symbol content, do one of the following to return to
document-editing mode:
■ Click the Back button at the left side of the edit bar above the Stage.
■ Select Edit > Edit Document.
■ Click the scene name in the edit bar above the Stage.