
User Guide

Example: Creating a simple validator 221
}
return results;
}
}
}
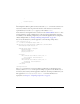
This example first defines a public constructor that calls super() to invoke the constructor of
its base class. The base class can perform the check to ensure that data was entered into a
required field, if you set the
required property of the validator to true.
Notice that the second argument of the constructor for the ValidationResult class is
null. You
use this argument to specify a subfield, if any, of the object being validated that caused the
error. When you are validating a single field, you can omit this argument. For an example that
validates multiple fields, see “Example: Validating multiple fields” on page 222.
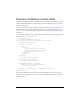
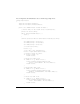
You can use this validator in your Flex application, as the following example shows:
<?xml version="1.0" ?>
<!-- validators/MainAgeValidator.mxml -->
<mx:Application xmlns:mx="http://www.adobe.com/2006/mxml"
xmlns:MyComp="myValidators.*">
<MyComp:AgeValidator id="ageV"
required="true"
source="{birthYear}"
property="text" />
<mx:Form >
<mx:FormItem label="Enter birth year: ">
<mx:TextInput id="birthYear"/>
</mx:FormItem>
<mx:FormItem label="Enter birth year: ">
<mx:Button label="Submit"/>
</mx:FormItem>
</mx:Form>
</mx:Application>
The package statement for your custom validator specifies that you should deploy it in a
directory called
myValidators. In the previous example, you place it in the subdirectory of
the directory that contains your Flex application. Therefore, the namespace definition in your
Flex application is
xmlns:MyComp="myValidators.*". For more information on
deployment, see Chapter 6, “Compiling Components,” on page 63.