
User Guide


210 Creating Custom Formatters
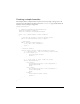
You can use this formatter in a Flex application, as the following example shows:
<?xml version="1.0" ?>
<!-- formatters/FormatterSimple.mxml -->
<mx:Application xmlns:mx="http://www.adobe.com/2006/mxml"
xmlns:MyComp="myFormatters.*">
<!-- Declare a formatter and specify formatting properties. -->
<MyComp:SimpleFormatter id="upperFormat" myFormatString="upper" />
<!-- Trigger the formatter while populating a string with data. -->
<mx:TextInput id="myTI" />
<mx:TextArea text="Your uppercase string is
{upperFormat.format(myTI.text)}" />
</mx:Application>
The namespace declaration in the <mx:Application> tag specifies to use the MyComp prefix
when referencing the formatter, and the location of the formatter’s ActionScript file. That file
is in the myFormatters subdirectory of the application, or in the default classpath of the
application. For more information on deploying your formatters, see Chapter 6, “Compiling
Components,” on page 63.
Handling errors in formatters
For all formatter classes, except for the SwitchSymbolFormatter class, when an error occurs,
the formatter returns an empty string and writes a string that describes the error condition to
the formatter’s
error property. The error property is inherited from the Formatter
superclass.
In your application, you can test for an empty string in the result returned by the formatter. If
detected, you can check the
error property to determine the cause of the error. For an
example that handles a formatter error, see Chapter 41, “Formatting Data,” in Flex 2
Developer’s Guide. For more information on the SwitchSymbolFormatter class, see “Using the
SwitchSymbolFormatter class” on page 211.