
User Guide


952 Chapter 7: Creating Components
10.
Select the Shape movie clip in the library, select Component Definition from the Library
options menu, and enter the AS 2.0 class Shape.
11.
Test the movie clip with the Shape component on the Stage.
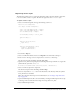
To change the theme color, set the style on the instance. The following code changes the color
of a Shape component with the instance name
shape to red:
shape.setStyle("themeColor",0xff0000);
12.
Draw a square on the Stage and convert it to a movie clip.
Give it the linkage name square_skin, and make sure Export in First Frame is selected.
Note: Because the movie clip isn’t placed in the component, Export in First Frame must be
selected so that the skin is available before initialization.
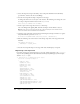
13.
Open the square_skin movie clip and place the following ActionScript on Frame 1 to register
the symbol with the style name
themeColor:
mx.skins.ColoredSkinElement.setColorStyle(this, "themeColor");
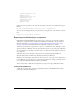
14.
Place the following code on the instance of the Shape component on the Stage in the main
Timeline:
onClipEvent(initialize){
themeShape = "square_skin";
}
15.
Test the movie clip with Shape on the Stage. The result should display a red square.
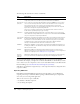
Registering a new style name
If you have created a new style name and it is a color style, add the new name to the
colorStyles
object in the StyleManager.as file (First Run\Classes\mx\styles\StyleManager.as). This example
adds the
shapeColor style:
// initialize set of inheriting color styles
static var colorStyles:Object =
{
barColor: true,
trackColor: true,
borderColor: true,
buttonColor: true,
color: true,
dateHeaderColor: true,
dateRollOverColor: true,
disabledColor: true,
fillColor: true,
highlightColor: true,
scrollTrackColor: true,
selectedDateColor: true,
shadowColor: true,
strokeColor: true,
symbolBackgroundColor: true,
symbolBackgroundDisabledColor: true,
symbolBackgroundPressedColor: true,
symbolColor: true,