
User Guide

Move between scenes 99
Name button instances
You’ll provide instance names for the buttons on the Stage so that you can refer to the instance
names in ActionScript.
1.
On the lower right side of the Stage, select the button at the left. In the Property inspector
(Window > Properties), type goScene_btn in the Instance Name text box to name the instance
of the symbol.
2.
Select the middle button and use the Property inspector to give the button an instance name of
attachMovie_btn.
3.
Select the far right button and use the Property inspector to give the button an instance name
of playSound_btn.
Add a scene
You can use scenes in Flash to organize your document into discrete sections that can contain
content exclusive of other scenes. You’ll create and add content to a new scene.
1.
Select Insert > Scene.
You can no longer see Scene 1, and Scene 2 now appears above the Stage. The Stage is empty.
2.
From the Library panel (Window > Library), drag the Animation movie clip to the Stage. With
the movie clip selected, use the Property inspector to give the instance an x coordinate of 200
and a y coordinate of 15. Press Enter or Return.
The movie clip moves to the designated Stage coordinates.
3.
Use the Property inspector to give the Animation movie clip an instance name of
animation_mc.
4.
Rename Layer 1 Animation. Create a new layer and name it Buttons. Drag an instance of the
BTNback symbol to the Stage, and place it anywhere to the right of the movie clip.
5.
Use the Property inspector to give the button an instance name of back_btn.
Move between scenes
You can move between scenes in the authoring environment by selecting a scene in the
Scene panel.
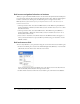
1.
To open the Scene panel, select Window > Design Panels > Scene.
2.
Select Scene 1.