
User Guide

88 Chapter 11: Create a Timeline Animation
3.
With the playhead on Frame 15, select the Selection tool. Drag the tire shadow slightly up and
to the right.
4.
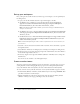
With Frame 15 still selected, select the Eyedropper tool in the Tools panel, and then click the
shadow object.
5.
If the Color Mixer is not already open, select Window > Design Panels > Color Mixer to open
it, then change the Alpha value from 25% to 10%.
6.
Click the options menu control in the upper right of the Color Mixer, and select Close Panel
to close the panel.
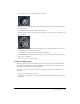
7.
Select any frame between Frames 2 and 14 on the ShadowAnim layer. In the Property inspector,
select Shape from the Tween pop-up menu.
8.
On the ShadowAnim layer, select any frame between Frames 16 and 29. Again, use the Tween
pop-up menu in the Property inspector to select Shape.
Copy and paste keyframes in an animation
For the tire to look realistic as it bounces, it should compress slightly on each bounce. You can
create this effect by transforming the shape of the tire in Frame 1 of the animation, and copying
that frame in Frame 30.
1.
With the Selection tool, select Frame 1 of the TireAnim layer. Then press F6 to add a keyframe.
A new keyframe is added, and the playhead moves to Frame 2.
2.
Select Frame 1 of the TireAnim layer again.
3.
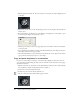
In the Tools panel, select the Free Transform tool.
The tire is selected, and transform handles appear around it.