
User Guide

Create the checkout screen 39
Create the checkout screen
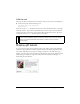
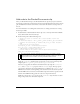
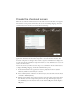
When the user clicks the Checkout button on the main screen, the Checkout screen appears.
The Checkout screen provides forms where the user can enter billing, shipping, and credit
card information. The checkout screen looks like the following:
The checkout interface consists of components placed on a keyframe at Frame 10 in the
application. You will use the Accordion component to create the checkout interface. The
Accordion component is a navigator that contains a sequence of children that it displays one
at a time. You will also add a Button component instance to create a Back button, so users can
return to the main screen.
Later in the tutorial, you will create movie clips to use as children in the Accordion instance,
to display the Billing, Shipping, and Credit Card Information panes.
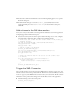
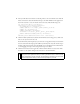
1. In the main Timeline for the application, move the playhead to Frame 10 (labeled
Checkout). Make sure the Form layer is selected.
2. Insert a blank keyframe on Frame 10 in the Form layer (select the frame and select Insert
> Timeline > Blank Keyframe).
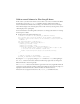
3. With the new keyframe selected, drag an instance of the Accordion component from the
User Interface tree in the Components panel onto the Stage. In the Property inspector,
enter checkout_acc for the instance name. Set the width to 300 pixels and the height to
200 pixels.