
User Guide

Bind data components to display gift ideas 31
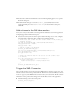
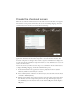
13. In the Value column for the Bound To item, click the magnifying glass icon to open the
Bound To dialog box.
14. In the Bound To dialog box, select the products_dg (DataGrid) instance in the
Component Path pane. Select
dataProvider:array in the Schema Location pane.
Click OK.
Add columns to the Gift Ideas section
Now you are ready to add columns to the data grid in the Gift Ideas section of the application,
for displaying product information and price.
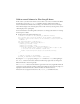
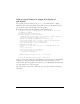
■ Select the Actions layer. In the Actions panel, add the following code to create, configure,
and add a Name column and a Price column to the DataGrid instance:
// Define data grid columns and their default widths in the products_dg
// DataGrid instance.
var name_dgc:DataGridColumn = new DataGridColumn("name");
name_dgc.headerText = "Name";
name_dgc.width = 280;
// Add the column to the DataGrid.
products_dg.addColumn(name_dgc);
var price_dgc:DataGridColumn = new DataGridColumn("price");
price_dgc.headerText = "Price";
price_dgc.width = 100;
// Define the function that will be used to set the column’s label
// at runtime.
price_dgc.labelFunction = function(item:Object) {
if (item != undefined) {
return "$"+item.price+" "+item.priceQualifier;
}
};
products_dg.addColumn(price_dgc);
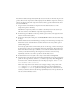
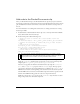
Trigger the XML Connector
Next you will add a line of code that causes the XMLConnector instance to load, parse, and
bind the contents of the remote products.xml file. This file is located at the URL you entered
for the
URL property of the XMLConnector instance that you created earlier. The file contains
information on the products that will appear in the Gift Ideas section of the application.
■ Add the following code in the Actions panel:
products_xmlcon.trigger();