
User Guide

Final steps in component development 185
Final steps in component development
After you create the component and prepare it for packaging, you can add an icon and a tool
tip. To make sure you completed all the necessary steps, you can also refer to the “Component
development checklist” on page 186.
Adding an icon
You can add an icon that represents your component in the Components panel of the Flash
authoring environment.
To add an icon for your component:
1. Create a new image.
The image must measure 18 pixels square, and you must save it in PNG format. It must
be 8-bit with alpha transparency, and the upper left pixel must be transparent to support
masking.
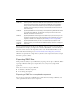
2. Add the following definition to your component’s ActionScript class file before the
class definition:
[IconFile("component_name.png")]
3.
Add the image to the same directory as the FLA file. When you export the SWC file, Flash
includes the image at the root level of the archive.
Adding a tooltip
Tooltips appear when a user rolls the mouse over your component name or icon in the
Components panel of the Flash authoring environment.
You define a tooltip in the Component Definition dialog box. You can access this dialog box
from the Library options menu (Windows: Right-click, Mac: control-click) of the
component’s FLA file.
To add a tooltip in the Component Definition dialog box:
1. With the FLA file of your component open in Flash, make sure the Library is visible
(Window > Library menu).
2. Click the Library options menu (Windows: Right-click, Mac: Control-click).
The Library options menu is on the right side of the Library title bar, and appears as an
icon of three lines and a down triangle.
3. Select the Component Definition option.