
User Guide

About skinning components 107
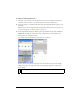
6. Select the Export for ActionScript check box and click OK.
Export in First Frame should be automatically selected; if it is not, select it.
7. Enter the following code in the Actions panel on Frame 1 of the MyComboBox symbol:
#initclip 10
import MyComboBox
Object.registerClass("ComboBox", MyComboBox);
#endinitclip
8.
When you finish editing the symbol, click the Back button at the left side of the
information bar at the top of the Stage to return to document-editing mode.
9. Drag a ComboBox component to the Stage.
10. In the Property inspector, enter as many Label parameters as necessary for the vertical scroll
bar to appear.
11. Select File > Save.
12. Select File > New and create a new ActionScript file.
13. Enter the following code:
import mx.controls.ComboBox
import mx.controls.scrollClasses.ScrollBar
class MyComboBox extends ComboBox{
function getDropdown():Object{
var oldName = ScrollBar.prototype.downArrowDownName;
ScrollBar.prototype.downArrowDownName = "MyScrollDownArrowDown";
var r = super.getDropdown();
ScrollBar.prototype.downArrowDownName = oldName;
return r;
}
}
14.
Select File > Save and save this file as MyComboBox.as.
15. Return to the file MyComboTest.fla.
16. Click a blank area on the Stage and, in the Property inspector, click the Publish
Settings button.
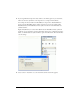
17. Click the ActionScript Version Settings button.
18. Click the Add New Path (+) button to add a new classpath, and select the Target button
to browse to the location of the MyComboBox.as file on your hard disk.
19. Select Control > Test Movie.