
User Guide

102 Customizing Components
To dynamically create a component and apply a new skin:
1. Select File > New to create a new Flash document.
2. Select File > Save and give the file a unique name, such as DynamicSkinning.fla.
3. Drag any components from the Components panel to the library, including the
component whose skin you edited (in this example, RadioButton).
This adds the symbols to the document’s library, but doesn’t make them visible in
the document.
4. Drag MyRadioTrueUp and any other symbols you customized from MyTheme.fla to the
library of DynamicSkinning.fla.
This adds the symbols to the document’s library, but doesn’t make them visible in
the document.
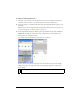
5. Open the Actions panel and enter the following on Frame 1:
import mx.controls.RadioButton;
createClassObject(RadioButton, "myRadio", 0,
{trueUpIcon:"MyRadioTrueUp", label: "My Radio Button"});
6.
Select Control > Test Movie.
To manually add a component to the Stage and apply a new skin:
1. Select File > New to create a new Flash document.
2. Select File > Save and give the file a unique name, such as ManualSkinning.fla.
3. Drag components from the Components panel to the Stage, including the component
whose skin you edited (in this example, RadioButton).
4. Drag MyRadioTrueUp and any other symbols you customized from MyTheme.fla to the
library of ManualSkinning.fla.
This adds the symbols to the document’s library, but doesn’t make them visible in
the document.
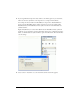
5. Select the RadioButton component on the Stage and open the Actions panel.
6. Attach the following code to the RadioButton instance:
onClipEvent(initialize){
trueUpIcon = "MyRadioTrueUp";
}
7.
Select Control > Test Movie.