
User Guide
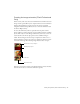
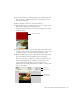
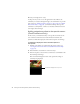
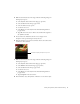
Table Of Contents
- Contents
- Introduction
- Flash Lite Overview
- About Flash Lite technology
- Flash Lite 1.x availability
- About Flash Lite content types
- Workflow for authoring Flash Lite applications (Flash Professional Only)
- Flash Lite authoring features in Flash Professional 8 (Flash Professional Only)
- Using Flash Lite document templates (Flash Professional Only)
- Hello World Flash Lite application (Flash Professional Only)
- About the stand-alone Flash Lite player
- Creating a Flash Lite Application (Flash Professional Only)
- Café application overview (Flash Professional Only)
- Viewing the completed application (Flash Professional Only)
- Creating the application (Flash Professional Only)
- Index
36 Creating a Flash Lite Application (Flash Professional Only)
18. Save your changes (File > Save).
At this point, if you were to test the application in the emulator, the
animation you created would play through to the end and then stop. In the
next section (see “Adding navigation and text to the specials screen (Flash
Professional Only)” on page 36), you’ll add ActionScript that stops the
animation at each keyframe, as well as user interface elements that let the
user navigate between images.
Adding navigation and text to the specials screen
(Flash Professional Only)
In this section, you’ll add interactivity to the specials screen that lets the
user control the transition between each animation. You’ll also add
dynamic text fields that display the name and description of each image.
To add text to display the names and descriptions of
the
specials:
1. In Flash, open the file you completed in the previous section (see
“Creating the menu for the main screen (Flash Professional Only)”
on page 29).
2. In the Timeline, select Frame 10 on the Text layer.
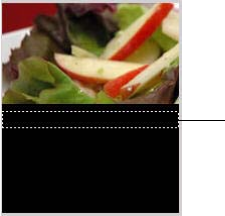
3. In the Tools palette, select the Text tool and create a text field below the
first masked specials image.
This text field will display the name of the special whose image is
currently being displayed.
Text field to display name of special