Developing Flash Lite Applications
Trademarks 1 Step RoboPDF, ActiveEdit, ActiveTest, Authorware, Blue Sky Software, Blue Sky, Breeze, Breezo, Captivate, Central, ColdFusion, Contribute, Database Explorer, Director, Dreamweaver, Fireworks, Flash, FlashCast, FlashHelp, Flash Lite, FlashPaper, Flash Video Endocer, Flex, Flex Builder, Fontographer, FreeHand, Generator, HomeSite, JRun, MacRecorder, Macromedia, MXML, RoboEngine, RoboHelp, RoboInfo, RoboPDF, Roundtrip, Roundtrip HTML, Shockwave, SoundEdit, Studio MX, UltraDev, and WebHelp are eith
Contents Introduction . . . . . . . . . . . . . . . . . . . . . . . . . . . . . . . . . . . . . . . . . . . . . 5 What’s new in Flash Lite authoring . . . . . . . . . . . . . . . . . . . . . . . . . . . . . . . 5 Guide to instructional media. . . . . . . . . . . . . . . . . . . . . . . . . . . . . . . . . . . . . . 6 Additional resources . . . . . . . . . . . . . . . . . . . . . . . . . . . . . . . . . . . . . . . . . . . . 6 Typographical conventions . . . . . . . . . . . . . . . . . . . . . . . . . . . .
Chapter 5: Testing Flash Lite Content (Flash Professional Only) . . . . . . . . . . . . . . . . . . . . . . . . . . . . . . . . .63 Overview of Flash Lite testing features (Flash Professional Only) . . . 63 Using the Flash Lite emulator (Flash Professional Only) . . . . . . . . . . . 66 Flash Lite error and warning messages (Flash Professional Only) . . 74 Selecting test devices and Flash Lite content type (Flash Professional Only). . . . . . . . . . . . . . . . . . . . . . . . . . . . . . . . . . . . . . .
Introduction This manual describes how to develop applications for mobile devices using Macromedia Flash Lite. You can use various modes of navigation for different devices and how to work with text and fonts. This manual also describes how to manage the runtime memory available to Flash Lite applications running on various models of mobile phones.
Guide to instructional media The Flash Lite documentation package includes the following media to help you learn how to create Flash Lite applications: ■ Getting Started with Flash Lite provides an overview of Flash Lite technology and developing Flash Lite content for mobile devices. It also includes a step-by-step tutorial for creating a Flash Lite application.
CHAPTER 1 1 Creating Interactivity and Navigation Macromedia Flash Lite 1.0 and Flash Lite 1.1 support user interaction through the device’s keypad, or through a stylus or touch-screen interface on devices that provide one. There are two ways to add key-based interactivity to a Flash Lite application. You can use the Flash Lite default tab navigation, or you can create a custom key-based navigation system.
Keys supported by Flash Lite In addition to the alphanumeric keys available on standard telephones, most mobile devices feature a five-way keypad, which let users navigate and select items on the device’s display as well as the Left and Right soft keys. A device’s soft keys are multifunctional keys that use the device’s display to identify their purpose at any moment.
Using tab navigation in Flash Lite On desktop Flash applications, the Tab and Shift+Tab keys let users switch keyboard focus among objects on the screen. The object that has focus responds to further keypresses. In Flash Lite, the arrow keys on the device’s five-way keypad serve the same purpose as the Tab and Shift+Tab keys. Flash Lite supports three different modes of tab navigation: two-way, four-way, and four-way with wrap-around.
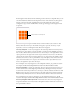
Each navigation mode discussed in the following sections references a sample file that you can view in the Flash Lite emulator. Each sample file consists of the same three-by-three grid of buttons, as shown below. The only difference between the sample files is that each is configured to target a device and Flash Lite content type that support the navigation mode in question.
About the focus rectangle By default, Flash Lite draws a yellow rectangle around the button or input text field that has focus. The focus rectangle lets the user know which object on the screen will respond when the user presses the device’s Select key.
If your application contains input text fields, Macromedia recommends that you do not disable the focus rectangle, as it provides the only visual clue that an input text field has focus.
Handling key events (Flash Professional Only) In addition to using tab navigation between buttons and input text fields, a Flash Lite application can also respond to arbitrary keypress events. Not all devices and content types support all device keys. For example, on a device that supports two-way navigation (see “Modes of tab navigation” on page 9) Flash Lite doesn’t generate keypress events for the Left and Right Arrow keys.
The following table lists the ActionScript keypress event that Flash Lite generates in response to the user pressing a key on the device: Device key ActionScript key event Availability 0-9, *, # 0, 1, 2, 3, 4, 5, 6, 7, 8, All devices - 9, *, # Select key All devices Left Arrow key Devices that support four-way navigation, only. Right Arrow key Devices that support four-way navigation, only. Up Arrow key Devices that support four-way navigation, only.
To create and use a key catcher button: 1. Create a new document from the Flash Lite 1.1 Series 60 template, and save it as keycatcher.fla. For more information on creating documents from the Flash Lite templates, see “Using Flash Lite document templates (Flash Professional Only)” in Getting Started with Flash Lite. 2. Select the layer in the Timeline named Content. 3. Using the Oval tool, create a oval or circle on the Stage and convert it to a movie clip. 4.
9. Test the application by selecting Control > Test Movie. Press the four arrow keys on the emulator’s keypad to make the circle move around the Stage. For another example of using a key catcher button, see “Creating a simple menu using movie clips (Flash Professional Only)” on page 16. Creating a simple menu using movie clips (Flash Professional Only) In this section you’ll learn how to create a simple menu using movie clips.
3. Open the Library panel (Window > Library) and drag an instance of the movie clip symbol named Menu Item Clip from the Library panel to the Stage. This movie clip contains two keyframes, or visual states: one for the menu item’s initial, unselected state, and the other for its selected state, which appears when the menu item receives focus. The following image shows the first keyframe of the movie clip’s timeline.
6. Assign the instance names of menu_2 and menu_3 to the middle and lower movie clips, respectively. menu_1 menu_2 menu_3 The numeric suffix appended to each instance name lets you dynamically refer to each movie clip in code, which you’ll add shortly. 7. Using the Text tool, create a text field along the lower edge of the Stage. 8. In the Property inspector, select Dynamic from the Text Type pop-up menu, and type status in the Var text box.
12. Open the Library and drag an instance of the button named key catcher to the Stage. Next you’ll attach event handler code to this button that handles user keypress events and update the user interface. 13. With the button selected on the Stage, open the Actions panel. 14.
15. Select Control > Test Movie to test the application in the emulator. To interact with the menu, click the Up and Down Arrow keys on the emulator with your mouse, or press the corresponding arrow keys on your keyboard. Handling button events (Flash Professional Only) Flash Lite supports the following ActionScript button events: press, release, rollOver, and rollOut.
6. Type the following code in the Actions panel: on(press) { trace("You pressed Button 1"); } on(release) { trace("You released Button 1"); } on(rollOver) { trace("Button 1 has focus"); } on(rollOut) { trace("Button 1 lost focus"); } 7. Drag another instance of the same button to the Stage and position it directly below the first button. 8.
11. Test the application in the emulator (Control > Test Movie). Watch the messages in the Output panel as you press the Up and Down Arrow keys on the emulator’s keypad. Creating a simple menu using buttons and tab navigation (Flash Professional Only) This section shows you how to create a simple menu using buttons and tab navigation. To create the menu, you’ll use three button symbols, one for each menu option.
3. In the Timeline (Window > Timeline), select the layer named Menu Buttons. 4. Drag an instance of the News Button symbol from the Library panel to the Stage. 5. Repeat step 4 for the Sports and Weather buttons. 6. Align the three buttons vertically, as the following image shows: 7. In the Tools palette, select the Text tool and create a text field along the bottom of the Stage. This text field displays a short message when the user rolls over each menu item. 8. 9.
10. In the Actions panel, type the following code: on(rollOver) { status = "Press to select News" } on(press) { status = "You selected news" } This code assigns some text to the dynamic text field when the user rolls over the News menu button. 11. Select the Sports button and type the following code in the Actions panel: on(rollOver) { status = "Press to select Sports"; } on(press) { status = "You selected Sports"; } 12.
15. Select Control > Test Movie to preview the application in the emulator. Click the Down Arrow key on the emulator with your mouse (or press the Down Arrow key on your computer’s keyboard) to navigate between menu options; to select a menu item, click the emulator’s Select key by using your mouse (or press the Enter key on your computer’s keyboard).
Using the soft keys (Flash Professional Only) A device’s soft keys are multifunctional keys that use the device’s display to identify their purpose at any moment.
For example, consider the following SetSoftKeys command call: fscommand2("SetSoftKeys", "Options", "Exit"); The following image shows the result of this command on an application running on an actual device in normal (not full-screen) mode: Available screen area in non-full-screen applications Soft key labels displayed by device If you enable full-screen mode—that is, if you call fscommand("fullscreen", true)—the labels that you specify as parameters to the SetSoftKeys command are not visible.
3. In the Timeline, select the Content layer. 4. Using the Text tool, create a static text field named Left (or text of your choice) and position it in the lower-left corner of the Stage, above the Left soft key on the device. 5. Create another static text field named Right, and position it in the lower-right corner of the Stage, above the Right soft key on the device. 6. Using the Text tool, create another dynamic text field and position it in the middle of the Stage.
10. In the Actions panel, type the following code: fscommand2("SetSoftKeys", "Left", "Right"); fscommand2("FullScreen", true); The two parameters of the SetSoftKeys command—Left and Right, in this case— specify the labels that Flash Lite displays above the soft keys when the application is not being viewed in full-screen mode. In this case, the application uses the FullScreen command (see FullScreen in Flash Lite 1.
Creating Interactivity and Navigation
2 CHAPTER 2 Working with Text and Fonts This chapter describes how you can add static and dynamic text fields, and add input text fields to your Macromedia Flash Lite applications. This chapter contains the following topics: About text in Flash Lite . . . . . . . . . . . . . . . . . . . . . . . . . . . . . . . . . . . . . . . . . . . . . . . . . . . . 31 Using input text fields . . . . . . . . . . . . . . . . . . . . . . . . . . . . . . . . . . . . . . . . . . . . . . . . . . . . .
About font rendering methods in Flash Lite To render text on a device’s display, Flash Lite can either use fonts that are available on the device or use font data that is embedded in the SWF file. Device fonts have the advantage of smaller SWF file sizes but give less control over the font display. When you embed font data in the SWF file, you have more control over the font display, but it increases the file size.
3. In the Property inspector, in the Var text box, type nameVar. The value that you enter must be a valid variable identifier—the first character must be a letter, underscore (_), or dollar sign ($), and each subsequent character must be a letter, number, underscore, or dollar sign. Dynamic text field selected on Stage Property inspector Variable name assigned to selected text field 4. In the Timeline, select Frame 1 on the layer named ActionScript. 5.
Using input text fields Input text fields in Flash Lite, like dynamic text fields, let you get and set their contents at runtime with ActionScript. In addition, input text fields let Flash Lite applications get user input using the device’s generic input text dialog box. (Flash Lite does not support inline text input.
The Flash Lite emulator mimics the features of the text input dialog box when you test your application in the Flash authoring tool. The following image shows the text input dialog running in the emulator: ‘ Text input dialog running in emulator For an example of using an input text field in an application, see “Text field example application (Flash Professional Only)” on page 42. Types of input text fields Flash Lite supports single line, multiline, and password input text fields.
For example, when a user edits a single line input text field, the device’s input text dialog box displays a single line input text box. The input text box scrolls horizontally if the user enters more characters than can display.
Restricting character input You can use the SetInputTextType command to restrict the characters that the user can enter in the text input dialog box. For example, suppose an application contains an input text field for the user to provide a numeric value, such as their age. And furthermore suppose that the input text field has the variable name of ageVar.
Font rendering methods in Flash Lite Flash Lite can render text field fonts in any of the following ways: Use fonts that are available on the device You can apply a font to a text field that you know is available on the device, or you specify one of the three generic device fonts (_sans, _serif, or _typewriter) that are available in the Font pop-up menu.
To select a font rendering method for a text field: 1. Select a text field on the Stage. 2. In the Property inspector, select one of the following options from the Font Rendering Method pop-up menu: ■ ■ ■ Select Use Device Fonts to have Flash Lite use a font that is available on the device. No font data is embedded in the published SWF file. Select Bitmap text (no Anti-Alias) to have Flash Lite align font outlines along pixel boundaries, which makes small text appear crisp and clear.
Flash Lite renders anti-aliased text using vector representations of font outlines. If you want anti-aliased text to appear as smooth as possible, you should set the player’s rendering quality to high. Rendering quality affects all vector content on the screen, not just anti-aliased text.
To embed font outlines for a dynamic and input text field: 1. Select the dynamic or input text field on the Stage. 2. In the Property inspector, select Bitmap (no anti-alias) or Anti-Alias for Animation from the Font rendering method pop-up menu. 3. Click the Embed button located next to the Font rendering method menu to open the Character Embedding dialog box. 4.
Text field example application (Flash Professional Only) This section describes how to create a simple application that uses static, dynamic, and input text fields. The application asks the user (using text in a static text field) to provide their name (using an input text field). After they enter their name and select a button, the application shows a message (using a dynamic text field) addressed to the user. You can find a completed sample file for this section, textfield_example.
8. Select Window > Common Libraries > Buttons to open a library of prebuilt button symbols. 9. In the Buttons library, double-click the Circle Buttons folder to open it. 10. Drag 11. an instance of the symbol named “circle button - next” to the Stage. Using the Text tool create another text field at the bottom of the Stage. This text field will display a message that contains the name the user enters in the input text field. 12.
15. Select Control > Test Movie to test the application in the emulator. a. Press the Down arrow on the emulator’s keypad to give the input text field focus. b. Press the Select key on the emulator to open the emulator’s text input dialog box, and type your name using your computer’s keyboard.
c. Press OK to close the input text dialog box. d. Press the Down Arrow key on the emulator’s keypad again to give focus to the button, and press the Select key. Creating scrolling text (Flash Professional Only) Flash Lite 1.1 supports the scroll and maxscroll text field properties, which let you create scrolling text fields. The scroll property specifies the first visible line in a text block; you can get and set its value.
To create a scrolling text field and control it with ActionScript: 1. In Flash, create a new document from the Flash Lite 1-1 - Symbian Series 60 device template. For more information about creating documents from device templates, see “Using Flash Lite document templates (Flash Professional Only)” in Getting Started with Flash Lite. 2. Using the Text tool, click the Stage, and then drag a text field approximately the size shown in the following image on the Stage: 3.
9. Create a new button symbol, and add an instance of it to the Stage or in the area off the Stage. This button acts as key catcher button, and it doesn’t need to be visible to the user. For more information about creating key catcher buttons, see “Creating a key catcher button (Flash Professional Only)” on page 14. 10. Select 11. the button, and open the Actions panel (Window > Actions). Enter the following code in the Actions panel: on(keyPress "") { story.
Working with Text and Fonts
3 CHAPTER 3 Working with Sound Macromedia Flash Lite 1.1 supports device sounds and standard, or native, Flash sound. This chapter describes what you must do to incorporate sound with your applications on mobile devices. This chapter contains the following topics: About sound in Flash Lite . . . . . . . . . . . . . . . . . . . . . . . . . . . . . . . . . . . . . . . . . . . . . . . . . . 49 Using device sound (Flash Professional Only). . . . . . . . . . . . . . . . . . . . . . . . . . . . . . . .
Event and stream (synchronized) sound Flash Lite 1.1 supports event and stream (synchronized) sound. Event sounds play independently of the Timeline and continue to play until either the end of the sound buffer has been reached, or the sound is stopped using ActionScript. Event sounds must download completely before they begin playing. Stream sounds are synchronized with the Timeline on which they reside and are often used to synchronize audio with animation.
The Timeline in the Flash authoring tool displays sound waveforms, as the following image shows. Waveforms for sounds that are linked to external device sounds are colored green; waveforms for sounds that are not linked to external device sounds are colored blue. Sound linked to external device sound Sound not linked to external device sound This section contains the following topics: Adding a device sound to a button (Flash Professional Only) . . . . . . . . . . . . . . . . . .
5. In the Timeline, select the layer named Content in the Timeline. 6. Drag the button symbol named Play from the buttons library to the Stage. 7. Double-click the new button to open it edit mode. The Timeline changes to show the button’s frames named Up, Over, Down, and Hit. 8. Select Insert > Timeline > Layer to create a new layer. 9. Select Modify > Timeline > Layer Properties, and change the name of the layer to Sound. 10.
c. Browse to the flash_install_dir/Tutorials and Samples/Samples/Flash Lite/Sound/ and select the file named hi_hat.mid. i d. 13. Click OK. Select Control > Test Movie to start the Flash Lite emulator and test your SWF file. In the emulator, press the Down Arrow key on the keypad to give the Play button focus, and then press the Select key to play the sound. Triggering device sounds in Flash Lite 1.0 In Flash Lite 1.0, a device sound can only play in response to a user pressing a key on their device.
The following image shows how the application might look in Flash: The stop() action Sound attached to this frame The gotoAndStop(10) function call attached to button When the user select the button, the sound on Frame 10 plays. This technique requires that the device sound be attached to the same frame specified in the gotoAndPlay() function.
To create a sound bundle file: 1. Open the Flash Lite Sound Bundler application (FlashLiteBundler.exe) located in the Flash 8 install folder (for example, boot drive/Program Files/ Macromedia/Flash 8/ FlashLiteBundler.exe). The Sound Bundler appears as a floating window. 2. From your desktop, drag the first sound file to be bundled into the floating window. The Flash Lite 1.1 Sound Bundler window appears. The upper part of the Sound Bundler window is a list of the files you added to the sound bundle.
5. Click Save Bundle to save the FLS file. 6. To exit from the Sound Bundler, right-click on the Sound Bundler window and select Exit. The next step is to add the sound bundle (FLS) file to your Flash document. The process is the same as adding standard device sounds to Flash documents, except that instead of specifying a single device sound file to replace the proxy sound, you specify the FLS file that you created. For more information, see “Using device sound (Flash Professional Only)” on page 50).
CHAPTER 4 4 Optimizing content for performance and file size This chapter provides tips and techniques for optimizing your Flash Lite for file size and performance. This chapter contains the following topics: SWF file size and memory . . . . . . . . . . . . . . . . . . . . . . . . . . . . . . . . . . . . . . . . . . . . . . . . . 57 Performance optimization . . . . . . . . . . . . . . . . . . . . . . . . . . . . . . . . . . . . . . . . . . . . . . . . . 57 Device speed and frames per second . . . . . . .
Animation guidelines When creating animated content for a mobile phone, it is important to consider the phone’s CPU limitations. The following guidelines can help prevent your Flash Lite content from running slowly: ■ Flash Lite can render vector graphics in your application at three different quality levels: low, medium, and high. The higher the rendering quality, the more smoothly and accurately that Flash Lite renders vector graphics, and the more processing that is required of the device’s CPU.
Bitmap versus vector graphics When you create content for mobile devices, it is sometimes preferable to use bitmaps instead of vectors because they require less CPU power to animate. For example, a road map of a large city would have too many complex shapes to scroll and animate well on a mobile phone if it were created as a vector graphic; a bitmap would animate better.
4. In the Compression pop-up menu, select one of the following options: ■ ■ 5. Select the Photo (JPEG) option for images with complex color or tonal variations, such as photographs or images with gradient fills. This option produces a JPEG format file. Select the Use Imported JPEG Data check box to use the default compression quality specified for the imported image. To specify a new quality compression setting, deselect Use Imported JPEG Data and enter a value between 1 and 100 in the Quality text box.
Optimizing ActionScript Because of CPU limitations, use the following guidelines when developing ActionScript for Flash Lite content used on mobile phones: ■ Keep the ActionScript as simple as possible. ■ Limit the number of loops that you use and the amount of code that each loop contains. ■ Stop frame-based looping as soon as it is no longer needed. ■ When possible, avoid string and emulated array processing because it can be CPU-intensive.
Optimizing content for performance and file size
CHAPTER 5 5 Testing Flash Lite Content (Flash Professional Only) Macromedia Flash Professional 8 includes a Flash Lite emulator that lets you test your application in the authoring tool as it will appear and function on an actual device. When you’re satisfied with the application running in the emulator, you can test it on an actual device. This chapter describes the Flash Lite testing and debugging features that are available in Flash Professional 8.
The Flash Lite emulator lets you preview your Flash Lite content as it will function and appear on an actual device. The emulator also contains controls that let you select a different test device, and change the level of debugging information that the emulator generates. The emulator displays debugging messages in the Output panel to help you troubleshoot problems with your content.
The Device Settings dialog box lets you select the test devices and Flash Lite content type that you are targeting. The test devices that you select are available for you to test against in the Flash Lite emulator. Each combination of test device and Flash Lite content type defines a device configuration that specifies what features are available to your application, such as supported audio formats, ability to make network connections, and other features.
Using the Flash Lite emulator (Flash Professional Only) The Flash Lite emulator lets you preview your application within the Flash authoring tool.
You can use your mouse to click directly on the Flash Lite emulator’s keypad, or use the following equivalent keyboard shortcuts: ■ The arrow keys (Left, Right, Up, Down) map to the arrow keys on the emulator’s five-way keypad. ■ The Enter or Return key corresponds to the Select key on the emulator’s five-way keypad. ■ The Page Up and Page Down keys correspond to the Left and Right soft keys, respectively. (Soft keys are only supported by Flash Lite 1.1 and later.
If you haven’t yet selected any test devices before testing your application, the Test Device pop-up menu says , and Flash displays a warning message where the emulator normally appears. To open the Device Settings dialog box and select your test devices without leaving the Flash Lite test window, click the message (in blue text) in the emulator pane, or select the Device Settings option in the Test Device pop-up menu.
For more information about selecting your test devices, see “Selecting test devices and Flash Lite content type (Flash Professional Only)” on page 76. Setting emulator debug options (Flash Professional Only) The Flash Lite emulator can send debugging messages to the Output panel while content is running. The emulator reports the following types of information to the Output panel: Trace messages that are generated by a trace() function call within your Flash Lite application.
Zooming and rotating the Flash Lite emulator (Flash Professional Only) You can rotate the Flash Lite emulator, as well as zoom in and out on its contents. Rotating the emulator is useful if the content in your application is meant to be viewed in an orientation that is different from the device’s normal orientation. For example, suppose you’re creating a game for a device whose screen is oriented vertically, but the game is designed to be played with the device oriented horizontally.
For example, the following two images show the same content—a simple vector shape. The image on the left show the content as viewed in the Flash Lite emulator at normal magnification level. The image on the right shows a portion of the same content zoomed to 400%. To zoom in or out on the Flash Lite emulator, do one of the following: ■ Select View > Magnification, and then select the desired magnification. ■ Select View > Zoom In or View > Zoom Out. ■ Press Ctrl+= (to zoom in) or Ctrl+- (to zoom out).
About screen size and available Stage size (Flash Professional Only) Each combination of target device and Flash Lite content type determines, among other things, the available screen area that a Flash Lite application can occupy. The available Stage area may be equal to, or less than, the device’s full screen size.
■ The ActionScript Debugger ■ The View > Show Redraw Regions menu command ■ The Controller toolbar (Window > Toolbarsf > Controller) Flash Lite features not supported by the emulator (Flash Professional Only) The emulator doesn’t support all the features that are available to Flash Lite applications running on an actual device. For example, the emulator doesn’t support the ability to initiate phone calls or SMS messages.
Flash Lite error and warning messages (Flash Professional Only) There are two types of error messages that the Flash Lite emulator generates while you test your content. One type of message appears only in the emulator; the other occurs in the emulator and on an actual device. The first type of error message provides useful debugging information about your SWF file.
The following table lists all the errors that occur in the Flash Lite player, including error numbers, the short descriptions that appear in the error dialog box, and the longer descriptions that appear in the Output panel: Error number Error string Description and possible causes 1 Out of Memory. The emulator has run out of heap memory. Unless otherwise specified, the emulator allocates 1 MB of memory for a SWF file to use.
Error number Error string Description and possible causes 12 Bad Sound Data. The emulator has detected that the SWF file contains an unsupported sound data format. 13 Root Movie Unloaded. The emulator has detected that the root movie has been unloaded and was not replaced with another SWF file. Selecting test devices and Flash Lite content type (Flash Professional Only) You use the Device Settings dialog box to select the test devices and content type for your Flash Lite application.
2. In the Device Settings dialog box, select the content type for your application from the Content Type pop-up menu. The content type that you select corresponds to the Flash Lite player configuration that your content will run in. For example, if you’re creating content for the stand-alone version of Flash Lite, you would select Standalone Player from this menu. 3. Add devices from the list of available devices (on the left) to the list of test devices (on the right).
4. To view information about a device, select the device in either the Available Devices or Test Devices pane. The lower edge of the Device Settings dialog box displays the device’s model name, available Stage area, and supported Flash Lite platforms. Device name, available Stage size, and supported Flash Lite platforms Link to check for new devices The Available Stage property is the size of the available screen area on that device for the content type.
The following table lists and describes all the Flash Lite content types available as of this writing. As discussed in “Flash Lite 1.x availability” in Getting Started with Flash Lite, most of the content types are only available in a specific geographic region or from specific mobile operators. The third column in the table provides the availability of each content type by region and mobile operator.
Flash Lite content type Description Image Viewer Use the Image Viewer application that NTT DoCoMo (Japan only) lets the user manage and preview multimedia files on the device, including SWF files. Incoming Call Uses Flash Lite to display an animation NTT DoCoMo, KDDI, and when the user receives a call. Vodafone (Japan only) Mailer Uses Flash Lite to display an animation Vodafone (Japan only) when the user sends or receives an email message.
Determining platform capabilities (Flash Professional Only) Each combination of target device and Flash Lite content type defines a set of available Flash Lite features, such as navigation type, supported device sound formats, or input text support. When the Information debug option is enabled in the emulator settings pane, the emulator generates a list of platform capabilities for the currently selected device and content type.
Capability name Description and possible values LoadVars Indicates how frequently Flash Lite processes loadVariables() function calls. Valid values are as follows: OnePerKey: Only one loadVariables() call is allowed for each keypress. OnePerKeyPerFrame: Only one loadVariables() call is allowed per event handler or per frame. All: No restriction on how frequently loadVariables() can be called. None: The loadVariables() function is not supported.
Capability name Description and possible values keySet Indicates what key events are supported by Flash Lite on the device. For more information about handling key events, see “Handling key events (Flash Professional Only)” on page 13. Valid values are as follows: All: All key events are handled: Phone: Only events associated with the 0-9, #, *, Select, and fourway navigation keys are handled. mouseType Indicates what mouse events are supported by Flash Lite.
Testing Flash Lite Content (Flash Professional Only)
APPENDIX Warning and Error Messages (Flash Professional Only) This appendix lists the possible information and warning messages that the Flash Lite emulator might generate while your testing your Flash Lite application. For more information about these warning messages, see “Setting emulator debug options (Flash Professional Only)” on page 69. Also see “Flash Lite error and warning messages (Flash Professional Only)” on page 74 which lists errors that can occur on both the emulator and on an actual device.
Error code Message Description FTPA005 The call to GetURL for URL was ignored because there was more than one request per keypress. Flash Lite allows only one getURL() function call per keypress; the emulator detected that there was more than one getURL() so only the first command is processed—the others are ignored. FTPA006 The call to GetURL for URL was ignored because it was not associated with a keypress.
Error code Message FTPA017 The call to loadVariables for URL was ignored because there was more than one request per keypress. Description Your application made multiple loadVariables() function calls during a single keypress event. Flash Lite allows only one loadVariables() command per keypress, so only the first command is processed—the others are ignored. FTPA018 The call to loadVariables for URL was ignored because it was not associated with a keypress.
Error code Message FTPS012 Event sound was ignored In Flash Lite 1.0, a sound can play only in because it was not associated response to the user pressing a key on with a keypress. their device. For more information, see “Triggering device sounds in Flash Lite 1.0” on page 53. FTPS021 Sound not supported for the selected content type on this device. The selected test device and content type do not support sound. FTPS022 ADPCM sounds not supported for the selected content type on this device.
Error code Message Description FTPS029 FSCommand2 commandname command found. The emulator detected the specified fscommand2() command. FTPS030 FSCommand2 commandname command not supported in the emulator, please test it on the device. The emulator does not support the specified fscommand2() command.
Error code Message Description FTPS037 SMAF sounds not supported for the selected content type on this device. The emulator detected a SMAF device sound, which is not supported by the selected content type on this device. FTPS038 The call to StartVibrate was ignored because there was more than one request per frame or event.
Error code Message Description FTPS069 SMAF(MA-5) sounds not supported for the selected content type on this device. The emulator detected a SMAF (MA-5) device sound, which is not supported by the selected content type on this device. FTPS070 MFI sounds with Fujitsu extension not supported for the selected content type on this device. The emulator detected a MFI device sound with a Fujitsu extension, which is not supported by the selected content type on this device.
Error code Message Description FTPS105 This SWF is not in Flash Lite format. Your application attempted to load a SWF file whose version was not in the Flash Lite format; Flash Lite can load other Flash Lite SWF files or Flash 4-formatted SWF files, only. FTPS106 Mouse Event (event-name) was ignored because it was not triggered by Keypress. The emulator detected a mouse event over a button in your Flash Lite application.
Index A application modes, in Flash Lite 78 B button events about 20 handling 20 C features unsupported by 72 interacting with 66 previewing applications with 66 rotating 70 warning and error messages 74, 85 zooming 70 Flash Lite rendering quality and text fields 39 default rendering quality 39 font rendering methods about 38 applying to text fields 38 content types in Flash Lite, described 78 D device settings about 76 selecting test devices and content type 76 device sound about 50 adding 51 triggeri
M T menus creating with buttons 22 creating with movie clips 16 tab navigation about 9 example application using 22 focus rectangle 11 four-way 10 four-way with wrap-around 10 guidelines for 12 modes of 9 two-way 10 text fields creating scrolling text 45 font rendering methods, about 32 input text fields, using 34 restricting characters in input text fields 37 N native sound, about 56 navigation.