
User Guide

100 Button component
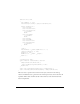
3. Save the file.
4. Create a new FLA file and save it in the same folder as the AS file.
5. Create a new symbol by selecting Insert > New Symbol.
6. Set the name to ButtonSkin.
7. If the advanced view is not displayed, click the Advanced button.
8. Select Export for ActionScript.
The identifier is automatically filled out with
ButtonSkin.
9. Set the AS 2.0 class to RedGreenBlueSkin.
10. Make sure that Export in First Frame is already selected, and click OK.
11. Drag a Button component to the Stage.
12. Select Control > Test Movie.
Using movie clips to customize Button skins
The example above demonstrates how to use an ActionScript class to customize the Button
skin, which is the method used by the skins provided in both the Halo and Sample themes.
However, because the example uses simple colored boxes, it is simpler in this case to use
different movie clip symbols as the skins.
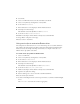
To create movie clip symbols for Button skins:
1. Create a new FLA file.
2. Create a new symbol by selecting Insert > New Symbol.
3. Set the name to RedButtonSkin.
4. If the advanced view is not displayed, click the Advanced button.
5. Select Export for ActionScript.
The identifier is automatically filled out with
RedButtonSkin.
6. Set the AS 2.0 class to mx.skins.SkinElement.
7. Make sure that Export in First Frame is already selected, and click OK.
8. Open the new symbol for editing.
9. Use the drawing tools to create a box with a red fill and black line.
10. Set the border style to hairline.
11. Set the box, including the border, so that it is positioned at (0,0) and has a width and height
of 100.
The
SkinElement class resizes the content as appropriate.