
User Guide

62 Chapter 3: Working with Vector Objects
To resize the inner polygon of a smart polygon, do one of the following:
• If the polygon has an inner polygon, drag the inner polygon control point.
• If the polygon has no inner polygon, drag the reset inner polygon control point.
To reset the inner polygon of a selected smart polygon:
• Click the reset inner polygon control point.
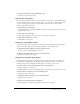
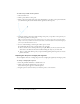
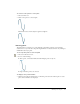
Adjusting spiral Auto Shapes
Spirals have two control points. There are control points for adjusting the number of turns in the
spiral, and for making the spiral open or closed.
To adjust the number of turns in a selected spiral:
• Drag the spirals control point.
To open or close a selected spiral:
• Click the open/close spiral control point.
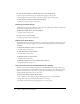
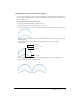
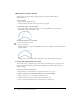
Adjusting star Auto Shapes
Stars initially have five control points. There are control points for adding or removing points, for
adjusting the inner and outer angles of the points, and for adjusting the roundness of the peaks
and valleys.
To change the number of sides on a selected star:
• Drag the Points control point.
To adjust the valleys of a selected star:
• Drag the valley control point.
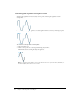
To adjust the points of a selected star:
• Drag the peak control point.
To adjust the roundness of a selected star’s peaks or valleys:
• Drag a Roundness control point.
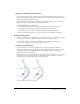
Using the Assets panel to add Auto Shapes to a drawing
The Assets panel contains a Shapes tab where you can find additional Auto Shapes. These Auto
Shapes are generally more complex than those that appear in the Tools panel. Instead of drawing
these Auto Shapes directly on the canvas, you place these Auto Shapes into your drawing by
dragging them from the Assets panel to the canvas.
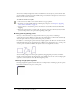
To create a Auto Shape using the Assets panel:
1 Choose Window > Auto Shapes to display the Shapes tab, if it is not already visible.
2 Drag a Auto Shape preview from the Assets panel to the canvas.
3 If desired, edit the Auto Shape by dragging any of its control points.