
User Guide

Using the Export Wizard 229
To set optimization settings using Export Preview:
1 Click the Options tab. Most of the options available here are similar to those in the Optimize
panel. For more about these options, see “Using optimization settings” on page 231.
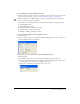
2 Click the Optimize to Size Wizard button to optimize a graphic based on a target file size.
Enter a file size in kilobytes and click OK.
The Optimize to Size Wizard attempts to match the requested file size using these methods:
■ Adjusting JPEG quality
■ Modifying JPEG smoothing
■ Altering the number of colors in 8-bit images
■ Changing dither settings in 8-bit images
■ Enabling or disabling optimization settings
To set exported image dimensions using Export Preview:
1 Click the File tab.
2 Specify a scale percentage or enter the desired width and height in pixels. Select Constrain to
scale the width and height proportionally.
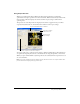
To define only a portion of an image for export using Export Preview:
1 Click the File tab.
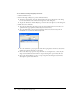
2 Select the Export Area option and do one of the following to specify the export area:
■ Drag the dotted border that appears around the preview until it encloses the desired export
area. (Drag inside the preview to move hidden areas into view.)
■ Enter pixel coordinates for the boundaries of the export area.