
User Guide


Applying Live Effects 121
Experiment with the settings until you get the look you want. If you want to change the effect
settings later, see “Editing Live Effects” on page 124.
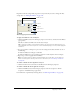
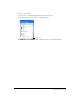
Inner Bevel pop-up window
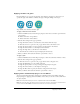
To apply a Live Effect to selected objects:
1 Click the Add Effects button in the Property inspector, then choose an effect from the Effects
pop-up menu.
The effect is added to the Effects list for the selected object.
Tip: To apply a Live Effect so that it appears to affect only a pixel selection within an image, you
can cut and paste the selection in place to create a new bitmap image, select it, and then apply the
Live Effect.
2 If a pop-up window or dialog box opens, enter the settings for the effect and then do one of
the following:
■ If the Live Effect has a dialog box, click OK.
■ If the Live Effect has a pop-up window, press Enter or click anywhere in the workspace.
3 Repeat steps 1 and 2 to apply more Live Effects.
Note: The order in which Live Effects are applied affects the overall effect. You can drag Live
Effects to rearrange their stacking order. For more information, see “Reordering Live Effects”
on page 125.
To enable or disable an effect applied to an object:
• Click the check box next to the effect in the Effects list in the Property inspector.
To enable or disable all effects applied to an object:
• Click the Add Effects button in the Property inspector, then choose Options > All On
or Options > All Off from the pop-up menu.
For information on permanently removing effects, see “Removing Live Effects” on page 125.
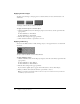
Contrast
Softness
Button bevel preset
Width of bevel
Angle of bevel