
User Guide


114 Chapter 5: Applying Color, Strokes, and Fills
Creating fills with the Gradient tool
The Gradient tool is in the same tool group as the Paint Bucket tool. This new tool works much
as the Paint Bucket tool does, but it fills an object with a gradient instead of a solid color. Like the
Paint Bucket tool, it retains the properties of the last-used element.
To use the Gradient tool:
1 Click the Paint Bucket tool in the Tools panel and choose the Gradient tool from the
pop-up menu.
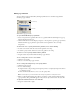
2 Choose from the following attributes in the Property inspector:
Fill Options is a pop-up menu from which you can choose a gradient type.
Fill Color box, when clicked, displays the Edit Gradient pop-up window, from which you can
set a variety of color and transparency options.
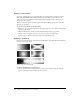
Edge determines if the gradient has a hard, anti-aliased, or feathered fill edge. If you choose a
feathered edge, you can specify the amount of the feathering.
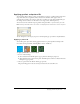
Texture gives you many options to choose from, including Grain, Metal, Hatch, Mesh,
or Sandpaper.
3 Click and drag the pointer to establish a starting point of the gradient as well as the direction
and length of the gradient area.
Transforming and distorting fills
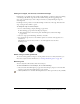
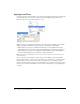
You can move, rotate, skew, and change the width of an object’s pattern or gradient fill. When
you use the Pointer or Gradient tools to select an object with a pattern or gradient fill, a set of
handles appears on or near the object. You can drag these handles to adjust the object’s fill.
Use the fill handles to interactively adjust a pattern or gradient fill.
To move the fill within an object:
• Drag the round handle, or click in a new location in the fill using the Gradient tool.
To rotate the fill:
• Drag the lines connecting the handles.
To adjust the fill width and skew:
• Drag a square handle.