-
Extending Dreamweaver
-
Trademarks 1 Step RoboPDF, ActiveEdit, ActiveTest, Authorware, Blue Sky Software, Blue Sky, Breeze, Breezo, Captivate, Central, ColdFusion, Contribute, Database Explorer, Director, Dreamweaver, Fireworks, Flash, FlashCast, FlashHelp, Flash Lite, FlashPaper, Flex, Flex Builder, Fontographer, FreeHand, Generator, HomeSite, JRun, MacRecorder, Macromedia, MXML, RoboEngine, RoboHelp, RoboInfo, RoboPDF, Roundtrip, Roundtrip HTML, Shockwave, SoundEdit, Studio MX, UltraDev, and WebHelp are either registered tradema
-
Contents Introduction . . . . . . . . . . . . . . . . . . . . . . . . . . . . . . . . . . . . . . . . . . . . . 9 Background . . . . . . . . . . . . . . . . . . . . . . . . . . . . . . . . . . . . . . . . . . . . . . . . . . . . 9 Installing an extension . . . . . . . . . . . . . . . . . . . . . . . . . . . . . . . . . . . . . . . . . . 10 Creating an extension . . . . . . . . . . . . . . . . . . . . . . . . . . . . . . . . . . . . . . . . . . 10 Additional resources for extension writers . . . . . . . . .
-
Chapter 4: User Interfaces for Extensions. . . . . . . . . . . . . . . . . . . 111 Designing an extension user interface . . . . . . . . . . . . . . . . . . . . . . . . . . . 111 Dreamweaver HTML rendering control . . . . . . . . . . . . . . . . . . . . . . . . . .112 Using custom UI controls in extensions . . . . . . . . . . . . . . . . . . . . . . . . . .113 Adding Flash content to Dreamweaver . . . . . . . . . . . . . . . . . . . . . . . . . 124 Chapter 5: The Dreamweaver Document Object Model . . . . .
-
Chapter 10: Reports . . . . . . . . . . . . . . . . . . . . . . . . . . . . . . . . . . . 249 Site reports . . . . . . . . . . . . . . . . . . . . . . . . . . . . . . . . . . . . . . . . . . . . . . . . . 249 Stand-alone reports. . . . . . . . . . . . . . . . . . . . . . . . . . . . . . . . . . . . . . . . . . 253 The Reports API . . . . . . . . . . . . . . . . . . . . . . . . . . . . . . . . . . . . . . . . . . . . . 256 Chapter 11: Tag Libraries and Editors . . . . . . . . . . . . . . . . . . . . . .
-
Chapter 16: Data Sources . . . . . . . . . . . . . . . . . . . . . . . . . . . . . . 379 How data sources work . . . . . . . . . . . . . . . . . . . . . . . . . . . . . . . . . . . . . . 380 A simple data source example . . . . . . . . . . . . . . . . . . . . . . . . . . . . . . . . .382 The Data Sources API . . . . . . . . . . . . . . . . . . . . . . . . . . . . . . . . . . . . . . . . 391 Chapter 17: Server Formats. . . . . . . . . . . . . . . . . . . . . . . . . . . . . 399 How data formatting works . .
-
PART 4: APPENDIX Appendix: The Shared Folder . . . . . . . . . . . . . . . . . . . . . . . . . . . 483 The Shared folder contents . . . . . . . . . . . . . . . . . . . . . . . . . . . . . . . . . . . 483 Using the Shared folder . . . . . . . . . . . . . . . . . . . . . . . . . . . . . . . . . . . . . . .491 Index . . . . . . . . . . . . . . . . . . . . . . . . . . . . . . . . . . . . . . . . . . . . . . . .
-
Contents
-
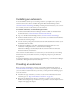
Introduction This guide describes the Macromedia Dreamweaver 8 framework and application programming interface (API) that lets you build extensions to Dreamweaver. It provides information about how each type of extension works; the API functions that Dreamweaver calls to implement the various objects, menus, floating panels, server behaviors, and so on, that make up the features of Dreamweaver; and a simple example of each type of extension.
-
Installing an extension To become familiar with the process of writing extensions, you might want to explore the extensions and resources that are available through the Macromedia Exchange website (www.macromedia.com/exchange). Installing an existing extension introduces you to some of the tools that you need to work with in your own extensions. To install an extension, use the following procedure: 1. Download and install the Extension Manager, which is available on the Macromedia Downloads website (www.
-
■ Determine which files you need to modify or create. ■ Plan the user interface (UI), if any, for the extension. ■ Create the necessary files and save them in the appropriate folders. ■ Restart Dreamweaver so that it recognizes the new extension. ■ Test the extension. ■ Package the extension so that you can share it with others. For more information, see “Working with the Extension Manager” on page 109.
-
■ Streamlined handling of CSS styles The CSS Styles and Relevant CSS panels have been combined. The Design panel is now named CSS; the CSS Styles panel is now named Styles. There is now a menu option for Document CSS Styles and Selection CSS Styles in the Window menu. In addition, an Edit Rule button has been added to the Property inspector. ■ Visual aids for CSS divs and layers Dreamweaver now includes visual aids to let users see their CSS page layout.
-
Errata A current list of known issues can be found in the Extensibility section of the Dreamweaver Support Center (www.macromedia.com/go/extending_errata). Conventions used in this guide The following typographical conventions are used in this guide: font indicates code fragments and API literals, including class names, method names, function names, type names, scripts, SQL statements, and both HTML and XML tag and attribute names.
-
Introduction
-
1 PART 1 Customizing Dreamweaver You can customize Macromedia Dreamweaver 8 to suit your web development needs, including changing settings in dialog boxes, setting preferences in a variety of areas, and changing keyboard shortcuts. You can also customize code hints and code coloring in Code view, the cascading style sheet (CSS) profile, and Dreamweaver’s default HTML formatting. Chapter 1: Customizing Dreamweaver. . . . . . . . . . . . . . . . . . . . . . . . 17 Chapter 2: Customizing Code View . . . . .
-
-
1 CHAPTER 1 Customizing Dreamweaver In addition to creating and using Dreamweaver extensions, you can customize Macromedia Dreamweaver in many ways, which lets you work in a manner that’s familiar, comfortable, and efficient for you. Ways to customize Dreamweaver There are several general approaches to customizing Dreamweaver. Some of these approaches are covered in Using Dreamweaver. These approaches let you customize your workspace. You can also change settings in dialog boxes in Dreamweaver.
-
■ Changing the default file type ■ Customizing the interpretation of third-party tags ■ Customizing workspace layouts ■ Customizing the Code view toolbar Customizing default documents The DocumentTypes/NewDocuments folder contains a default (blank) document of each type that you can create using Dreamweaver.
-
Customizing the appearance of dialog boxes The dialog box layouts for objects, commands, and behaviors are specified as HTML forms; they reside in HTML files in the Configuration folder within the Dreamweaver application folder. You edit these forms as you would edit any form in Dreamweaver. For more information, see Using Dreamweaver.
-
Changing the default file type By default, Dreamweaver shows all the file types it recognizes in the File > Open dialog box. You can use a pop-up menu in that dialog box to limit the display to certain types of files. If most of your work involves a specific file type (such as ASP files), you can change the default display. Whatever file type is listed on the first line of the Dreamweaver Extensions.txt file becomes the default.
-
Customizing the interpretation of third-party tags Server-side technologies such as ASP, Macromedia ColdFusion, JSP, and PHP use special nonHTML code in HTML files; servers create and serve HTML content based on that code. When Dreamweaver encounters non-HTML tags, it compares them with information in its third-party tag files, which define how Dreamweaver reads and displays non-HTML tags. For example, in addition to regular HTML, ASP files contain ASP code for the server to interpret.
-
■ String-delimited tags String-delimited tags start with one string and end with another string. They are like empty HTML tags (such as img) in that they don’t surround content and don’t have closing tags. If the happy tag were a string-delimited tag, the tag specification would include the start_string and end_string attributes. An ASP tag is a string-delimited tag; it starts with the string <% and ends with the string %>, and it has no closing tag.
-
■ describes what kinds of content the tag can contain and where in an HTML file the tag can appear. Valid values are "block_model", "head_model", "marker_model", and "script_model": content_model ■ block_model specifies that the tag can contain block-level elements such as div and p, and that the tag can appear only in the body section or inside other body-content tags such as div, layer, or td.
-
■ detect_in_attribute indicates whether to ignore everything between start_string and end_string (or between opening and closing tags if those strings are not defined) even when those strings appear inside attribute names or values. You should generally set this to "true" for string-delimited tags. The default is "false". For example, ASP tags sometimes appear inside attribute values, and sometimes contain quotation marks (").
-
Container None. Example How custom tags appear in the Design view The way that custom tags appear in the Design view of the Document window depends on the values of the tag_type and render_contents attributes of the tagspec tag. (See “Customizing the interpretation of third-party tags” on page 21.
-
Avoiding rewriting third-party tags Dreamweaver corrects certain kinds of errors in HTML code. For details, see Using Dreamweaver. By default, Dreamweaver refrains from changing HTML in files with certain filename extensions, including .asp (ASP), .cfm (ColdFusion), .jsp (JSP), and .php (PHP). This default is set so that Dreamweaver does not accidentally modify the code contained in any such non-HTML tags.
-
To turn off Dreamweaver encoding options: 1. Select Edit > Preferences, and select the Code Rewriting category. 2. Deselect either or both Special Characters options. For information on the other Code Rewriting preferences, see Using Dreamweaver. Customizing Dreamweaver in a multiuser environment You can customize Dreamweaver in a multiuser operating system such as Windows 2000, Windows XP, or Mac OS X.
-
Mac OS X platforms use the following location: drive:Users/username/Library/Application Support/Macromedia/Dreamweaver 8/ Configuration NO TE To install extensions that all users can use in a multiuser operating system, you must be logged in as Administrator (Windows) or root (Mac OS X). The first time you run Dreamweaver, it copies only some of the configuration files into your user Configuration folder. (The files that it copies are specified in the version.xml file in the Configuration folder.
-
About mm_deleted_files.xml tag syntax The mm_deleted_files.xml file contains a structured list of items that specify configuration files that Dreamweaver is to ignore. These items are specified by XML tags, which you can edit in a text editor. The following sections describe the syntax of the mm_deleted_files.xml tags. Optional attributes are marked in the attribute lists with curly braces ({}); all attributes not marked with curly braces are required.
-
Container This tag must be contained in a deleteditems tag. Example
-
■ ■ You must use a space in the following places: ■ Before the closing angle bracket (>) on the !ELEMENT line ■ After the opening parentheses in a list of values for an attribute ■ Before a closing parentheses in a list of values ■ Before and after each pipe (|) in a list of values. You must include an exclamation point (!) without a space before each of the following words: ELEMENT, ATTLIST, Error, and msg (ELEMENT, !ATTLIST, !Error, !msg ).
-
The following example shows an entry for the APPLET tag that would be accurate for Netscape Navigator 3.0:
-
3. Add any new tags or attributes that you know are supported by the browser, using the syntax shown in “About browser-profile formatting” on page 30. If you don’t want to receive error messages about a particular unsupported tag, add it to the list of supported tags. If you do this, save the profile in a separate file with a new filename (such as Browsername x.x limited). Giving this alternate profile a new name preserves the original profile with only the tags that are truly supported. 4.
-
Changing FTP mappings The FTPExtensionMap.txt file (Windows) and the FTPExtensionMapMac.txt file (Macintosh) map filename extensions to FTP transfer modes (ASCII or BINARY). Each line in each of the two files includes a filename extension (such as GIF) and either the word ASCII or the word BINARY, to indicate which of the two FTP transfer modes should be used when transferring a file with that extension. On the Macintosh, each line also includes a creator code (such as DmWr) and a file type (such as TEXT).
-
Extensible document types in Dreamweaver XML provides a rich system for defining complex documents and data structures. Dreamweaver uses several XML schemas to organize information about server behaviors, tags and tag libraries, components, document types, and reference information. When you create and work with extensions in Dreamweaver, there are many instances in which you create or modify existing XML files to manage the data that your extension uses.
-
Document type Server model ColdFusion Component Internal type File extensions Dynamic cfc JSP JSP Dynamic jsp PHP PHP Dynamic php, php3 Library Item DWExtension lbi ASP.NET C# Template DWTemplate axcs.dwt ASP.NET VB Template DWTemplate axvb.dwt ASP JavaScript Template DWTemplate aspjs.dwt ASP VBScript Template DWTemplate aspvb.dwt ColdFusion Template DWTemplate cfm.dwt HTML Template DWTemplate dwt JSP Template DWTemplate jsp.dwt PHP Template DWTemplate php.
-
If you need to create a new document type, you can either add your entry to the document definition file that Macromedia provides (MMDocumentTypes.xml) or add a custom definition file to the Configuration/DocumentTypes folder. NO TE The NewDocuments subfolder resides in the Configuration/DocumentTypes folder. This subfolder contains default pages (templates) for each document type.
-
The following table describes the tags and attributes that you can use within a document type definition file. Element Type Tag Required Description Attribute Yes Parent node. id Yes Unique identifier across all document type definition files. servermodel No Specifies the associated server model (case-sensitive); by default, the following values are valid: documenttype (root) ASP.NET C# ASP.
-
Element Type Tag Required Description Attribute internaltype Yes A broad classification of how Dreamweaver treats a file. The internaltype identifies whether the Design view is enabled for this document and handles special cases such as Dreamweaver templates or extensions.
-
Element Type Tag Required Description Attribute winfileextension Yes The file extension that is associated with the document type on Windows. You specify multiple file extensions by using a comma-separated list. The first extension in the list is the extension that Dreamweaver uses when the user saves a documenttype document. If two nonserver model-associated document types have the same file extension, Dreamweaver recognizes the first one as the document type for the extension.
-
Element Type Tag Required Description Attribute title (subtag) description (subtag) Yes The string that appears as a category item under Blank Document in the New Document dialog box. You can place this string directly in the definition file or point to it indirectly for localization purposes. For more information on localizing this string, see “Localized strings” on page 44. Formatting is not allowed, so HTML tags cannot be specified. No The string that describes the document type.
-
■ The value of the internaltype attribute for the new document type must be DWTemplate. ■ The dynamicid attribute must be set, and the value must be a reference to the identifier of an existing dynamic document type. The following example defines a dynamic document type: PAGE 43
Document extensions and file types By default, Dreamweaver shows all the file types it recognizes in the File > Open dialog box. After creating a new document type, extension developers need to update the appropriate Extensions.txt file. If the user is on a multiuser system (such as Windows XP, Windows 2000, or Mac OS X), the user has another Extensions.txt file in their Configuration folder. The user must update the Extensions.txt file because it is the instance that Dreamweaver looks for and parses.
-
3. Add a new line for each new file type. In capital letters, enter the filename extensions that the new file type can have, separated by commas; then add a colon and a brief descriptive phrase to show in the pop-up menu for file types that appears in the File > Open dialog box. For example, for JPEG files, enter JPG,JPEG,JFIF:JPEG Image Files 4. Save the Extensions.txt file. 5. Restart Dreamweaver. To see the changes, select File > Open and click the pop-up menu of file types.
-
myJSPDocType/Description or In these examples, myJSPDocType/Description is a unique string identifier that acts as a placeholder for the localized string. The localized string is defined in the next step. 4. In the Configuration/Strings folder, create a new XML file (or edit an existing file) that defines the localized string.
-
Opening a document in Dreamweaver When a user opens a file, Dreamweaver follows a series of steps to identify the document type based on the file’s extension. If Dreamweaver successfully finds a unique document type, Dreamweaver uses that type and loads the associated server model (if any) for the document that the user is opening. If the user has selected to use Dreamweaver UltraDev 4 server behaviors, Dreamweaver loads the appropriate UltraDev 4 server model.
-
Description Outermost tag, which signals the start of the panel set description. Attributes None. Contents This tag may contain one or more , , or tags. Container None. Example Description Specifies the application window’s initial position and size. Attributes rect, maximize ■ rect specifies the position and size of the application window.
-
Description Specifies the Document window’s initial position and size. Attributes rect, maximize ■ rect specifies the position and size of the Document window. The string is in the form “left top right bottom” specified as integers. If the maximize value is true, the rect value is ignored. ■ maximize is a Boolean value: true if the Document window should be maximized on startup; false otherwise. The default value is true. Contents None.
-
■ y specifies the top position of the panel group. Its value can be an integer or a value that is relative to the screen. If the integer value is not on the screen, the panel group appears in the closest screen position possible to make it visible on the screen. Relative values can be “top” or “bottom”; these values indicate which edge of the panel group to align with which edge of the virtual screen. ■ width is the width, in pixels, of the panel group. This attribute is optional.
-
■ height is an integer that specifies the height of the panel in pixels. This attribute is optional. If height is not specified, the build-in default for each panel is used. N OT E Width is inherited from the parent. is a number that is the ID of the front panel. ■ activepanel ■ visible ■ maximize is a Boolean value: true if the panel should be maximized when it appears initially; false otherwise.
-
■ ■ id is a number that indicates the ID for the panel.
-
Container This tag must be contained in a panelcontainer tag. Example Customizing the Code view toolbar The Code view toolbar displays 15 buttons initially. This is a subset of the buttons that are available.
-
enabled="dw.getFocus(true) == 'textView' || dw.getFocus(true) == ¬ 'html'" command="if (dw.getFocus(true) == 'textView' || dw.getFocus(true) ¬ == 'html') dw.getDocumentDOM().source.expandAllCodeFragments();" update="onViewChange" /> --> 4. Save the file. To make any buttons that are not visible in the toolbar appear, you remove the comment that surrounds a button in the XML file.
-
Customizing Dreamweaver
-
2 CHAPTER 2 Customizing Code View Macromedia Dreamweaver 8 uses two devices in Code view that help you enter code quickly and make your code readable and accurate. These two devices are code hints and code coloring. In addition, Dreamweaver validates your code for the target browsers that you specify and allows you to change default HTML formatting. You can customize code hints and code coloring by modifying the XML files that implement them.
-
Dreamweaver cannot express some types of Code Hints menus through the XML file or the JavaScript API. Both the CodeHints.xml file and the JavaScript API expose a useful subset of the Code Hints engine, but some Dreamweaver functionality is not accessible. For example, there is no JavaScript hook to open a color picker, so Dreamweaver cannot express the Attribute Values menu using JavaScript. You can only open a menu of text items from which you can insert text.
-
Tag Library Editor ]]> ...
-
Description Each menugroup tag corresponds to a type of menu. You can see the menu types that Dreamweaver defines by selecting the Code Hints category from the Preferences dialog box. Select Preferences from the Edit menu to display the Preferences dialog box. You can create a new menu group or add to an existing group. Menu groups are logical collections of menus that the user might want to enable or disable using the Preferences dialog box.
-
Attributes None. Contents Description text. Container The menugroup tag. Example Tag Library Editor. ]]>
-
■ The casesensitive attribute specifies whether the pattern is case-sensitive. The possible values for the casesensitive attribute are true, false, or a subset of the commaseparated list that you specify for the doctypes attribute. The list of document types lets you specify that the pattern is case-sensitive for some document types but not for others. The value defaults to false if you omit this attribute.
-
■ The icon attribute, which is optional, specifies the path to an image file that Dreamweaver displays as an icon to the left of the menu text. The location is expressed as a URL, relative to the Configuration folder. ■ The texticon attribute, which is optional, specifies a text string to appear in the icon area instead of an image file. This attribute is used for the HTML Entities menu. Contents None. Container The menu tag.
-
■ The pattern attribute specifies the name of the function and its argument list. For methods, the pattern attribute describes the name of the object, the name of the method, and the method’s arguments. For a function name, the Code Hints menu appears when the user types functionname(. The menu shows the list of arguments for the function. For an object method, the Code Hints menu appears when the user types objectname. (including the period).
-
Code coloring Dreamweaver lets you customize or extend the code coloring schemes that you see in Code view so that you can add new keywords to a scheme or add code coloring schemes for new document types. If you develop JavaScript functions to use in your client-side script, for example, you can add the names of these functions to the keywords section so that they display in the color that is specified in Preferences.
-
-
Notice that the syntaxColor and tagColor tags in the Colors.xml file assign color and style values to an id string value. The id value is then used in the codeColoring.xml file to assign a style to a scheme tag. For example, the defaultTag tag in the codeColoring.xml excerpt has an id of "CodeColor_HTMLComment". In the Colors.xml file, the id value of "CodeColor_HTMLComment" is assigned a text= value of "#999999", which is gray.
-
Contents blockEnd, blockStart, brackets, charStart, charEnd, charEsc, commentStart, commentEnd, cssProperty, cssSelector, cssValue, defaultAttribute, defaultText, endOfLineComment, entity, functionKeyword, idChar1, idCharrest, ignoreCase, ignoreMMTParam, ignoreTags, keywords, numbers, operators, regexp, sampletext, searchPattern, stringStart, stringEnd, stringEsc, urlProtocol, urlProtocols Container The codeColoring tag.
-
Attributes canNest, doctypes, id, name, scheme Specifies whether the scheme can nest inside itself. Values are "Yes" or "No". The default is "No". ■ canNest ■ doctypes="doc_type1, doc_type2,…" Required. Specifies a comma-separated list of document types into which you can nest this code coloring scheme. Document types are defined in the Dreamweaver Configuration/Document Types/MMDocumentTypes.xml file. ■ id="id_string" ■ name="display_name" ■ scheme Required.
-
Description Contains a text string that represents the delimiter of the start of a character. You must specify the charStart and charEnd tags in pairs. Multiple charStart … charEnd pairs are allowed. Attributes None. Example Description Contains a text string that represents the delimiter of the end of a character. You must specify the charStart and charEnd tags in pairs. Multiple charStart … charEnd pairs are allowed. Attributes None.
-
Attributes None. Example Description A text string that delimits the end of a comment block. You must specify the commentStart and commentEnd tags in pairs. Multiple commentStart…/commentEnd pairs are allowed. Attributes None. Example ]]> Description An empty tag that indicates the code coloring rule for the @import function of the style element in a CSS.
-
Attributes name, id ■ name="cssMedia_name" ■ id="id_string" A string that assigns a name to the CSS @media function. Required. An identifier string that maps color and style to this syntax item. Example Description An empty tag that indicates CSS rules and holds code coloring attributes. Attributes name, id ■ name="cssProperty_name" ■ id="id_string" A string that assigns a name to the CSS property. Required.
-
Description An empty tag that indicates CSS rules and holds code coloring attributes. Attributes name, id ■ ■ name="cssValue_name" id="id_string" A string that assigns a name to the CSS value. Required. An identifier string that maps color and style to this syntax item. Example Description Optional. This tag applies only to tag-based syntax (that is, where ignoreTags="No").
-
Example Description Optional. If this tag is present, all text that is not defined by any other tag is colored according to the style assigned to this tag. If this tag is omitted, black text is used. Attributes name, id ■ ■ name="cssSelector_name" id="id_string" A string that assigns a name to the CSS Selector. Required. An identifier string that maps color and style to this syntax item.
-
Attributes name, id ■ name="entity_name" ■ id="id_string" A string that assigns a name to the entity. Required. An identifier string that maps color and style to this syntax item. Example Description Identifies keywords that define a function. Dreamweaver uses these keywords to perform code navigation. Multiple functionKeyword tags are allowed.
-
Description A list of characters that are to be recognized as the remaining characters in an identifier. If idChar1 is not specified, all characters of the identifier are validated against this list. Attributes name, id ■ name="idCharRest_name" ■ id="id_string" A string that assigns a name to the stringStart block. Required. An identifier string that maps color and style to this syntax item.
-
Description Specifies whether markup tags should be ignored. Values are Yes and No; the default is Yes. Set to No when syntax is for tag markup language that is delimited by < and >. Set to Yes when syntax is for a programming language. Attributes None. Example No Description Specifies whether the text that is matched by this scheme is locked from being edited in the Code view. Values are Yes and No. Default is No. Attributes None.
-
Description List of keywords for type specified in category attribute. Multiple keywords tags are allowed. Attributes name, id ■ ■ name="keywords_name" id="id_string" A string that assigns a name to the list of keywords. Required. An identifier string that maps color and style to this syntax item.
-
Attributes name, id ■ name="operator_name" ■ id="id_string" A string that assigns a name to the list of operator characters. Required. An identifier string that maps color and style to this syntax item. Example !?:=&|^~]]> Description Specifies a list of searchPattern tags. Attributes name, id, delimiter, escape ■ name="stringStart_name" A string that assigns a name to the list of search pattern strings.
-
Attributes doctypes ■ doctypes="doc_type1, doc_type2,...” The document types for which this sample text appears. Example
-
Attributes name, id, wrap ■ name="stringStart_name" ■ id="id_string" A string that assigns a name to the stringStart block. Required. An identifier string that maps color and style to this syntax item. ■ wrap="true" or "false". Defines whether code coloring recognizes text strings that wrap to the next line. The default is "true".
-
Description This tag groups one or more tags to which you can assign a unique color and style. Attributes id, name, taglibrary, tags Required. An identifier string that maps color and style to this syntax ■ id="id_string" ■ name="display_name" item. ■ A string that Dreamweaver displays in the code color editor. taglibrary="tag_library_id" The identifier of the tag library to which this group of tags belongs.
-
Sample code
header
Here's some editable text
Example customText This value tells Dreamweaver to use custom colors to color the block delimiters.
-
Example ]]> innerTag This value is identical to the outerTag value, except that the tag coloring is taken from the scheme inside the delimiters. This is currently used for the html tag. nameTag This value specifies that the blockStart string is the opening of a tag and blockEnd string is the closing of a tag, and these delimiters are to be colored based on the tag settings of the scheme.
-
Scheme processing Dreamweaver has three basic code coloring modes: CSS mode, Script mode, and Tags mode. In each mode, Dreamweaver applies code coloring only to particular fields. The following chart indicates which fields are subject to code coloring in each mode.
-
Wildcard characters The following is a list of wildcard characters that Dreamweaver supports, along with the strings to specify them and descriptions of their usage. Wildcard Escape Description string Wildcard \* Skip all characters in the rule until the character that follows the wildcard is found. For example, use to match all tags of this type that have the name attribute specified. Wildcard with escape character \e*x Where x is the escape character.
-
Escape characters The following is a list of escape characters that Dreamweaver supports, along with the strings to specify them and descriptions of their usage. Escape character Escape Description string Backslash \\ The backslash character (\) is the code coloring escape character, so it must be escaped to be specified in a code coloring rule.
-
Scheme precedence Dreamweaver uses the following algorithm to color text syntax in Code view: 1. Dreamweaver determines the initial syntax scheme based on the document type of the current file. The file document type is matched against the scheme.documentType attribute. If no match is found, the scheme where scheme.documentType = "Text" is used. 2. Schemes can be nested if they specify blockStart…blockEnd pairs. All nestable schemes that have the current file extension listed in one of the blockStart.
-
Editing schemes You can edit the styles for a code coloring scheme either by editing the code coloring file or by selecting the Code Coloring category in the Dreamweaver Preferences dialog box, as shown in the following figure: For fields that you can specify more than once, such as stringStart, specify color and style settings only on the first tag. Data will be lost when you split color and style settings across tags and you later edit the colors or styles by using the Preferences dialog box.
-
To edit styles for a scheme using the Code Coloring category in the Preferences dialog box, double-click a document type, or click the Edit Coloring Scheme button, to open the Edit Coloring Scheme dialog box. To edit the style for a particular element, select it in the Styles For list. The items listed in the Styles For pane include the fields for the scheme being edited and also the schemes that might appear as blocks within this scheme.
-
Code coloring examples The following code coloring examples illustrate the code coloring schemes for a cascading style document and a JavaScript document. The lists of keywords in the JavaScript example are abbreviated for the sake of keeping the example short. CSS code coloring Yes Yes PAGE 90
CSS sample text The following sample text for the CSS scheme illustrates the CSS code coloring scheme: /* Comment */ H2, .head2 { font-family : 'Sans-Serif'; font-weight : bold; color : #339999; } The following lines from the Colors.
-
_$abcdefghijklmnopqrstuvwxyzABCDEFGHIJKLMNOPQRSTUVWXYZ _$abcdefghijklmnopqrstuvwxyzABCDEFGH IJKLMNOPQRSTUVWXYZ0123456789 function break . . .
-
var tokens = new Array("Hello", "world"); displayWords(tokens); The following lines from the Colors.
-
Contents The property and value tags. Container None. Example ... Description Defines a supported CSS property for the browser profile. Attributes name, names, supportlevel, message The name of the property for which you are specifying support. ■ name="property_name" ■ names="property_name, property_name, ..." A comma-separated list of property names for which you are specifying support. The names attribute is a kind of shorthand.
-
■ The message attribute defines a message string that Dreamweaver displays when it finds the property in a document. The message string describes possible limitations or workarounds for the property value. message="message_string" Contents value Container css-support Example Description Defines a list of values supported by the current property.
-
Container property Example Changing default HTML formatting To change general code formatting preferences, use the Code Format category of the Preferences dialog box.
-
Customizing Code View
-
PART 2 2 Overview of Extending Dreamweaver Learn the fundamental concepts of the Macromedia Dreamweaver 8 interface and how to extend Dreamweaver to suit your web development needs. These fundamental concepts include the Dreamweaver folders, extension APIs, Dreamweaver interface components, the Dreamweaver Document Object Model (DOM), and Dreamweaver document types. Chapter 3: Extending Dreamweaver . . . . . . . . . . . . . . . . . . . . . . . . .99 Chapter 4: User Interfaces for Extensions . . . . . . .
-
-
3 CHAPTER 3 Extending Dreamweaver Typically, you create a Dreamweaver extension to perform one of the following types of tasks: ■ Automating changes to the user’s current document, such as inserting HTML, CFML, or JavaScript; changing text or image properties; or sorting tables ■ Interacting with the application to automatically open or close windows, open or close documents, change keyboard shortcuts, and more ■ Connecting to data sources, which lets Dreamweaver users create dynamic, data-driven pag
-
Types of Dreamweaver extensions The following list describes the types of Dreamweaver extensions that are documented in this guide: Insert Bar object extensions create changes in the Insert bar. An object is typically used to automate inserting code into a document. It can also contain a form that gathers input from the user and JavaScript that processes the input. Object files are stored in the Configuration/ Objects folder.
-
Server Behavior extensions add blocks of server-side code (ASP, JSP, or ColdFusion) to the document. The server-side code performs tasks on the server when the document is viewed in a browser. Server behaviors appear on the Plus (+) menu of the Dreamweaver Server Behaviors panel. Server behavior files are stored in the Configuration/Server Behaviors folder. Data source extensions let you build a connection to dynamic data stored in a database.
-
Code Hints are menus that offer a typing shortcut by displaying a list of strings that potentially complete the string you are typing. If one of the strings in the menu matches the string that you started to type, you can select it to insert it in place of the string that you are typing. Code Hints menus are defined in the codehints.xml file in the Configuration/ CodeHints folder, and you can add new code hints menus to it for new tags or functions that you have defined. Menus are defined in the menus.
-
The Configuration/Shared folder does not correspond to a specific extension type. It is the central repository for utility functions, classes, and images that are used by more than one extension. The files in the Configuration/Shared/Common folder are designed to be useful to a broad range of extensions. These files are useful as examples of JavaScript techniques and as utilities.
-
Multiuser Configuration folders For the multiuser operating systems of Windows XP, Windows 2000, and Macintosh OS X, Dreamweaver creates a separate Configuration folder for each user in addition to the Dreamweaver Configuration folder. Any time Dreamweaver or a JavaScript extension writes to the Configuration folder, Dreamweaver automatically writes to the user Configuration folder instead.
-
To reload extensions 1. Control-click (Windows) or Option-click (Macintosh) the Categories menu in the Insert bar’s title bar. 2. Select Reload Extensions. NO T E Remember that in a multiuser operating system you should edit copies of configuration files in your user Configuration folder rather than editing master configuration files. For more information, see “Configuration folders and extensions” on page 102.
-
How Dreamweaver processes JavaScript in extensions Dreamweaver checks the Configuration/extension_type folder during startup.
-
Dreamweaver supports the use of event handlers within links. Event handlers in links must use syntax, as shown in the following example: link text Plug-ins (set to play at all times) are supported in the BODY of extensions. The document.write() statement, Java applets, and ActiveX controls are not supported in extensions.
-
Do not write JavaScript code in the HTML files except for required event handlers. This eliminates the need to fix a bug multiple times for multiple translations after the HTML files are replicated and translated into other languages. ■ XML String files Store all strings in XML files in the Dreamweaver Configuration/Strings folder. If you install many related extension files, this lets you share all strings in a single XML file.
-
Localizable Strings with Embedded Values Some display strings have values embedded in them. You can use the errMsg() function to display these strings. You can find the errMsg() function, which is similar to the printf() function in C, in the string.js file in the Configuration/Shared/MM/Scripts/CMN folder. Use the placeholder characters percent sign (%) and s to indicate where values should appear in the string and then pass the string and variable names as arguments to errMsg().
-
Extending Dreamweaver
-
CHAPTER 4 4 User Interfaces for Extensions Most extensions are built to receive information from the user through a user interface (UI). For example, if you create a Property inspector extension for the marquee tag, you need to create a way for the user to specify attributes like direction and height. If you plan to submit your extension for Macromedia certification, you need to follow the guidelines that are available within the Extension Manager files on the Macromedia Exchange website (www.macromedia.
-
When you design an extension, you should determine what variables are necessary and what form elements can best handle them. Consider the following basic guidelines when you design an extension UI: ■ To name your extension, place the name in the title tag of your HTML file. Dreamweaver displays the name in the extension title bar. ■ Keep text labels on the left side of your UI, aligned right, with text boxes on the right side, aligned left.
-
In most cases, DOCTYPE statements must go on the first line of a document. However, to avoid conflicts with extension-specific directives that, in previous versions, were required to be on the first line of a file (such as the comment at the top of a Property inspector file, or the MENULOCATION=NONE directive in a command), DOCTYPE statements and directives can now be in any order as long as they appear before the opening html tag.
-
Editable select lists Extension UIs often contain pop-up lists that are defined using the select tag. In Dreamweaver, you can make pop-up lists in extensions editable by adding editable="true" to the select tag. To set a default value, set the editText attribute and the value that you want the select list to display.
-
The following example creates a Command extension that contains an editable select list using common JavaScript functions: To create the example: 1. Create a new blank file in a text editor. 2. Enter the following code:
Editable Dropdown Test 3. Save the file as Strikethrough.htm in the Configuration/Objects/Text folder.
-
Next, decide whether to use objectTag() or insertObject() for the next function. The Strikethrough object simply wraps the s tag around the selected text, so it doesn’t meet the criteria for using the insertObject() function (see “insertObject()” on page 162). Within the objectTag() function, use dw.getFocus() to determine whether the Code view is the current view. If the Code view has input focus, the function should wrap the appropriate (uppercase or lowercase) tag around the selected text.
-
To separate the HTML object definition file from the supporting JavaScript functions: 1. Create a new blank file. 2. Paste all the JavaScript functions into the file. 3. Remove the functions from Strikethrough.htm, and add the JavaScript filename to the src attribute of the script tag, as shown in the following example:
Strikethrough 4. Save the Strikethrough.htm file. 5.
-
■ Each button tag in the XML file places an icon on the Insert bar and connects it to the proper HTML file or function. To add the new object to the Insert bar: 1. Find the following line near the beginning of the inserbar.xml file: This line identifies the beginning of the Common category on the Insert bar. 2.
-
To create the function: 1. After the objectTag() function in Strikethrough.js, create a function called fontColorRed() by entering the following code: function fontColorRed(){ var dom = dw.getDocumentDOM(); if (dw.getFocus() == 'textView' || dw.getFocus(true) == 'html'){ var upCaseTag = (dw.getPreferenceString("Source Format", "Tags Upper Case", "") == 'TRUE'); // Manually wrap tags around selection. if (upCaseTag){ dom.source.wrapSelection('',''); }else{ dom.source.
-
2. Save the file as Strikethrough.htm. 3. Reload the extensions (see “Reloading extensions” on page 104). To test the dialog box: 1. Click the Red Text checkbox. 2.
-
Building an Insert bar pop-up menu The Dreamweaver Insert bar introduces a new organization for objects and now supports pop-up menus to help organize objects into smaller groups, as shown in the following figure. The following example builds a new category on the Insert bar called Editorial and then adds a pop-up menu to that category. The pop-up menu contains the Strikethrough object you already created and groups it with a Blue Text object you will create.
-
// Manually wrap tags around selection. var dom = dw.getDocumentDOM(); if (dw.getFocus() == 'textView' || dw.getFocus(true) == 'html'){ var upCaseTag = (dw.getPreferenceString("Source Format", "Tags Upper Case", "") == 'TRUE'); // Manually wrap tags around selection. if (upCaseTag){ dom.source.wrapSelection('',''); }else{ dom.source.wrapSelection('',''); } }else if (dw.getFocus() == 'document'){ dom.
-
To edit insertbar.xml: 1. Find the following line of code near the beginning of the file: The insertbar tag defines the beginning of all the Insert bar contents. 2.
-
6. After the Strikethrough object button tag, add the hypertext object, as follows: NO T E 7. The button tag does not have a separate closing tag; it simply ends with “/>”. End the pop-up menu with the closing tag.
-
The Objects API This section describes the functions in the Objects API. You must define either the insertObject() or the objectTag() function. For details about these functions, see “insertObject()” on page 162. The remaining functions are optional. canInsertObject() Availability Dreamweaver MX. Description This function determines whether to display the Object dialog box. Arguments None. Returns Dreamweaver expects a Boolean value.
-
Returns Dreamweaver expects nothing. Example The following example opens the myObjectHelp.htm file in a browser; this file explains how to use the extension: function displayHelp(){ var myHelpFile = dw.getConfigurationPath() + '/ExtensionsHelp/myObjectHelp.htm'; dw.browseDocument(myHelpFile); } isDomRequired() Description This function determines whether the object requires a valid DOM to operate.
-
Description This function is required if the objectTag() function is not defined. It is called when the user clicks OK. It either inserts code into the user’s document and closes the dialog box or displays an error message and leaves the dialog box open. This works as an alternate function to use in objects instead of the objectTag() function. It does not assume that the user is inserting text at the current insertion point and allows data validation when the user clicks OK.
-
// do some document manipulation here. Exercise left to the reader } return errMsg; } objectTag() Description The objectTag() and insertObject() functions are mutually exclusive: If both are defined in a document, the objectTag() function is used. For more information, see “insertObject()” on page 162. This function inserts a string of code into the user’s document. In Dreamweaver MX, returning an empty string, or a null value (also known as "return;"), is a signal to Dreamweaver to do nothing.
-
windowDimensions() Description This function sets specific dimensions for the Options dialog box. If this function is not defined, the window dimensions are computed automatically. NO TE Do not define this function unless you want an Options dialog box that is larger than 640 x 480 pixels. Arguments platform ■ The value of the platform argument is either "macintosh" or "windows", depending on the user’s platform. Returns Dreamweaver expects a string of the form "widthInPixels,heightInPixels".
-
Insert Bar Objects
-
7 CHAPTER 7 Commands Macromedia Dreamweaver 8 commands can perform almost any kind of edit to a user’s current document, other open documents, or any HTML document on a local drive. Commands can insert, remove, or rearrange HTML tags and attributes, comments, and text. Commands are HTML files. The BODY section of a command file can contain an HTML form that accepts options for the command (for example, how a table should be sorted and by which column).
-
4. Dreamweaver calls the commandButtons() function, if defined, to determine which buttons appear on the right side of the Options dialog box and what code should execute when the user clicks the buttons. 5. Dreamweaver scans the command file for a FORM tag. If a form exists, Dreamweaver calls the windowDimensions() function, which sizes the Options dialog box that contains the BODY elements of the file. If the windowDimensions() function is not defined, Dreamweaver automatically sizes the dialog box.
-
This example creates two files in the Commands folder: Change Case.htm, which contains the UI, and Change Case.js, which contains the JavaScript code. If you prefer, you can create only the Change Case.htm file and put the JavaScript code in the HEAD section. Creating the UI The UI is a form that contains two radio buttons that let the user select uppercase or lowercase. To create the user interface: 1. Create a new blank file. 2.
-
The contents of the Title tag, Make Uppercase or Lowercase, appears in the top bar of the dialog box. Within the form, a table with two cells controls the layout of the elements. Within the table cells are the two radio buttons, Uppercase and Lowercase. The Uppercase button has the checked attribute, making it the default selection and ensuring that the user must either select one of the two buttons or cancel the command. The form looks like the following figure.
-
To determine whether the command should be active or dimmed: 1. Create a new blank file. 2. Add the following code: function canAcceptCommand(){ var theDOM = dw.getDocumentDOM(); // Get the DOM of the current document var theSel = theDOM.getSelection(); // Get start and end of selection var theSelNode = theDOM.getSelectedNode(); // Get the selected node var theChildren = theSelNode.childNodes; // Get children of selected node return (theSel[0] != theSel[1] && (theSelNode.nodeType == Node.
-
The next part of the return statement (&& (theSelNode.nodeType == Node.TEXT_NODE) checks to see if the selected node type is text. If so, the canAcceptCommand() function returns the value true. If the node type is not text, the test continues to see if the node has children (|| theSelNode.hasChildNodes()), and if the type of the first child node is text (&& (theChildren[0].nodeType == Node.TEXT_NODE))).
-
Linking functions to the OK and Cancel buttons When the user clicks OK or Cancel, the extension needs to perform the appropriate action. You determine the appropriate action by specifying which JavaScript function to perform when either button is clicked. To link the OK and Cancel button to functions: 1. Open the file Change Case.js in the Configuration/Commands folder. 2. At the end of the file, add the following code: function commandButtons() { return new Array("OK", "changeCase()", "Cancel", "window.
-
// Get the node that contains the selection. var theSelNode = theDOM.getSelectedNode(); // Get the children of the selected node. var theChildren = theSelNode.childNodes; var i = 0; if (theSelNode.hasChildNodes()){ while (i < theChildren.length){ if (theChildren[i].nodeType == Node.TEXT_NODE){ var selText = theChildren[i].data; var theSel = theDOM.nodeToOffsets(theChildren[0]); break; } ++i; } } else { // Get the offsets of the selection var theSel = theDOM.
-
The changeCase() function first tests the property document.forms[0].elements[0].checked. The document.forms[0].elements[0] property refers to the first element in the first form of the current document object, which is the UI for the extension. The checked property has the value true if the element is checked (or enabled) and false if it is not. In the interface, elements[0] refers to the first radio button, which is the Uppercase button.
-
Testing the extension After you place the files in the Commands folder, you can test the extension. To test the extension: 1. Restart Dreamweaver or reload extensions. For information on reloading extensions, see “Reloading extensions” on page 104. The Change Case entry should now appear on the Commands menu. 2. Type some text in a document. 3. Select the text. NO TE 4. Change Case is dimmed until the user selects text in the document. Select Change Case from the Commands menu.
-
Example The following example of the canAcceptCommand() function makes the command available only when the selection is a table: function canAcceptCommand(){ var retval=false; var selObj=dw.getDocumentDOM.getSelectedNode(); return (selObj.nodeType == Node.ELEMENT_NODE && ¬ selObj.tagName=="TABLE");{ retval=true; } return retval; } commandButtons() Description This function defines the buttons that should appear on the right side of the Options dialog box and their behaviors when they are clicked.
-
isDomRequired() Description This function determines whether the command requires a valid DOM to operate. If this function returns a value of true or if the function is not defined, Dreamweaver assumes that the command requires a valid DOM and synchronizes the Design and Code views of the document before executing. Synchronization causes all edits in the Code view to update in the Design view. Arguments None.
-
Arguments platform ■ The value of the platform argument is either "macintosh" or "windows", depending on the user’s platform. Returns Dreamweaver expects a string of the form "widthInPixels,heightInPixels". The returned dimensions are smaller than the size of the entire dialog box because they do not include the area for the OK and Cancel buttons. If the returned dimensions do not accommodate all options, scroll bars appear.
-
Commands
-
8 CHAPTER 8 Menus and Menu Commands Macromedia Dreamweaver 8 creates all its menus from the structure defined in the menus.xml file in the Dreamweaver Configuration/Menus folder. You can rearrange, rename, and remove menu commands by editing the menus.xml file. You can also add, change, and remove keyboard shortcuts for menu commands, although in most cases it is easier to do that using the Keyboard Shortcut Editor (see Dreamweaver Help).
-
About the menus.xml file The menus.xml file contains a structured list of menu bars, menus, menu commands, separators, shortcut lists, and keyboard shortcuts. These items are described by XML tags that you can edit in a text editor. N OT E Be careful when making changes to menus. Dreamweaver ignores any menu or menu command that contains an XML syntax error.
-
■ id The menu ID for the menu bar. Each menu ID in the menus.xml file should be unique. ■ platform Indicates that the menu bar should appear only on the given platform. Valid values are "win" and "mac". Contents This tag must contain one or more menu tags. Container None.
-
■ showIf Specifies that the menu should appear only if the given Dreamweaver enabler is the value true. The possible enablers are: _SERVERMODEL_ASP, _SERVERMODEL_ASPNET, _SERVERMODEL_JSP, _SERVERMODEL_CFML (for all versions of Macromedia ColdFusion), _SERVERMODEL_CFML_UD4 (for UltraDev version 4 of ColdFusion), _SERVERMODEL_PHP, _FILE_TEMPLATE, _VIEW_CODE, _VIEW_DESIGN, _VIEW_LAYOUT, and _VIEW_STANDARD. You can specify multiple enablers by placing a comma (which means AND) between the enablers.
-
■ key The keyboard shortcut for the command, if any. Use the following strings to specify modifier keys: ■ ■ Cmd specifies the Control key (Windows) or Command key (Macintosh). Alt and Opt interchangeably specify the Alt key (Windows) or Option key (Macintosh). ■ Shift ■ Ctrl ■ ■ specifies the Shift key on both platforms. specifies the Control key on both platforms. A Plus (+) sign separates modifier keys if a given shortcut uses more than one modifier.
-
A JavaScript expression that indicates whether the menu command has a check mark next to it in the menu; if the expression evaluates as true, the item appears with a check mark. ■ checked ■ dynamic If present, indicates that a menu command is to be determined dynamically, by an HTML file; the file contains JavaScript code to set the text and state of the menu command. If you specify a tag as dynamic, you must also specify a file attribute.
-
Attributes {app} ■ app The name of the application in which the separator is shown. Not currently used. Contents None (empty tag). Container This tag must be contained in a menu tag. Example Description Specifies a shortcut list in the menus.xml file. Attributes {app}, id, {platform} ■ app The name of the application in which the shortcut list is available. Not currently used. ■ id The ID for the shortcut list.
-
Description Specifies a keyboard shortcut in the menus.xml file. Attributes key, {app}, {platform}, {file}, {arguments}, {command}, id, {name} ■ key The key combination that activates the keyboard shortcut. For syntax details, see
-
Description Represents one tool; it contains all the shortcuts for the tool as subtags in the menus.xml file. Attributes {name}, id ■ name ■ id A localized version of the tool name. The internal tool identifier that identifies the tool to which the shortcuts apply. Contents This tag can contain one or more activate, override, or action tags. Container This tag must be contained in a menu tag. Example PAGE 190
Example Description Contains the key combination to activate the tool. Attributes {name}, key, id ■ name ■ key ■ id A localized version of the action. The key combination used to activate the tool. For syntax details, see
-
Container This tag must be contained in a tool tag. Example Changing menus and menu commands By editing the menus.xml file, you can move menu commands within a menu or from one menu to another, add separators to or remove them from menus, and move menus within a menu bar or even from one menu bar to another. You can move items into or out of context menus using the same procedure as for other menus.
-
To move a menu: 1. Quit Dreamweaver. 2. Make a backup copy of the menus.xml file. 3. Open menus.xml in a text editor such as BBEdit, HomeSite, or Wordpad. (Don’t open it in Dreamweaver.) 4. Cut an entire menu and its contents, from the opening menu tag to the closing /menu tag. 5. Place the insertion point at the new location for the menu. (Make sure it’s between a menubar tag and the corresponding /menubar tag.) 6. Paste the menu into its new location.
-
3. Open menus.xml in a text editor such as BBEdit, HomeSite, or Wordpad. (Don’t open it in Dreamweaver.) 4. Look at the Keyboard Shortcut Matrix (available from the Dreamweaver Support Center) and find a shortcut that’s not being used or one that you want to reassign. If you reassign a keyboard shortcut, change it on a printed copy of the matrix for future reference. 5.
-
■ Items in the formats pop-up menu for a binding in the Bindings panel are specified in Formats.xml files, in subfolders of the ServerFormats folder. You can add entries to this menu from inside Dreamweaver by using the Add Format dialog box. ■ The Tag Library Editor dialog box menu commands are specified in the TagLibraries/ TagImporters/TagImporters.xml file.
-
The following table lists the files you use to create a Menu command. Path File Description Configuration/Menus/ menus.xml Contains a structured list of menu bars, menus, menu commands, separators, shortcut lists, and keyboard shortcuts. Modify this file to add new menus and menu commands. Configuration/Menus/ commandname.htm Contains the functions required by the menu command.
-
The command is renamed in the Commands menu. To delete a command you’ve created: 1. Select Commands > Edit Command List. A dialog box appears, listing all the commands you can delete. (Commands that are in the default Commands menu don’t appear on this list and can’t be deleted using this approach.) 2. Select a command to delete. 3. Click Delete, and then confirm that you want to delete the command. The command is deleted.
-
5. Dreamweaver calls the receiveArguments() function, if defined, in the selected Menu Commands file to let the command process any arguments that pass from the menu item. NO T E If it is a dynamic menu item, the ID of the menu item passes as the only argument. 6. Dreamweaver calls the commandButtons() function, if defined, to determine which buttons appear on the right side of the Options dialog box and what code should execute when the user clicks the buttons. 7.
-
Creating the menu commands Add the following HTML menu tags to the end of the menus.xml file to create a menu called MyMenu that contains the Undo and Redo menu items.
-
In this command, the receiveArguments() function processes the arguments and executes the command. More complex menu commands might call different functions to execute the command. For example, the following code checks whether the first argument is "foo"; if it is, it calls the doOperationX() function and passes it the second argument. If the first argument is "bar", it calls the doOperationY() function and passes it the second argument.
-
The setMenuText() function looks like the following example code: function setMenuText() { if (arguments.length != 1) return ""; var whatToDo = arguments[0]; if (whatToDo == "undo") return dw.getUndoText(); else if (whatToDo == "redo") return dw.getRedoText(); else return ""; } Placing the command file in the Menu folder To implement the menu Undo and Redo menu items, you must save the MyMenu.htm command file in the Dreamweaver Configuration/Menus folder or a subfolder that you create.
-
Creating the dynamic menu items The following menu tags in the menus.xml file define the Preview in Browser submenu of the File menu:
-
function canAcceptCommand() { var PIB = dw.getBrowserList(); if (arguments[0] == 'primary' || arguments[0] == 'secondary') return havePreviewTarget(); return havePreviewTarget() && (PIB.length > 0); } The canAcceptCommand() function in the PIB_Dynamic.js file again retrieves the browser list that was created in Preferences. Then it checks whether the first argument (arguments[0]) is primary or secondary. If so, it returns the value returned by the havePreviewTarget() function.
-
var selFile = selFiles[i]; // For server connections, the files will // already be remote URLs. if (selFile.indexOf("://") == (-1)) { var urlPrefix = "file:///"; var strTemp = selFile.substr(urlPrefix.length); if (selFile.indexOf(urlPrefix) == -1) bHavePreviewTarget = false; else if (strTemp.indexOf("/") == -1) bHavePreviewTarget = false; else if (!DWfile.exists(selFile)) bHavePreviewTarget = false; else if (DWfile.getAttributes(selFile).
-
The havePreviewTarget() function sets the value bHavePreviewTarget to false as the default return value. The function performs two basic tests calling the dw.getFocus() function to determine what part of the application currently has input focus. The first test checks whether the site panel has focus (if (dw.getFocus(true) == 'site')). If the site panel does not have focus, the second test checks to see if a document (dw.getFocus() == 'document'), Text view (dw.
-
var var var var theBrowser = null; i=0; browserList = null; result = false; if (havePreviewTarget()) { // Code to check if we were called from a shortcut key if (whichBrowser == 'primary' || whichBrowser == 'secondary') { // get the path of the selected browser if (whichBrowser == 'primary') { theBrowser = dw.getPrimaryBrowser(); } else if (whichBrowser == 'secondary') { theBrowser = dw.getSecondaryBrowser(); } // Match the path with the name of the corresponding browser // that appears in the menu.
-
if (whichBrowser == 'primary') { result = window.confirm(MSG_NoPrimaryBrowserDefined); } else if (whichBrowser == 'secondary') { result = window.confirm(MSG_NoSecondaryBrowserDefined); } // If the user clicked OK, show the prefs dialog with the browser panel. if (result) dw.showPreferencesDialog('browsers'); } } } The function first sets the variable whichBrowser to the value that Dreamweaver passes, arguments[0].
-
If the user pressed the shortcut keys (F12 or Ctrl+F12) and no primary or secondary browser has been specified, a dialog box appears to inform the user. If the user clicks OK, the function calls the function dw.showPreferencesDialog() with the browsers argument to let the user specify a browser at that point. The Menu Commands API The custom functions in the Menu Commands API are not required. canAcceptCommand() Description Determines whether the menu item is active or dimmed. Arguments {arg1}, {arg2},..
-
Returns Dreamweaver expects an array that contains an even number of elements. The first element is a string that contains the label for the topmost button. The second element is a string of JavaScript code that defines the behavior of the topmost button when it is clicked. The remaining elements define additional buttons in the same manner.
-
isCommandChecked() Description Determines whether to display a check mark next to the menu item. Arguments {arg1}, {arg2},...{argN} ■ If it is a dynamic menu item, the unique ID that the getDynamicContents() function specifies is the only argument. Otherwise, if the arguments attribute is defined for a menuitem tag, the value of that attribute passes to the isCommandChecked() function (and to the canAcceptCommand(), receiveArguments(), and setMenuText() functions) as one or more arguments.
-
receiveArguments() Description Processes any arguments passed from a menu item or from the dw.runCommand() function. If it is a dynamic menu item, it processes the dynamic menu item ID. Arguments {arg1}, {arg2},...{argN} ■ If it is a dynamic menu item, the unique ID that the getDynamicContents() function specifies is the only argument.
-
If the arguments attribute is defined for a menuitem tag, the value of that attribute passes to the setMenuText() function (and to the canAcceptCommand(), isCommandChecked(), and receiveArguments() functions) as one or more arguments. The arguments attribute is useful for distinguishing between two menu items that call the same menu command. ■ Returns Dreamweaver expects the string that should appear in the menu. Example function setMenuText() { if (arguments.
-
Example The following example of windowDimensions() sets the dimensions of the Parameters dialog box to 648 x 520 pixels: function windowDimensions(){ return "648,520"; } 214 Menus and Menu Commands
-
9 CHAPTER 9 Toolbars You can create a toolbar for Macromedia Dreamweaver 8 simply by creating a file that defines the toolbar and placing that file in the Configuration/Toolbars folder. Within a toolbar file, you can define items such as check buttons, radio buttons, text boxes, and pop-up menus using a few custom XML tags.
-
Some types of toolbar controls, such as push buttons and pop-up menus, have icon images associated with them. Icon images are stored in an images folder in the Toolbars folder. Images can be in any format that Dreamweaver can render but are typically GIF or JPEG file formats. Images for Macromedia-authored toolbars are stored in the Toolbars/images/MM folder. As with menus, you can specify the functionality of individual toolbar items either through the item attributes or through a command file.
-
You cannot drag and drop toolbars between the document window and the Dreamweaver workspace frame. ■ Toolbars remain a fixed size. A toolbar does not shrink if the container shrinks or if other toolbars are placed next to it. ■ You can show or hide toolbars from the View >Toolbars menu. ■ Toolbars cannot overlap. ■ Only the outline of the toolbar appears while you drag it. On the Macintosh, toolbars are always attached to the document window.
-
A simple toolbar command file This simple example implements a Title text box item as seen on the Dreamweaver Document toolbar. The text box item lets the user enter a name for the current Dreamweaver document.
-
canAcceptCommand(): enable the toolbar item The canAcceptCommand() function consists of one line of code that checks to see whether there is a current Document Object Model (DOM) and whether the document is parsed as HTML. The function returns the results of those tests. If the conditions are true, Dreamweaver enables the text box item on the toolbar. If the function returns the value false, Dreamweaver disables the item. The function is as follows: function canAcceptCommand() { return (dw.
-
The function is as follows: function getCurrentValue() { var title = ""; var dom = dw.getDocumentDOM(); if (dom) title = dom.getTitle(); return title; } Until the user enters a title for the document, the getTitle() function returns Untitled Document, which appears in the text box. After the user enters a title, the getTitle() function returns that value, and Dreamweaver displays it as the new document title.
-
-
■ or "document" Defaults to "mainframe". Specifies where the toolbar should dock in the Dreamweaver workspace on Windows. If the container is set to "mainframe", the toolbar appears in the outer workspace frame and operates on the front document. If the container is set to "document", the toolbar appears in each document window. On the Macintosh, all toolbars appear in each document window. container="mainframe" ■ initiallyVisible="true" or "false".
-
■ This attribute is required if the initialPosition attribute specifies below. Otherwise, it is ignored. Specifies the ID of the toolbar below which this toolbar should be positioned. relativeTo="toolbar_id" Contents The toolbar tag contains include, itemref, and separator tags as well as individual item definitions such as button, combobox, dropdown, and so on. For descriptions of the item definitions that you can specify, see “Toolbar item tags” on page 226. Container The toolbarset tag.
-
Description Defines a single toolbar item. Toolbar items include buttons, radio buttons, check buttons, combo boxes, pop-up menus, and so on. For a list of the types of toolbar items that you can define, see “Toolbar item tags” on page 226. Attributes The attributes vary, depending on the item that you define. For a complete list of the attributes that you can specify for toolbar items, see “Item tag attributes” on page 232. Contents None. Container The toolbar tag or the toolbarset tag.
-
■ showIf="script" Specifies that this item appears on the toolbar only if the specified script returns a true value. For example, you can use showIf to show certain buttons only in a given application or only when a page is written in a server-side language such as ColdFusion, ASP, or JSP. If you do not specify showIf, the item always appears. Dreamweaver checks this property whenever the item’s enabler runs; that is, according to the value of the update attribute. You should use this attribute sparingly.
-
Toolbar item tags Each type of toolbar item has its own tag and set of required and optional attributes. You can define toolbar items either inside or outside of toolbars. In general, it is better to define them outside of toolbars and refer to them within toolbars using the itemref tag. You can define the following types of items in a toolbar.
-
Description A check button is a button that has a checked or unchecked state and that executes a specific command when clicked. When it is checked, it appears pressed in and highlighted. When it is not checked, it appears flat. Dreamweaver implements the following states for the check button: Mouse-over, Pressed, Mouse-over-while-pressed, and Disabled-while-pressed.
-
Radio buttons act the same as the Code view, Design view, and Split view buttons on the Dreamweaver document toolbar. Attributes id, image, tooltip, checked, command, {showIf}, {disabledImage}, {overImage}, {label}, {file}, {domRequired}, {enabled}, {update}, {arguments} For a description of each attribute, see “Item tag attributes” on page 232. Contents None. Container The toolbar tag or the toolbarset tag. Example PAGE 229
Contents None. Container The toolbar tag or the toolbarset tag. Example PAGE 230
Description A combo box is an editable pop-up menu that executes its command when you select an entry or when the user makes an edit in the text box and switches focus. The menu looks and acts the same as the Font control on the Text Property inspector, except it’s a standard size instead of the small Property inspector size.
-
Container The toolbar tag or the toolbarset tag. Example Description A color picker is a panel of colors that does not have an associated text box that executes its command when the user selects a new color. This panel looks and acts the same as the color picker on the Dreamweaver Property inspector. You can specify a different icon to replace the default icon.
-
Item tag attributes The attributes for toolbar item tags have the following meanings: id="unique_id" Required. The id attribute is an identifier for the toolbar item. The id attribute must be unique within the current file and all files that are included within the current file. The itemref tag uses the item id to refer to and include an item within a toolbar. Example
-
If an icon is specified for a color picker, the icon replaces the color picker entirely. If the colorRect attribute is also set, the current color appears on top of the icon in the specified rectangle. Example image="Toolbars/images/MM/codenav.gif" disabledImage="image_path" Optional. Dreamweaver ignores the disabledImage attribute for items other than buttons, check buttons, radio buttons, menu buttons, color pickers, and combo buttons.
-
label="label string" Optional. This attribute specifies a label that displays next to the item. Dreamweaver does not automatically add a colon to labels. Labels for nonbutton items are always positioned on the left of the item. Dreamweaver places labels for buttons, check buttons, radio buttons, menu buttons, and combo buttons inside the button and to the right of the icon. Example label="Title: " width="number" Optional.
-
file="command_file_path" Required for pop-up menus and combo boxes. The file attribute is optional for other types of items. The file attribute specifies the path, relative to the Configuration folder, of a command file that contains JavaScript functions to populate, update, and execute the item. The file attribute overrides the enabled, checked, value, update, domRequired, menuID, showIf, and command attributes.
-
Example checked="dw.getDocumentDOM() != null && dw.getDocumentDOM().getView() == 'code'" value="script" This attribute is required for pop-up menus, combo boxes, text boxes, and color pickers. Dreamweaver ignores the value attribute for other types of items. To determine what value to display for pop-up menus and combo boxes, Dreamweaver first calls isCommandchecked() for each item in the menu.
-
The following list shows the possible handlers for update_frequency_list, from least to most frequent. If you do not specify the update attribute, the update frequency defaults to onEdit frequency. You can specify multiple update frequencies, separated by commas. The handlers run on any of the following specified events: executes when the server model of the current page changes. ■ onServerModelChange ■ onCodeViewSyncChange executes when the Code view becomes in or out of sync with the Design view.
-
Example command="dw.toggleLiveDebug()" arguments="argument_list" Optional. This attribute specifies the comma-separated list of arguments to pass to the receiveArguments() function in a toolbar command file. If you do not specify the arguments attribute, Dreamweaver passes the ID of the toolbar item.
-
canAcceptCommand() Availability Dreamweaver MX. Description Determines whether the toolbar item is enabled. The enabled state is the default condition for an item, so you should not define this function unless it returns a false value in at least one case. Arguments For pop-up menus, combo boxes, text boxes, and color pickers, the first argument is the current value within the control. The getDynamicContent() function can optionally attach individual IDs to items within a pop-up menu.
-
getCurrentValue() Availability Dreamweaver MX. Description Returns the current value to display in the item. Dreamweaver calls the getCurrentValue() function for pop-up menus, combo boxes, text boxes, and color pickers. For pop-up menus, the current value should be one of the items in the menu. If the value is not in the pop-up menu, Dreamweaver selects the first item. For combo boxes and text boxes, this value can be any string that the function returns.
-
The name getDynamicContent() is a misnomer because this function should be used even if the list of entries in the menu is fixed. For example, the Text_Size.htm file in the Configuration/Menus/MM folder is not a dynamic menu; it is designed to be called from each one of a set of static menu items. By adding a getDynamicContent() function that simply returns the list of possible font sizes, however, the same command file can also be used for a toolbar pop-up menu.
-
getMenuID() Availability Dreamweaver MX. Description Only valid for menu buttons. Dreamweaver calls the getMenuID() function to get the ID of the menu that should appear when the user clicks the button. Arguments None. Returns Dreamweaver expects a string that contains a menu ID, which is defined in the menus.xml file. Example function getMenuID() { var dom = dw.getDocumentDOM(); var menuID = ''; if (dom) { var view = dom.getView(); var focus = dw.
-
menuID = 'DWBrowseOptionsPopup'; } } return menuID; } getUpdateFrequency() Availability Dreamweaver MX. Description Specifies how often to run the handlers for the enabled, checked, showIf, and value attributes to update the visible state of the item. You must specify the update frequency for toolbar items because they are always visible, unlike menus. For this reason, you should always select the lowest frequency possible and make sure your enabled, checked, and value handlers are as simple as possible.
-
Description Returns a value that specifies whether the item is selected. For a button, checked means that the button appears on or depressed. The isCommandChecked() function is equivalent to the checked attribute in a toolbar item tag. Arguments For pop-up menus, combo boxes, text boxes, and color pickers, the first argument is the current value within the control. The getDynamicContent() function can optionally attach individual IDs to items within a pop-up menu.
-
else if (style == "Heading 6") bChecked = (textFormat == "h6"); else bChecked = (dw.cssStylePalette.getSelectedStyle() == style); return bChecked; } isDOMRequired() Availability Dreamweaver MX. Description Specifies whether the toolbar command requires a valid DOM to operate.
-
Arguments For pop-up menus, combo boxes, text boxes, and color pickers, the first argument is the current value within the control. The getDynamicContent() function can optionally attach individual IDs to items within a pop-up menu. If the selected item in the pop-up menu has an ID attached, Dreamweaver passes that ID to the receiveArguments() function instead of the value.
-
Returns Dreamweaver expects a Boolean value: true if the item appears; false otherwise. Example function showif() { var retval = false; var dom = dw.getDocumentDOM(); if(dom) { var view = dom.
-
Toolbars
-
10 CHAPTER 10 Reports Macromedia Dreamweaver 8 supports two types of reports: site reports and stand-alone reports. Site reports You use the Reports API to create custom site reports or modify the set of prewritten reports that come with Dreamweaver 8. You can access site reports only through the Reports dialog box. Site reports reside in the Dreamweaver Configuration/Reports folder. The Reports folder has subfolders that represent report categories. Each report can belong to only one category.
-
How site reports work 1. Reports are accessible through the Site > Reports command. When it is selected, this command displays a dialog box from which the user selects reports to run on a choice of targets. 2. The user selects which files to run the selected reports on using the Report On: pop-up menu. This menu contains the Current Document, Entire Current Local Site, Selected Files In Site, and Folder commands.
-
You create this extension by performing the following steps: ■ Creating the report definition ■ Writing the JavaScript code This example creates two files in the HTML Reports folder: List images.htm, which contains the report definition, and List Images.js, which contains the JavaScript code specific to this report. In addition, you reference the Reports.js file, which is included with Dreamweaver.
-
Writing the JavaScript code Dreamweaver includes the Reports.js file. You can call any of the functions in Reports.js. However, you also have to create the JavaScript file that contains any functions that are specific to your custom site report. To create the JavaScript file: 1. Create the file Configuration/Reports/HTML Reports/List Images.js, with the following content: // Function: configureSettings // Description: Standard report API, used to initialize and load // the default values.
-
Stand-alone reports You can use the Results Window API to create a stand-alone report. Stand-alone reports are regular commands that directly use the Results Window API rather than the Reports API. You can access a stand-alone report the same way you access any other command, through the menus or through another command. Stand-alone reports reside in the Dreamweaver Configuration/Commands folder. A custom command for a stand-alone report appears on the Commands menu.
-
5. To call the addItem() function, the processFile() function needs to have access to the Results window that was created by the stand-alone command. The processFile() function can also call the stopProcessing() function of the Results window object to stop processing the list of files. A simple stand-alone report example The simple stand-alone report extension lists all the images referenced in a particular file and displays the report in the Results window.
-
Writing the JavaScript code Next, you create the JavaScript file that contains any functions that are specific to your standalone report. To create the JavaScript file: 1. Create the Listimages.js file in the Configuration/Commands folder with the following code: function stdaloneresultwin() { var curDOM = dw.getDocumentDOM("document"); var tagList = curDOM.getElementsByTagName('img'); var imgfilename; var iOffset = 0; var iLineNumber = 0; var resWin = dw.
-
The Reports API The only required function for the Reports API is the processFile() function. All other functions are optional. processFile() Availability Dreamweaver 4. Description This function is called when there is a file to process. The Report command should process the file without modifying it and use the dw.ResultsPalette.SiteReports() function, the addResultItem() function, or the resWin.addItem() function to return information about the file.
-
Returns Dreamweaver expects a Boolean value: true if the report runs successfully; false if target is excluded from the report run. endReporting() Availability Dreamweaver 4. Description This function is called at the end of the Report process. Arguments None. Returns Dreamweaver expects nothing. commandButtons() Availability Dreamweaver 4. Description Defines the buttons that should appear on the right side of the Options dialog box and their behavior when they are clicked.
-
Example The following instance of the commandButtons() function defines the OK, Cancel, and Help buttons. function commandButtons(){ return new Array("OK" , "doCommand()" , "Cancel" , ¬ "window.close()" , "Help" , "showHelp()"); } configureSettings() Availability Dreamweaver 4. Description Determines whether the Report Settings button should be enabled in the Reports dialog box when this report is selected. Arguments None.
-
Returns Dreamweaver expects a string of the form "widthInPixels,heightInPixels". The returned dimensions are smaller than the size of the entire dialog box because they do not include the area for the OK and Cancel buttons. If the returned dimensions do not accommodate all options, scroll bars appear.
-
Reports
-
11 CHAPTER 11 Tag Libraries and Editors Macromedia Dreamweaver 8 users can use tag editors to insert new tags, edit existing tags, and access reference information about tags. Dreamweaver comes with editors for the following languages: HTML, ASP.Net, CFML, JRun, and JSP. You can customize tag editors that come with Dreamweaver, and you can create new tag editors. You can also add new tags to the tag libraries.
-
Tag library file format A tag library consists of a single root file, the TagLibraries.vtm file, that lists every installed tag, plus a VTML file for each tag in the tag library. The TagLibraries.vtm file functions as a table of contents and contains pointers to each individual tag’s VTML file.
-
The taglibrary tag groups one or more tags into a tag library. When you import tags or create a new set of tags, you can group them into tag libraries.
-
Attribute Description Mandatory/ optional taglibrary.id This can be any string that is different from the Optional taglibrary.ID attributes of other tag libraries in the file. The Extension Manager uses the ID attribute, so the MXP files can insert new taglibrary and the tags files into the TagLibraries.vtm file. taglibrary.tagchooser A relative path to the TagChooser.xml file that Optional is associated with this tag library.
-
To define tags, Dreamweaver uses a modified version of the Macromedia VTML file format. The following example demonstrates all the elements that Dreamweaver must use to define an individual tag: PAGE 266
The following table lists the attributes that define tags: Attribute Description Mandatory/ optional tag.bind Optional Used by the Data Binding panel. When you select a tag of this type, the bind attribute indicates the default attribute for data binding. tag.casesensitive Specifies whether the tag name is caseOptional sensitive. If the tag is case-sensitive, it is inserted into the user’s document using exactly the case that the tag library specifies.
-
Attribute Description Mandatory/ optional tagformat.nlaftertag The number of newline characters to insert after this tag. Optional attrib.name The name of the attribute, as it appears in the source code. Mandatory attrib.type If omitted, attrib.type is "text".
-
The Tag Chooser The Tag Chooser lets you view tags in functional groups so you can easily access frequently used tags. In order to add a tag or a set of tags to the Tag Chooser, you must add them to the tag library. You can do this by using the Tag Library Editor dialog box or by installing a Dreamweaver extension, which is packaged in an MXP file. TagChooser.xml files The TagChooser.xml file provides the metadata for organizing tag groupings that appear in the Tag Chooser.
-
The following table lists the tags that are available for use in the TagChooser.xml files: Tag Description tclibrary The tag is the outermost tag, which encapsulates Mandatory this tag library’s Tag Chooser structure. tclibrary.name Value appears in the Tree view node. Mandatory tclibrary.desc Value is an HTML string and appears in the Tag Info section of the Tag Chooser dialog box. If there is no DESC attribute, the information for Tag Info comes from the Reference panel.
-
The following table lists the attributes of the ELEMENT tag, which represents the tag to insert: Attribute Description Mandatory/ Optional element.name Value appears as a List view item. Mandatory element.value Value that is either placed directly into the code or Mandatory a parameter that passes into visual dialog boxes. element.desc Value is an HTML string and appears in the incorporated Reference panel.
-
Registering the tag in the tag library For Dreamweaver to recognize the new tag, it must be identified in the TagLibraries.vtm file, which is located in the Configuration/TagLibraries folder. However, if the user is on multiuser platform (such as Windows XP, Windows 2000, Windows NT, or Mac OS X), the user has another TagLibraries.vtm file in their user Configuration folder. This file is the one that needs to be updated because this file is the instance that Dreamweaver searches for and parses.
-
Creating a tag definition (VTML) file When a user selects a registered tag using the Tag Chooser or a tag editor, Dreamweaver searches for a corresponding VTML file for the tag definition. To create a tag definition file: 1. In a text editor, create a file with the following contents: PAGE 273
// inspectTag() API function defined (required by all tag editors) function inspectTag(tagNodeObj) { // call into a common library version of inspectTagCommon defined // in tagDialogCmns.js (note that it's been included) // For more information about this function, look at the comments // for inspectTagCommon in tagDialogCmn.js tagDialog.inspectTagCommon(tagNodeObj, theUIObjects); } function applyTag(tagNodeObj) { // call into a common library version of applyTagCommon defined // in tagDialogCmns.
-
| Type: | |