
User Guide

Director Basics 39
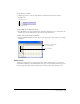
To group a panel with another panel or panel group:
1 Select a panel or tab within a panel group.
2 From the panel’s Options menu, select Group [panel name] With, and then select a panel or
panel group name from the submenu that appears.
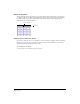
To remove a panel (tab) from a panel group:
1 Select a tab within a panel group.
2 From the panel group’s Options menu, select Group [panel name] With, and then select New
Panel Group from the submenu that appears.
The selected panel opens in its own floating panel.
Note: The New Panel Group submenu option is dimmed if the panel group only contains a single panel.
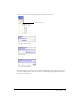
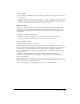
To rename a panel group:
1 Select Rename Panel Group from the panel’s Options menu.
2 In the Rename Panel Group dialog box, enter a new name for the panel in the Panel Group
Name text box, and click OK.
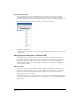
To rearrange the order of tabs within a panel group:
1 Select a tab within a panel group.
2 Select Group [Panel Name] With from the panel group’s Options menu. Then select the name
of the panel group that contains the selected panel.
The tab is moved to the last (right-most) position in the panel group.
Note: Whenever you make changes to your panels, it’s a good idea to save your panel layout. See “Saving panel
layouts” on page 40.
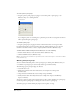
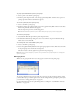
Managing Casts
When casts are grouped with other casts, they appear as tabs in the Cast panel group.
To save the configuration of your Cast panel tabs, you must save the panel layout before closing
your file. When you open the file again, restore the tab configuration by opening the panel layout
you created. See “Saving panel layouts” on page 40.
For more information about Cast panel management, see Chapter 4, “Cast Members and Cast
Windows,” on page 127.