
User Guide


Cast Members and Cast Windows 131
To create a cast member in a media editing window:
1 Open a media editing window by selecting Window and then selecting the type of cast
member you want to create (Paint, Vector Shape, Text, and so on).
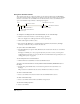
2 Click the New Cast Member button to create a cast member of the corresponding type. The
cast member is added to the most recently active Cast window.
To create a cast member using the Script window:
1 Open the Script window by selecting Window > Script.
2 Click the New Cast Member button to create a script cast member.
To create a cast member on the Stage:
1 Open the Tool palette, if it is not already open, by selecting Window > Tool Palette.
2 Using the tools in the Tool palette, create content directly on the Stage. Each object you create
automatically becomes a cast member.
Note: Cast members created on the Stage are automatically placed in the Score.
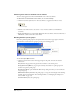
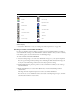
Using the Cast window
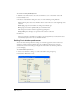
In the Cast window, you can view the cast in either the default List view or the Thumbnail view.
(You can change the default so that the Cast window opens in Thumbnail view. See “Setting Cast
window preferences” on page 140.)
The Cast window lets you do the following actions:
• Organize and display all media in a movie.
• Move groups of cast members.
• Launch editors for cast members.
• Launch the Property inspector to view, add, and change comments about your cast members
and to view and modify cast member properties.
• Group multiple casts in a tabbed view using panel groups (see “Working with Cast panel
groups” on page 132).
To view the Cast window:
• Select Window > Cast or press Control+3 (Windows) or Command+3 (Macintosh).
If there is more than one cast in the movie, you can select which Cast window to open by
selecting Window > Cast and then selecting a cast name from the Cast submenu.
New Cast Member button