
User Guide


Drawing vector shapes 137
To create a vector shape using the Pen tool:
1 In the Vector Shape window, click the New Cast Member button.
2 Click the Pen tool and begin to draw:
■ To create a corner point, click once.
■ To create a curve point, click and drag. Dragging creates control handles that define
how the line curves through the point that you define.
■ To constrain a new point to vertical, horizontal, or a 45° angle, hold down Shift
while clicking.
To draw using a basic shape tool:
1 In the Vector Shape window, click the New Cast Member button.
2 Select the Filled or Unfilled Rectangle, Rounded Rectangle, or Ellipse tool.
3 Hold down the mouse button to start a shape, drag to draw, and release the mouse button
to end the shape.
To constrain a rectangle to a square, or to constrain an ellipse to a circle, hold down Shift
while dragging.
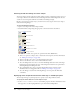
To select a vertex or vertices, do one of the following:
• To select one vertex, select the Arrow tool and click the vertex.
• To select multiple vertices, either select the Arrow tool and hold Shift while clicking the
vertices, or click and drag a selection rectangle over the vertices (marquee-select).
• To select all the vertices in a curve, select the Arrow tool and double-click one of the vertices
in the curve.
To create multiple curves, do one of the following:
• If you use the Pen tool, double-click the last vertex drawn. The next vertex starts a new curve.
• With no vertices selected, use the Pen tool to start a new curve.
• To create two separate curves from one, select two adjacent vertices in a curve and select
Modify > Split Curve.
• If the current shape is empty or closed, select one of the shape tools and draw a new shape.
Note: If you create multiple shapes in the Vector Shape window, Director treats all the shapes as one
if you change shape attributes. If, for example, you create ten open shapes in one Vector Shape
window and select Close, Director closes all ten shapes.