
User Guide

Using Auto Distort 111
To apply color effects to a selected area:
1 Select an area within a bitmap cast member by using either the Marquee or the Lasso tool.
2 Use any of the following effects:
■ To soften the edges of the selected artwork, click the Smooth button. This effect works only
with 8-bit cast members.
■ To reverse the colors of the selected area, click the Invert button.
■ To increase or reduce the brightness of the selected area, click the Lighten Color or Darken
Color button. This effect works on 8-bit (256 color) images only.
■ To fill the selected area with the current foreground color and pattern, click the Fill button.
■ To change all pixels of the foreground color within the selection to the currently selected
destination color, click the Switch Colors button.
Using Auto Distort
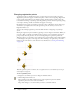
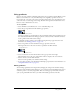
You can use Auto Distort to create animations that show bitmap cast members gradually changing
from frame to frame. Auto Distort generates intermediate cast members for any cast member that
is free-rotated, made into a perspective, slanted, distorted, or skewed.
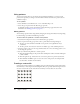
Cast members created with Auto Distort after using the perspective effect.
To use Auto Distort:
1 Select the portion of a bitmap cast member you want to change.
2 Use the Free Rotate, Perspective, Skew, Distort, or Stretch button to change the image.
3 Without deselecting the changed image, select Xtras > Auto Distort.
4 In the Auto Distort dialog box, enter the number of cast members to create and click the
Begin button.
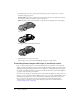
Director generates new cast members with an intermediate amount of change applied to each
one. The new cast members appear in the first available cast positions.