DIRECTOR MX ® 2004 Getting Started with Director
Trademarks Afterburner, AppletAce, Attain, Attain Enterprise Learning System, Attain Essentials, Attain Objects for Dreamweaver, Authorware, Authorware Attain, Authorware Interactive Studio, Authorware Star, Authorware Synergy, Backstage, Backstage Designer, Backstage Desktop Studio, Backstage Enterprise Studio, Backstage Internet Studio, Contribute, Design in Motion, Director, Director Multimedia Studio, Doc Around the Clock, Dreamweaver, Dreamweaver Attain, Drumbeat, Drumbeat 2000, Extreme 3D, Fireworks,
CONTENTS CHAPTER 1: Introduction . ............................................ 7 About Director . . . . . . . . . . . . . . . . . . . . . . . . . . . . . . . . . . . . . . . . . . . . . . . . . . . . 7 What’s new in Director MX 2004 . . . . . . . . . . . . . . . . . . . . . . . . . . . . . . . . . . . . . . 8 Guide to instructional media. . . . . . . . . . . . . . . . . . . . . . . . . . . . . . . . . . . . . . . . . . 9 Getting online help . . . . . . . . . . . . . . . . . . . . . . . . . . . . . . . .
Using the Property inspector . . . . . . . . . . . . . . . . . . . . . . . . . . . . . . . . . . . . . . . . . 27 Controlling your view of the Property inspector . . . . . . . . . . . . . . . . . . . . . . . . 27 Setting cast member and sprite properties. . . . . . . . . . . . . . . . . . . . . . . . . . . . . 28 Setting movie properties . . . . . . . . . . . . . . . . . . . . . . . . . . . . . . . . . . . . . . . . . . 29 Using the Script window . . . . . . . . . . . . . . . . . . . . . . . . . . . . . . .
Create a QuickTime sprite . . . . . . . . . . . . . . . . . . . . . . . . . . . . . . . . . . . . . . . . 61 Specify direct-to-Stage playback for a QuickTime cast member . . . . . . . . . . . . 62 Add custom buttons . . . . . . . . . . . . . . . . . . . . . . . . . . . . . . . . . . . . . . . . . . . . . 62 Import a sound. . . . . . . . . . . . . . . . . . . . . . . . . . . . . . . . . . . . . . . . . . . . . . . . . 64 Add a sound to the Score . . . . . . . . . . . . . . . . . . . . . . . . . . . . . . . .
Contents
CHAPTER 1 Introduction Welcome to Macromedia Director MX 2004. With Director, you can develop high-performance multimedia content and applications for CDs, DVDs, kiosks, and the Internet. This guide, Getting Started with Director, is designed to get you up and running as quickly as possible. It includes installation guidelines for both new and returning users as well as an orientation to Director and tutorials for new users.
Users view your completed Director movies in one of the following ways: • In a projector, which plays on your user’s computer as a stand-alone application. • In the Macromedia Shockwave Player format, which plays in Shockwave-enabled web browsers. Millions of web users already have the Shockwave Player on their computers, browsers, or system software. Others have downloaded Shockwave Player, which is free, from the Macromedia website at www.macromedia.com/shockwave/download/.
Integrating with Macromedia server technologies You can now choose to integrate Director with Macromedia server technologies, such as Macromedia ColdFusion MX 6.1 and Macromedia Flash Communication Server MX. For multi-user games, distance learning content, and other server-controlled content, this link between your Director content and IT infrastructure extends your interactivity options.
To access context-sensitive help, do one of the following: • If you are working in a window, display the Options menu for that window and select Help. • If you are working in a dialog box, click the Help button. Director Help opens and displays a topic that relates to the window or dialog box that you are using.
Director Scripting Reference This manual is available in printable PDF format from the Director Documentation Center at www.macromedia.com/go/director_docs. It provides a complete reference of the Director application programming interfaces (APIs), including both Lingo and JavaScript syntax. Information in the manual is also available in the online Director Help.
Chapter 1: Introduction
CHAPTER 2 Installing and Configuring Director Installing Macromedia Director MX 2004 takes only a few minutes. After installation, you may want to customize Macromedia Director MX 2004 to fit your authoring needs. You can install Xtra extensions to add functionality and set up an Internet connection for remote access to files. You can configure Director immediately after installation, or you can return to configuration at any time.
Installing Director Follow these steps to install Director on either a Windows or a Macintosh computer. On the Macintosh, you need administrator privileges and an administrator password to complete the installation. To install Director on a Windows or a Macintosh computer: 1 Insert the Director CD into the computer’s CD-ROM drive and do one of the following: In Windows, if the installation program does not start automatically, select Run from the Windows Start menu, type d:\setup.
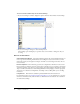
Connecting to the Internet Director can connect to the Internet to import media files and retrieve data. Follow the steps here before you try to connect to the Internet, if you plan to access files remotely while using Director. Use the settings in the Network Preferences dialog box to control how the connection works and to define a preferred browser. To select Internet connection settings: 1 Select Edit > Preferences > Network.
Chapter 2: Installing and Configuring Director
CHAPTER 3 Getting to Know the Workspace The Macromedia Director MX 2004 workspace is designed to make the most efficient use of the space on your screen. Windows, also called panels, can be organized into tabbed panel groups, and panel groups can be docked together. To make the most of the features in Director, you should take a few minutes to understand how to navigate and customize your workspace. As you get to know the workspace, you will also learn about the features that Director has to offer.
The action in a Director movie takes place in a window called the Stage. To create a Director movie, you add cast members (media elements) to the Cast window by creating them in Director or importing them. Next, you place them on the Stage as sprites. A sprite is simply a copy of a cast member that appears on the Stage. Then you refine the actions of the sprites by editing them on the Stage or in the Score.
Getting to know the default workspace When creating and editing a basic movie, you typically work in four of the windows that appear in the default workspace: the Stage, the Score, the Cast window, and the Property inspector. From the Cast window, you import, create, and edit the cast members, or media elements, of your movie. In the Property inspector, you control the properties of the cast members.
To change window preferences: 1 Select Edit > Preferences. 2 Select one of the following commands: General, Score, Sprite, Cast, Paint, Editors, or Script. These commands all open dialog boxes that allow you to modify the behavior of windows. The General command controls windows in general, while the other commands control a specific window or set of windows. (The Network command is also available, but it does not control window preferences. Rather, it controls Internet connection settings.
To move around on the Stage: 1 If the Stage is not already displayed, select Window > Stage. 2 Do one of the following: From the Tool palette, select the Hand tool. ■ Press and hold the Spacebar. 3 Place the hand on the Stage, and click and drag to move the Stage. ■ Increasing or decreasing your view of the Stage You can author in Director on a zoomed Stage—one that is either larger or smaller than the normal size of the movie.
Using the Score Like the Stage, the Score provides a view of your movie. The Stage provides a graphical view, while the Score provides a view of the movie’s timeline. The Stage displays the point in time that is selected within the Score. The Score organizes and controls a movie’s content over time in rows called channels. The Score includes many Sprite channels for the movie’s sprites. Sprite channels are numbered and control when sprites appear in the movie.
To create a new marker: 1 If the Score is not already displayed, select Window > Score. 2 Display the frame that you want to mark with a marker. 3 Directly above the frame that you want to mark, click the white bar in the Marker channel. 4 Select the New Marker text, and type a new name for the marker. A new marker on a frame in the Score To jump to a marker in the Score: 1 On the Marker channel, open the Markers menu. Markers menu 2 Select the name of the marker that you want to jump to.
To show or hide the effects channels: • Click the Hide/Show Effects Channels button in the upper right corner of the Score to change the display. Hide/Show Effects Channels button Setting the number of Sprite channels Although the Score can include as many as 1000 Sprite channels, most movies use as few as possible to improve performance in the authoring environment and during playback. Sprites in higher channels appear on the Stage in front of sprites in lower channels.
To change the zoom setting: 1 On the right side of the Score, click the Zoom Menu button. Zoom Menu button 2 Select a size from the Zoom menu. Sizes are displayed as a percentage of full size. Using the Control panel The Control panel governs how movies play back in the authoring environment. You can jump to specific frames within the movie, control how many frames per second play on the Stage, and change the volume at which sounds play.
Navigating frames in a movie As you build a movie, you sometimes need to check individual frames or examine transitions from one frame to the next. The Control panel allows you to check these details. To step through a movie one frame at a time: • On the Control panel, click the Step Forward button. To go to a specific frame in a movie: • Enter a frame number in the frame counter, and press Enter (Windows) or Return (Macintosh).
To create a new cast member: 1 If the Cast window is not already displayed, select Window > Cast. 2 On the Tool palette, select a text, drawing, or control button. Text, drawing, and control buttons 3 Click the Stage to place the new cast member. The cast member now appears in the Cast window. To import a cast member from an existing media file: 1 If the Cast window is not already in thumbnail view, click the Cast View Style button.
To switch between a list view and a graphical view: 1 If the Property inspector is not already displayed, select Window > Property Inspector. 2 Near the top of the Property inspector, click the List View Mode button. List View Mode button To show more or less information in the Property inspector: • Click the expander arrow in the Property inspector.
To set the properties of a sprite or cast member: 1 Do one of the following: On the Stage or in the Score, select a sprite. In the Cast window, select a cast member. 2 In the Property inspector, change one of the properties. 3 Click the Stage to enter your selection. Then look on the Stage to see the effect of the new property.
DirectX 5.2 specifies the DirectX 5.2 drivers for hardware acceleration that work only with Windows platforms. Software specifies the Director built-in software renderer that works with Macintosh and Windows platforms. Auto specifies that the most suitable renderer should be selected. This option is the default value for this property. Note: If the preferred renderer is not available on the client computer, the movie selects the most suitable available renderer.
By scripting in the Script window, you can accomplish many of the same tasks that you can in the graphical interface of Director—such as moving sprites on the Stage or playing sounds. But much of the usefulness of scripting is in the flexibility that it brings to a movie. Instead of playing a series of frames exactly as the Score dictates, a movie can have scripts that control frame play in response to specific conditions and events.
Using the Message window The Message window supports testing and debugging in Director. These features are especially important as you add script-based interactivity to your movies. Like the Script window, the Message window offers both Lingo and JavaScript syntax. The Message window offers two modes—a standard mode and a trace mode: • In standard mode, you can enter script into the Input pane to test the result before you add it • to the movie.
Most panels or panel groups have a header bar that displays the name and includes the following features: an expander arrow to collapse and expand the panel or panel group, a gripper to dock and undock the panel or panel group, and an Options menu for managing the panel or panel group.
To move a panel to a different panel group: 1 Select a stand-alone panel or a panel within a panel group. 2 From the Options menu, select Group [panel name] With, where [panel name] is the name of the panel that you selected. Note: If Group [panel name] With is not available on the Options menu, then the panel cannot be moved to a new panel group. 3 From the Group [panel name] With menu, do one of the following: ■ ■ To move the panel to an existing tabbed panel group, select a panel group name.
Docking panel groups You can dock stand-alone panels and panel groups in two ways: to each other and to the docking channels. (Docking channels are available only in Windows and cannot be used for docking document windows.) In Windows, the docking channels run along the left and right sides of the application window. The area between these docking channels is called the View Port. Docking is restricted by window type.
Saving panel sets You can save your current workspace layout as a panel set. Later, you can open that panel set to return to the workspace layout. You can manage your workspace by saving multiple panel sets, removing panel sets that you no longer use, and restoring the default panel set. To save a panel set: 1 Select Window > Panel Sets > Save Panel Layout. 2 Name the panel layout, and click OK.
To collapse or expand a panel group: • Click the expander arrow or the panel group’s title in the header bar. Click to expand or collapse a panel To close or collapse a docked collection of panel groups: • If the panel groups are docked to each other, click the Close button in the title bar. • If the panel groups are docked to the docking channel (Windows only), click the arrow in the center of the docking channel’s separator bar.
Adding media Xtra extensions can import media as cast members into Director. Some of these media Xtra extensions are built into Director, such as Macromedia Flash, Vector Shape, and Animated GIF. Other media Xtra extensions come from third-party developers; they can include databases, 3D graphics processors, special types of graphics, and so on. To see which media Xtra extensions are available to add to your movie: • Select Insert > Media Element.
Adding transitions Transition Xtra extensions supply transitions in addition to the predefined transitions that are available in Director. You can access these additional transitions in the same place that you access the standard transitions. To see which transition Xtra extensions are available to add to your movie: 1 Select a frame in the Score. 2 Select Modify > Frame > Transition.
Chapter 3: Getting to Know the Workspace
CHAPTER 4 Building Your First Basic Movie This tutorial takes you through the steps of creating your first movie in Macromedia Director MX 2004. If you are new to using Director, follow this tutorial to learn hands-on how to create a simple interactive movie with animation, sound, and video. The movie is designed to suggest what is possible with Director rather than simulate a fully developed Director project.
View the completed movie Start by viewing a completed version of the tutorial movie to become familiar with how your finished movie should look. 1 Start Director. 2 Select File > Open. 3 Within your Director MX 2004 application folder, browse to Tutorials/Basics/Finished and double-click the Basic_finished.dir file. 4 If windows obscure the Stage, drag them out of the way. 5 To play the movie, click the Play button at the bottom of the Stage.
If the Property inspector is not in graphical view, as shown in the following illustration, click the List View Mode button to switch to the graphical view. Tip: To see the names of buttons (like the List View Mode button), place your mouse pointer over the button. The name of the button appears in a floating box next to the button until you move the mouse. List View Mode button Stage Size arrow 4 Click the Stage Size arrow, and select 500 x 330. The size of the Stage increases.
View your cast members To create a Director movie, you need cast members. Cast members are the objects that appear on the Stage and in the Score. Some of these elements might be text, graphics, sound, video, or scripting behaviors. The movie you create in this tutorial consists of three scenes. Some cast members appear in more than one scene, and some appear in one scene only. First, use the Cast window to view your current set of media. Next, you will begin adding new cast members.
Building the first scene with text and an image Building a scene in Director requires creating or importing the cast members for the scene and placing sprites on the Stage. As you learned in Chapter 3, “Getting to Know the Workspace,” on page 17, sprites are objects that control when, where, and how cast members appear in a movie. You create sprites by placing cast members on the Stage or in the Score.
3 Click the Bold button and the Italic button. The style of the selected text changes from plain to bold and italic. 4 Give the text cast member a name. Click the Cast Member Name text box at the top of the window. Then type TitleText, and press Enter (Windows) or Return (Macintosh). 5 Close the Text window, and save your movie. Add sprites to the Stage To begin building the scene, you drag the TitleText cast member, button cast member, and bitmap cast member from the Cast window to the Stage or Score.
b Click the Forecolor color picker, and select white. c In the X text box, type 15. In the Y text box, type 15, and press Enter (Windows) or Return (Macintosh). The text is placed at precise coordinates on the Stage.
Add sprites to the Score When you place a cast member on the Stage, the sprite is added to both the Stage and the Score. You can also place cast members on the Score. When you place a cast member on the Score, the sprite is added to the Stage as well. 1 Click the Trio cast member in cast slot 6. 2 Drag the Trio cast member to the Score window so that it fills channel 2, just below the TitleText sprite. Make sure that the sprite begins in frame 1 of the Score.
Create a new button cast member Now you are ready to create the second button. Remember that button cast members contain special functionality to automatically highlight when clicked. Creating button cast members in Director is different from creating most other cast members. Cast members are often created in separate windows and then dragged from the Cast window to the Stage. You create a button cast member directly on the Stage, using the Tool palette. You will use the Button tool to create a new button.
5 When you release the mouse button, the rectangle you created becomes an editable text box in which you enter the text that you want to appear on your button. Type Go to Sound and Video in the text box. Note: If the text is too long for your button, you can enlarge the button. Click the button with the Arrow tool selected, and then drag the sizing handle on the right edge of the button to the right. 6 On the Sprite tab of the Property inspector, do the following: In the X text box, type 200.
Edit sprites in the Score window You can shorten or lengthen sprites as needed. To make the Score information for your entire movie easier to read on the screen without scrolling, you will shorten the sprites for scene 1. 1 In the Score window, click the end of the TitleText sprite, and drag it to the left to frame 10.
Change the default length of sprites You can change the default length of sprites that you drag to the Stage and Score by editing the Sprite Preferences. You will now change the default sprite length to 10 frames, which makes it easier to compose a movie that consists only of 10-frame scenes. 1 Select Edit > Preferences > Sprite to open the Sprite Preferences dialog box. 2 In the Span Duration text box, type 10 and click OK.
• From cast slot 4, drag the black background image to channel 1, frame 15 of the Score. When you place a sprite on the Score, Director automatically centers the sprite on the Stage. Name a cast member The background cast member has not yet been named. Naming cast members makes it easier to identify the sprites in the Score. 1 In the Cast window, select the cast member in cast slot 4. 2 In the Cast Member Name text box at the top of the Cast window, type Background.
4 Click the Import button. 5 In the Image Options dialog box, click the OK button. The tire has taken up the first available slot in the Cast window. The new cast member has adopted the file name from “tire.png” as the cast member name. Animate the image to travel up You are now ready to add the tire to the scene and create an animation of it bouncing. You can create the animation effect by placing a sprite of the tire cast member on the Stage and then moving the sprite to a new position in each frame.
Animate the image to travel down You now have an animation of a tire rising off the ground. To animate the tire returning to its starting point, you can use the same method that you used when animating the tire to travel up. But you can also use a shortcut to create a reversed copy of the tire sprite. 1 In the Score, click channel 2 anywhere between frames 16 and 23. 2 3 4 5 The tire sprite that you created previously is selected. Select Edit > Copy Sprites to copy the sprite.
1 In the Score, click channel 1, frame 24 and drag it to frame 34. 2 Scrub the playhead again. This time, the background sprite exists through the whole tire animation. Change the tempo of an animation For the tire animation to be more realistic, the tire should slow as it reaches the top and accelerate as is returns to the ground. You can achieve this effect through a technique called tweening. 1 In the Score, move the playhead to the up phase of the animation (between frames 15 and 24).
10 Scrub the playhead. The tire accelerates as it reaches the bottom. Change the span of an animation It may seem that the tire is bouncing too rapidly. To make the animation run at a slower rate, you can add frames to the animation. You should also keep the separation between the up and down phases of the tire animation near the middle of the animation span. 1 In the Score, click the end frame of the Background sprite in frame 34, and drag it to frame 50.
Add an existing navigation button to the Score To complete the animation scene, you will add navigation buttons. First, you will use the Go to Sound and Video button that you created earlier for scene 1. Then you will create a new button that returns users to the first scene. Later, you will add Lingo to these buttons to make them function. 1 In the Score, click frame 15. 2 From the Cast window, drag the SoundVideo cast member to the lower side of the Stage.
4 At the bottom of the Stage, click the Rewind button, and then click the Play button. The movie plays from beginning to end, flashing scene 1 briefly on the Stage and playing the tire animation once before returning to frame 1 and playing again. 5 If your movie plays only once, turn on looping by selecting Control > Loop Playback. 6 When you finish viewing the movie, click the Stop button at the bottom of the Stage.
4 Click the Import button. The new digital video cast member appears in the Cast window in the first available cast slot. It is named after the imported file. Play the digital video You can view the QuickTime cast member by opening the QuickTime window. This window contains controls for playing the video file but not for editing the video; you cannot edit digital video files in Director. 1 In the Cast window, double-click the walkaround cast member. The QuickTime window opens.
3 When you finish playing the video, close the QuickTime window. Create a QuickTime sprite You are now ready to place the QuickTime sprite on the Stage. The sound and video scene should start in frame 55. 1 In the Score, click frame 55. The playhead moves to frame 55. 2 From the Cast window, drag the walkaround QuickTime cast member to near the top-center of the Stage. The new sprite appears on the Stage and in the Score in channel 1, frames 55 through 64.
Specify direct-to-Stage playback for a QuickTime cast member Director can play QuickTime video using direct-to-Stage playback, which lets the video play at the fastest possible speed. When direct-to-Stage playback is selected for digital video, the video appears in front of all other sprites, regardless of the channel that contains the sprite. To verify that direct-to-Stage playback is selected for the new QuickTime sprite, complete the following steps.
The Pause button’s sprite appears on the Stage and in channel 3, frames 55 through 64, of the Score. 4 In the Cast window, find the Rewind cast member and drag it to the Stage. Place the Rewind button on the Stage underneath the QuickTime sprite, just to the right of the Pause button. The Rewind button’s sprite appears on the Stage and in channel 4, frames 55 through 64 of the Score. 5 In the Score or on the Stage, press the Shift key and click the three buttons.
Import a sound The QuickTime movie has no sound track. You can make the scene more interesting by adding sound to accompany the video. The easiest way to add sound to a Director movie is to import a sound cast member and place it in one of the sound channels in the Score. Whenever the playhead plays frames that include sound sprites, the sound plays. You can also play sounds by using Lingo instead of the sound channels, which you will learn later in this tutorial. 1 Select File > Import.
3 From the Cast window, drag the track1 cast member to frame 55 in sound channel 1 of the Score. The sound is now ready to play when frames 55 to 64 of your movie play. 4 Rewind and play your movie. The playhead moves through the frames of your movie quickly. There is not enough time for the QuickTime sprite or the track1 sound to play through before the playhead reaches frame 64. Later, you will add Lingo to solve this problem.
3 From the Cast window, drag the Animation cast member to the Stage, placing it in the lower right corner of the Stage. The new Animation button sprite appears on the Stage and in frames 55 through 64 in channel 6 of the Score. Because you already selected frame 55 in channel 6, the sprite appears in that location when you drag it to the Stage. If you do not preselect a channel in the Score, the sprite appears in the first available channel in the frame where the playhead is located.
To make the playhead stay in one scene, you loop it in a single frame or a series of frames. For the start scene and the sound and video scene, the playhead can loop in one frame. For the animation scene, where the animation occurs over a series of frames, the playhead should loop over the same series of frames. To control the movement of the playhead without using buttons, you use the Script channel in the Score.
7 At the bottom of the Stage, click the Stop button to stop the movie. The handler that you wrote has three parts: • The first line, on • • exitFrame me, tells Director to run this script when the playhead leaves the frame where the script is located. This is frame 10. The second line, beginning with _movie.go, tells Director to send the playhead back to the current frame. The .frame in (_movie.frame) always refers to the frame number where the playhead is currently located. Again, this is frame 10.
1 In the Score, display frame 15. 2 Click the Marker bar above frame 15. Marker menu Marker bar A new marker appears in the Marker bar in frame 15. The text box next to the new marker contains “New Marker” as placeholder text. 3 In the text box next to the new marker, type Animation, and press Enter (Windows) or Return (Macintosh) to name the marker. Create navigation in Lingo using marker names You can write a script that loops the playhead in frames 15 through 50 using the name of the marker.
Add Lingo to navigation buttons To make the navigation buttons function, you need to add scripts to the buttons. These scripts should be attached to the button sprites, rather than to frames in the script channel. Your frame scripts respond to exitFrame events. After you write the button scripts, they will respond to mouse clicks. You start by adding scripts to the button sprites in the start scene. 1 In the Score, display frames 1 through 10.
Add markers to two additional scenes Your first button is complete. To use similar scripts on the remaining navigation buttons, you can add markers to the start scene as well as the sound and video scene. 1 Display frame 1 of the Score. 2 In the Score, click the marker bar in frame 1, the first frame of the start scene. A new marker appears. 3 In the text box next to the new marker, type Start, and press Enter (Windows) or Return (Macintosh). 4 Display frame 55 of the Score.
1 Make sure that the Cast window and the Score are both open. 2 Display frame 15 of the Score. 3 From the Cast window, drag the GoSndVid script cast member onto the SoundVideo button sprite that appears in frames 15 through 50 of the Score. The script is now attached to this sprite in the same way it is attached to the SoundVideo button sprite in scene 1.
Digital video movies use a timeline instead of a Score. The timing of the video playback is tied closely to the sound track of the video. For example, if the video has a sound track, the timing of the video and sound must remain synchronized during the entire playback of the video. For this reason, digital videos will skip frames if necessary to keep up with the sound track. On slower computers, several frames might be skipped during video playback. This kind of animation is called time-based.
9 Rewind and play your movie. 10 In the start scene, click the Go to Sound and Video button. The movie jumps to the sound and video scene, and the QuickTime sprite begins to play. 11 When the QuickTime sprite finishes playing, click the Rewind button on the Stage. The QuickTime sprite rewinds to the beginning of the video. Add a script that plays the QuickTime sprite When the video is playing normally, the movieRate is 1. You can now add the movieRate property to the Play button.
1 In the Cast window, select the PlayScript cast member. 2 Click the Cast Member Script button near the upper right corner of the window. Cast Member Script button The Script window opens with the Lingo from the PlayScript cast member visible. 3 Place the insertion point at the end of the second line of the handler that reads as follows: sprite(1).movieRate = 1 4 Press Enter (Windows) or Return (Macintosh), and type the following on the new line: sound(1).
Modify the script for the Rewind button You can modify the RewindScript cast member so that the sound stops when the user clicks the Rewind button. 1 In the Cast window, select the RewindScript cast member. 2 Click the Cast Member Script button in the upper right corner of the Cast window. 3 In the Script window, place the insertion point at the end of the third line of the handler that reads as follows: sprite(1).movieRate = 0 4 Press Enter (Windows) or Return (Macintosh).
Publishing your movie In general, you can publish your movie for the web by simply selecting File > Publish. Using default Publish settings, Director creates a Macromedia Shockwave version of your movie, with the Director movie (DCR) extension, in the same directory as your original movie. An HTML page includes the necessary tags to embed the movie. Your browser window opens, and your Shockwave content plays within the browser.
4 From the Basics folder, copy the Start folder and all of its contents to the dswmedia folder on your desktop. 5 From the Basics folder, copy the BasicsMedia folder and all of its contents to the dswmedia folder on your desktop. Note: The Start and BasicsMedia folders must be at the same level within the dswmedia folder for the linked media to play correctly.
Summarizing what you learned By completing this tutorial, you have become familiar with the basic tasks and procedures used to create Director movies.
Chapter 4: Building Your First Basic Movie
INDEX Numerics 3D properties 29 B Behavior channel 22 behaviors, definition of 31 browser, choosing preferred 15 C cache, clearing 15 canvas, definition of 21 Cast definition of 19 metaphor explained 17 cast members compared to sprites 26 creating 27 editing 28 importing 27 types of 26 Cast window, definition of 26 channels definition of 22 naming 8 number of 24 showing and hiding 23 turning on and off 24 clearing cache 15 closing panels and panel groups 36 ColdFusion MX 9 color palette 29 color, selecting
F Flash Communication Server MX 9 Flash MX 2004 8 font maps 30 frames definition of 22 navigating 23, 26 G graphical view mode in Property inspector 28 H help new features 9 online help 9 where to get more information 10 hiding effects channels 23 information in Property inspector 28 windows 19 I importing cast members 27 importing media DVD-Video 8 Flash MX 2004 8 increasing view of Stage 21 index color 29 installation Director software 14 Xtra extensions 14 integration with Macromedia Studio MX 2004 8 Int
panel sets definition of 32 saving, opening, and removing 36 panels closing, opening, and collapsing 36 definition of 32 docking 35 moving between panel groups 34 playhead location of 22 moving 23 playing DVD-Video 8 prebuilt components 8 preferences for windows 20 network 15 number of sprite channels 24 Property inspector changing view of 27 definition of 19, 27 editing cast members and sprites 28 information not appearing in 28 setting 3D properties 29 setting movie properties 29 Proxies option 15 publish
U undocking panels and panel groups 35 V View Port 35 volume, changing 25 W Window menu 20 windows changing preferences 20 displaying and hiding 19 moving between panel groups 34 types of 20 workspace customizing 8, 19, 32 default settings of 19 X Xtra extensions definition of 37 media 38 packaging movies with 39 scripting 38 transition 39 Z zooming Score 24 Stage 21 84 Index