
User Guide


Working with Tables 89
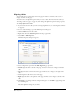
Adding, deleting, and merging table rows and columns
You can modify an existing table by adding or deleting rows or columns. You can also merge cells
to accommodate data.
This section covers the following topics:
• “Adding rows and columns” on page 89
• “Deleting rows and columns” on page 90
• “Merging and splitting cells” on page 91
Adding rows and columns
You can add a single row or column (see “Adding a single row or column” on page 89), or you
can add multiple rows or columns at the same time (see “Adding multiple rows or columns” on
page 90).
Adding a single row or column
You can add a single row or column to a table. To add multiple rows or columns, see “Adding
multiple rows or columns” on page 90.
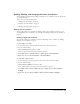
To add a single row in a table:
1 In your draft, place the insertion point in a table cell, or select an entire row.
2 Do one of the following:
• Click the Insert Row button in the toolbar.
A new row appears below the insertion point or selection.
• Select Table > Insert > Insert Row Above or Table > Insert > Insert Row Below.
• Right-click, then select Insert Row Above or Insert Row Below.
To add a single column in a table:
1 In your draft, place the insertion point in a table cell, or select an entire column.
2 Do one of the following:
• Click the Insert Column button in the toolbar.
A new column appears to the right of the insertion point or selection.
• Select Table > Insert > Insert Column to the Left or Table > Insert > Insert Column to
the Right.
• Right-click, then select Insert Column to the Left or Insert Column to the Right.