
User Guide


108 Chapter 7: Working with Images and Graphical Elements
To insert a horizontal rule:
1.
Place the insertion point in your draft where you want the horizontal rule to appear.
2.
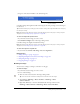
Select Insert > Horizontal Rule.
Contribute inserts the horizontal rule. Content before the insertion point appears above the
line, and content after the insertion point appears below the line.
To delete a horizontal rule:
1.
In your draft, click the horizontal rule to select it.
2.
Press Delete.
Changing the properties of a horizontal rule
You can customize the height, width, and shading applied to a horizontal rule on a page. By
default, a horizontal rule in Contribute is 3 pixels high, expands to the width of the page or table
cell in which it is inserted, and has a small drop shadow (or shading) applied.
For information about adding and deleting horizontal rules to a page, see “Adding and deleting a
horizontal rule” on page 107.
To set horizontal rule properties:
1.
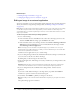
In your draft, click the horizontal rule to select it, and do one of the following:
■ Select Format > Horizontal Rule Properties.
■ Right-click (Windows) or Control-click (Macintosh) the horizontal rule, and then select
Properties.
The Horizontal Rule Properties dialog box appears.
2.
Change options as necessary.
For information about options in the dialog box, click the Help button.
3.
Click OK.
Contribute changes the horizontal rule properties.
Related topics
• “Adding and deleting a horizontal rule” on page 107