
User Guide
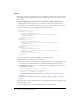

Table Of Contents
- Contents
- Introduction
- Administering ColdFusion MX 7
- Administering ColdFusion MX
- Using the ColdFusion MX Administrator
- Contents
- Initial administration tasks
- Accessing user assistance
- Server Settings section
- Data & Services section
- Debugging & Logging section
- Extensions section
- Event Gateways section
- Security section
- Packaging and Deployment section
- Enterprise Manager section
- Custom Extensions section
- Administrator API
- Data Source Management
- Contents
- About JDBC
- Adding data sources
- Connecting to DB2 Universal Database
- Connecting to Informix
- Connecting to Microsoft Access
- Connecting to Microsoft Access with Unicode
- Connecting to Microsoft SQL Server
- Connecting to MySQL
- Connecting to ODBC Socket
- Connecting to Oracle
- Connecting to other data sources
- Connecting to Sybase
- Connecting to JNDI data sources
- Web Server Management
- Deploying ColdFusion Applications
- Administering Security
- Using Multiple Server Instances
- Administering Verity
- Introducing Verity and Verity Tools
- Indexing Collections with Verity Spider
- Using Verity Utilities
- Contents
- Overview of Verity utilities
- Using the mkvdk utility
- Using the rck2 utility
- Using the rcvdk utility
- Using the didump utility
- Using the browse utility
- Using the merge utility
- Index

76 Chapter 4: Web Server Management
Apache
When you use Apache, you modify the apache_root/conf/httpd.conf file to create virtual hosts and
run the Web Server Configuration Tool. You store ColdFusion pages under the web root of each
virtual website.
To connect multiple Apache virtual hosts on a web server to a single ColdFusion server:
1.
Configure DNS for each virtual website, as described in your web server documentation.
2.
Open the apache_root/conf/httpd.conf file in a text editor and create virtual hosts, as necessary.
For more information, see your Apache documentation. For example:
...
NameVirtualHost 127.0.0.1
<VirtualHost 127.0.0.1>
ServerAdmin admin@yoursite.com
DocumentRoot "C:/Program Files/Apache Group/Apache2/htdocs"
ServerName SERVER02
ErrorLog logs/error.log
</VirtualHost>
<VirtualHost 127.0.0.1>
ServerAdmin admin@yoursite.com
DocumentRoot "C:/Program Files/Apache Group/Apache2/htdocs2"
ServerName mystore
ErrorLog logs/error-store.log
</VirtualHost>
<VirtualHost 127.0.0.1>
ServerAdmin admin@yoursite.com
DocumentRoot "C:/Program Files/Apache Group/Apache2/htdocs3"
ServerName myemployee
ErrorLog logs/error-employee.log
</VirtualHost>
...
3.
Test each virtual host to ensure that HTML pages are served correctly.
4.
Run the Web Server Configuration Tool, as follows:
■ GUI Specify Apache for the Web Server, specify the directory that contains the httpd.conf
file, and select the Configure Web Server for ColdFusion MX Applications check box.
■ Command line Specify -ws apache and the directory that contains the httpd.conf file, as
the following example shows:
cf_root/runtime/bin/wsconfig.exe -ws apache
-dir "c:\program files\apache group\apache2\conf"
-cfwebroot cf_root/wwwroot -coldfusion -v
For additional UNIX command-line examples, see “Using the command-line interface”
on page 69.
The Web Server Configuration Tool updates the httpd.conf file. For a sample, see “Apache”
on page 76.
5.
Restart Apache. You store ColdFusion files for each virtual host in the directory specified by the
DocumentRoot directive.
6.
Test each virtual host to ensure that ColdFusion pages are served correctly.