Getting Started with Flex 2 ® ™ Adobe Flex 2
© 2006 Adobe Systems Incorporated. All rights reserved. Getting Started with Flex 2 If this guide is distributed with software that includes an end-user agreement, this guide, as well as the software described in it, is furnished under license and may be used or copied only in accordance with the terms of such license.
Contents Installing Flex Builder . . . . . . . . . . . . . . . . . . . . . . . . . . . . . . . . . . . . . 7 Installing Flex Builder (stand-alone). . . . . . . . . . . . . . . . . . . . . . . . . . . . . . . 8 Installing Flex Builder (plug-in) . . . . . . . . . . . . . . . . . . . . . . . . . . . . . . . . . . . 9 Installing Flash Player 9 . . . . . . . . . . . . . . . . . . . . . . . . . . . . . . . . . . . . . . . . 10 About Flex Documentation . . . . . . . . . . . . . . . . . . . . . . . . . . . . . . .
Chapter 4: Building a Flex Data Services Application . . . . . . . . . 71 About Flex Data Services . . . . . . . . . . . . . . . . . . . . . . . . . . . . . . . . . . . . . . .71 About Flex Data Management Service. . . . . . . . . . . . . . . . . . . . . . . . . . . 72 About RPC services . . . . . . . . . . . . . . . . . . . . . . . . . . . . . . . . . . . . . . . . . . . 74 About the development environment . . . . . . . . . . . . . . . . . . . . . . . . . . . .
Chapter 11: Use List-based Form Controls. . . . . . . . . . . . . . . . . . 135 Set up your project . . . . . . . . . . . . . . . . . . . . . . . . . . . . . . . . . . . . . . . . . . . .135 Insert and position controls . . . . . . . . . . . . . . . . . . . . . . . . . . . . . . . . . . . .135 Populate the list . . . . . . . . . . . . . . . . . . . . . . . . . . . . . . . . . . . . . . . . . . . . . .138 Associate values with list items . . . . . . . . . . . . . . . . . . . . . . . . . . . . . . . . .
Show language reference Help . . . . . . . . . . . . . . . . . . . . . . . . . . . . . . . . 192 Open a code definition . . . . . . . . . . . . . . . . . . . . . . . . . . . . . . . . . . . . . . . . 193 Chapter 17: Debug an Application . . . . . . . . . . . . . . . . . . . . . . . . 195 Set up your project . . . . . . . . . . . . . . . . . . . . . . . . . . . . . . . . . . . . . . . . . . . 196 Create an MXML file . . . . . . . . . . . . . . . . . . . . . . . . . . . . . . . . . . . . . . . . . .
Installing Flex Builder This topic contains installation instructions for installing Adobe® Flex™ Builder™ 2 (both the stand-alone and plug-in configurations) and Adobe® Flash® Player 9 on Windows and Macintosh. Installation instructions for the entire Flex 2 product family can be found at http://www.adobe.com/go/flex2_installation. Contents Installing Flex Builder (stand-alone). . . . . . . . . . . . . . . . . . . . . . . . . . . . . . . . . . . . . . . . . . 8 Installing Flex Builder (plug-in) . . . . .
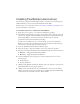
Installing Flex Builder (stand-alone) The stand-alone configuration of Flex Builder includes a customized version of Eclipse, Flex SDK 2, Flash Player 9, and its own Java Runtime Environment (JRE). Read the release notes on the Adobe website at www.adobe.com/go/flex_documentation for the latest information or instructions. To install the stand-alone configuration of Flex Builder: 1. Ensure that you are logged on as a user that has administrative privileges. 2.
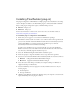
Installing Flex Builder (plug-in) The plug-in configuration of Flex Builder is an Eclipse plug-in that is installed into an existing version of Eclipse. In addition to the Flex Builder plug-in, it includes Flex SDK 2 and Flash Player 9. The plug-in configuration requires a minimum Eclipse version: ■ Windows Eclipse 3.1.1 ■ Macintosh Eclipse 3.2 For the latest information or instructions, see the release notes on the Adobe website at www.adobe.com/go/flex_documentation.
Installing Flash Player 9 You must use Flash Player 9 to run Flex 2 applications. Although the installer automatically installs Flash Player 9, you might need to install a different plug-in or run the stand-alone configuration. To install Flash Player 9 1. Locate the installer you want.
About Flex Documentation Getting Started with Flex 2 provides an introduction to the Adobe® Flex™ 2 product line, and contains a series of lessons designed to teach you the fundamentals of Flex. This manual is intended for application developers who are new to the Flex product line and require an overview of its features and capabilities. Contents Using this manual . . . . . . . . . . . . . . . . . . . . . . . . . . . . . . . . . . . . . . . . . . . . . . . . . . . . . . . . .
Using this manual This manual can help anyone get started with developing Flex applications. After reading this manual, you should read Flex 2 Developer’s Guide for detailed information about Flex features and information about creating Flex applications, and the Using Flex Builder 2 book for information on building applications using the Adobe® Flex™ Builder™ 2 IDE.
Chapter Description Chapter 12, “Use an Event Listener” Shows you how to use an event listener. It shows you how to write one for a Button control, and then how to call your event listener by using two different methods. Chapter 13, “Use Behaviors” Shows you how to add behaviors to a Flex user interface. Chapter 14, “Use View States and Transitions” Shows you how to use view states and transitions to create a user interface that reveals more information when users request it.
Accessing the Flex documentation The Flex documentation is designed to provide support for the complete spectrum of participants. Documentation set The Flex documentation set includes the following manuals: Book Description Getting Started with Flex 2 Contains an overview of Flex features and application development procedures. Using Flex Builder 2 Describes how to build an application using Flex Builder. Flex 2 Developer’s Guide Describes how to develop your dynamic web applications.
1 PART 1 Introducing Flex This part contains an introduction to the the Adobe Flex 2 product line and Adobe Flex Builder. The following chapters are included: Chapter 1: Introducing Flex. . . . . . . . . . . . . . . . . . . . . . . . . . . . . . . . . . 17 Chapter 2: Introducing Flex Builder 2 . . . . . . . . . . . . . . . . . . . . . . . .
CHAPTER 1 Introducing Flex 1 This topic introduces you to the Adobe® Flex™ 2 product line. Flex delivers an integrated set of tools and technology that enable developers to build and deploy scalable rich Internet applications (RIAs). Flex provides a modern, standards-based language supporting common design patterns and includes a client runtime environment, a programming model, a development environment, and advanced data services.
■ Adobe® Flex™ 2 SDK (software development kit) ■ Adobe® Flex™ Builder™ 2 ■ Adobe® Flex™ Data Services 2 ■ Adobe® Flex™ Charting 2 This section contains an overview of the Flex product line and of Flash Player. About Flash Player 9 While Flex applications run in a browser, they take advantage of the Flash Player 9 runtime environment for executing client-side logic, rendering graphics, and playing animation, audio, or video.
■ MXML is an XML language that you use to lay out the user interface for Flex applications. MXML provides tags that correspond to classes in the Flex framework and simplify usage for visual elements such as containers, navigators, and UI controls.
The following example shows the Flex Builder interface in design view: 20 Introducing Flex
The following example shows the Flex Builder interface in code view: About Flex Data Services 2 You build on the functionality of Flex 2 SDK by adding Flex Data Services. Flex Data Services adds enterprise messaging support and a greatly enhanced data services architecture to the Flex 2 SDK. You deploy Flex Data Services as a standard web application on your J2EE application server or servlet container.
These features let you create and deploy enterprise-class applications that take full advantage of the rich presentation layer that the Flex 2 SDK provides. For more information, see “Data Access with Flex Data Services” on page 28. About Flex Charting 2 The ability to display data in a chart or graph can make data interpretation much easier for application users.
Benefits of using Flex Flex lets you build applications that provide an engaging user experience. An engaging user experience ensures that customers are drawn into your application, that they understand how to use it, and that they can more quickly complete a task or find the information they are seeking. Enhanced user experience A complete environment Flex is a powerful application development solution for creating and delivering RIAs within the enterprise and across the web.
Flex application characteristics Many types of applications are appropriate for development in Flex. Some of the requirements of these applications, and how Flex supports these requirements, include the following: Collecting user input is one of the most common uses for web applications. Flex supports forms, and all common form elements, to let you create rich and dynamic user experiences.
Enterprise data applications often handle large data sets that must be transmitted to the client from the server, or transmitted to the server from the client. These large data sets can overwhelm the bandwidth of your network, and lead to sluggish application performance. Flex Data Management Services, a feature of Flex Data Services, lets you break large data sets into smaller units so that no single client can monopolize the network.
Error reporting Lets you direct runtime error and warning messages to a log file. Flash Debug Player can also capture the output of the trace() function and write it to the log file. For more information, see Chapter 11, “Running and Debugging Applications,” in Using Flex Builder 2, and Chapter 11, “Logging,” in Building and Deploying Flex 2 Applications. Debugging support Lets you debug ActionScript files that your Flex applications use.
Data access with HTTPService and WebService The Flex HTTPService and WebService tags let you retrieve data from a remote server. These tags, which are also called remote procedure call (RPC) components, let your application interact with remote servers to provide data to your applications, or for your application to send data to a server.
With Flex 2 SDK, Flash Player provides the platform for interface development so that both client and presentation tier logic executes on the client computer. Flex 2 SDK applications that execute in Flash Player process user interactions; perform data validation; issue HTTP and SOAP requests; and perform other operations previously performed on the server.
This example shows Flex Data Services executing on the application server. Flex applications executing in Flash Player can pass data to and receive data from Flex Data Services. Using the enhanced data services architecture Flex Data Services provide a data services architecture that greatly enhances the services of the Flex 2 SDK.
Summary of Flex application features The following table describes the features that you are most likely to use when building Flex applications: Feature Description User-interface controls Controls are user-interface components, such as Button, TextArea, and ComboBox controls. You use MXML tags to add controls to an application. For more information, see Chapter 9, “Using Controls,” in the Flex 2 Developer’s Guide.
Feature Description Data services Data service objects let you interact with server-side data sources. You can work with data sources that are accessible by using SOAP-compliant web services, Java objects, or HTTP GET or POST requests, and RemoteObjects accessed by using the AMF protocol if you have the Flex Data Services. For more information, see Chapter 39, “Storing Data,” in the Flex 2 Developer’s Guide.
Feature Description Repeaters Repeaters let you dynamically repeat any number of controls or containers specified in MXML tags, at runtime. For more information, see Chapter 26, “Dynamically Repeating Controls and Containers,” in the Flex 2 Developer’s Guide. Image and media importing You can use MXML tags to import several images into applications. Flex supports several formats, including JPEG, PNG, GIF, and SVG images and SWF files.
Where to next This book contains an introduction to Flex and an overview of developing Flex applications. The Flex documentation set contains detailed information about these topics. For more information, see the following: ■ For information on MXML and ActionScript, see Chapter 6, “Using MXML,” on page 85, and Chapter 7, “Using ActionScript,” on page 91. ■ For information on using Flex Builder, see Using Flex Builder 2. ■ For information on using Flex components, see the Flex 2 Developer’s Guide.
Introducing Flex
CHAPTER 2 2 Introducing Flex Builder 2 This chapter introduces you to Adobe® Flex™ Builder™ 2. An integrated development environment (IDE) for developing applications using the Adobe® Flex™ 2 framework and the Flash API, Flex Builder provides you with the tools you need to develop, design, and debug Flex 2 and ActionScript 3.0 applications. Contents About Flex Builder . . . . . . . . . . . . . . . . . . . . . . . . . . . . . . . . . . . . . . . . . . . . . . . . . . . . . . . .
Flex Builder versions and configurations Flex Builder is available in two versions: the standard version and a version that includes the Flex Charting components. (For more information, see “Flex Builder versions” in Using Flex Builder 2.) Each version is available in two configurations: standalone and plug-in. The standalone configuration is a customized packaging of Eclipse and the Flex Builder plug-ins created specifically for developing Flex and ActionScript applications.
Perspectives change automatically to support the task at hand. For example, when you create a Flex project, the workbench switches to the Flex Development perspective; when you start a debugging session, the Flex Builder debugging perspective is displayed when the first breakpoint is encountered. You can also manually switch perspectives yourself by selecting Window > Open Perspective from the main menu. Or, you can use the perspective bar, which is located in the workbench tool bar.
The code editor is contained within the Flex Development perspective, which also includes the supporting Navigator, Problems, and Outline views. When you create a project, Flex Builder switches into the development perspective so you can begin developing your application.
The Flex Development perspective contains the following elements: Allows you to write MXML, ActionScript, and CSS code. Provides code hinting and formatting, a design mode where you can visually define your Flex application layout, complete integration with the Flex Builder debugging tools, and syntax error checking and problem reporting. For more information about using the code editor, see Chapter 9, “Code Editing in Flex Builder” in Using Flex Builder 2.
Problems view Displays syntax and other compilation errors that are detected by the compiler. Since by default the compiler builds your Flex project each time you make a change to it, you get nearly immediate feedback as you write code. For more information about working with the Problems view, see “Using the Problems view” in Using Flex Builder 2. NO TE You can also optionally add the Tasks and Bookmarks views. These views provide additional shortcuts for managing and navigating your code.
Content Assist also provides hinting for any custom MXML components or ActionScript classes that you create yourself and which are part of your project. For example, if you define a custom MXML component and add it to your project, code hints are displayed when you refer to the component in your MXML application. Designing Flex applications in Flex Builder The development perspective has two modes: one for writing code and the other for visually laying out your application.
All of the Flex containers and components are contained in this view and you may select and add them to the design canvas. As you create your own custom components, they will also be displayed in the Components view. Components view You can use Flex Builder to create applications that change their appearance based on the task the user is performing. These user interface transformations are referred to as view states. You create and manage view states in the States view.
The Standard View shows some of the most commonly used general properties for that control or container (such as ID). It also shows common style properties and common layout properties. You must change the properties view to see a list of all the available properties for a container or component. You can select from one of the view buttons to change the properties view. The default selection is the Standard View (indicated by the Standard View command ).
If you select the Alphabetical View command ( ), Flex Builder displays a complete alphabetical list of the container’s or component’s properties. For more information about designing Flex applications in Flex Builder, see Chapter 5, “Building a Flex User Interface” in Using Flex Builder 2.
The Flex Debugging perspective The Flex Debugging perspective contains the tools you need to debug your applications. Like the development perspective, the primary tool within the debugging perspective is the code editor. In the context of debugging your applications, the code editor is used to locate and highlight lines of code that need attention so that you can fix them and continue testing your application.
The Flex Debugging perspective contains the following views: Debug view The Debug view (in other debuggers this is sometimes referred to as the callstack) displays the stack frame of the suspended thread of the Flex application you are debugging. You use the Debug view to manage the debugging process. For example, the Debug view allows you to resume or suspend the thread, step into and over code statements, and so on. The Breakpoints view lists all the breakpoints you set in your project.
The Variables view serves the same purpose as the locals window does in other debuggers. It displays information about the variables in the currently-selected stack frame. Variables view Expressions view The Expressions view serves the same purpose as the watch window does in other debuggers. It is used to monitor a set of critical variables. You can choose the variables you consider critical in the Variables view and add them to and monitor (watch) them in the Expressions view.
Compiling your applications Flex Builder automatically compiles your Flex and ActionScript 3.0 projects into application SWF files whenever changes are made to project resources. For example, when you add new a new file to a project, the project is compiled. You can override this default and instead compile your applications manually, whenever you choose.
For more information, see Chapter 11, “Running and Debugging Applications” in Using Flex Builder 2. More information about Flex Builder This chapter has presented a brief introduction to Flex Builder. Many of the Flex Builder features were skimmed over or excluded. For a much more thorough explanation of the features and uses of Flex Builder refer to the following documentation: Using Flex Builder 2 This user’s guide is available in the Flex Builder help system and in PDF format.
Introducing Flex Builder 2
2 PART 2 Flex Basics This part presents an overview of the products and technologies that comprise the Flex environment. The following chapters are included: Chapter 3: Building a Flex Application . . . . . . . . . . . . . . . . . . . . . . .53 Chapter 4: Building a Flex Data Services Application . . . . . . . . . . 71 Chapter 5: Using Flex Charting Components . . . . . . . . . . . . . . . . . 77 Chapter 6: Using MXML . . . . . . . . . . . . . . . . . . . . . . . . . . . . . . . . . . . .
CHAPTER 3 Building a Flex Application 3 Flex defines a component-based development model that you use to build your applications. To effectively design and build your applications, you should be familiar with this model, and with the steps of the application development and deployment process. This chapter describes the development process that you use to create an applications.
For example, the following figure shows two different Box containers that each contain three Button controls and a ComboBox control: Box container with horizontal layout Box container with vertical layout This figure shows the controls within a horizontal Box (HBox) container. An HBox container arranges its controls horizontally across the Flash Player drawing surface. The figure also shows the controls in a vertical Box (VBox) container. A VBox container arranges its controls vertically.
The data model supports automatic data validation. This means that you can use the Flex validators, such as the ZipCode validator, to ensure that the value in a model field is a valid ZIP code. If the data is invalid, you can display a message to the user so that the user can correct the error.
■ Web application server A web application server, such as JRun, ColdFusion, or PHP, can dynamically generate pages that host your Flex applications. In this case, you can take advantage of the application server’s available tag libraries and processing language to dynamically create a wrapper for your Flex application. However, you must precompile your Flex application before deploying it to this type of server.
7. Add a script to extend a component. 8. Compile your application into a SWF file. NO T E If you have Flex Data Services, you can deploy your application as a set of MXML and ActionScript files. Upon receiving an HTTP request to an MXML file, Flex Data Services compiles your application into a SWF file. For more information, see Chapter 4, “Building a Flex Data Services Application,” on page 71.
The main MXML file contains the tag. For more information, see Chapter 6, “Using MXML,” on page 85. Upon receiving an HTTP request for an MXML file, Flex performs the following steps: 1. Compiles the MXML file to produce a SWF file. 2. Caches the compiled SWF file on the server. 3. Returns the SWF file to the client. Upon subsequent requests to the MXML file, the Flex server determines whether the MXML file has been modified since the previous request.
Relationship of the Flex class hierarchy to MXML and ActionScript Flex is implemented as an ActionScript class library. That class library contains components (containers and controls), manager classes, data-service classes, and classes for all other features. You develop applications using the MXML and ActionScript languages with the class library. MXML tags correspond to ActionScript classes or properties of classes.
One advantage of having predefined layout rules is that your users will soon grow accustomed to them. That is, by standardizing the rules of user interaction, your users will not have to think about how to navigate the application, but can instead concentrate on the content that the application offers. Another advantage is that you do not have to spend time defining navigation and layout rules as part of the design process.
The following example is an MXML application that uses a Button control to trigger a copy of the text from a TextInput control to a TextArea control:
-
Using data binding Flex provides simple syntax for binding the properties of components to each other, or to a data model. In the following example, the value inside the curly braces ({ }) binds the text property of the TextArea control to the text property of a TextInput control. As the user enters text into the TextInput control, it is automatically copied to the TextArea control, as the following example shows:
-
In many Rich Internet Applications, the interface changes based on the task the user is performing. View states let you vary the contents and appearance of a component or application by modifying its base content. View states Transitions Transitions define how a change of view state appears on the screen. You define a transition using the effect classes, in combination with several effects designed explicitly for handling transitions.
-
Many times, the choice depends on your existing applications and how you choose to integrate them with your back end server-side resources. The performance of web services depends greatly on your application server’s underlying implementation of the web services engine, so you should load-test to see how well it performs. For more information, see Chapter 42, “Accessing Server-Side Data,” in the Flex 2 Developer’s Guide.
-
Unlike a set of static HTML pages or HTML templates created using JSP, ASP, or CFML, the files in a Flex application are compiled into a single binary SWF file. Another major difference between a Flex application and a JSP, ASP, or ColdFusion application is that application logic resides in the client-side SWF file.
-
Moving to Flex from an HTML templating environment In contrast to environments like JSP, ASP, and ColdFusion, Flex is not a templating system. MXML files are not templates that contain rules processed on the server to return a filled-in template. Instead, MXML code is compiled into a fully formed client application that is able to process server-side logic, and change what is displayed using its own client-side logic.
-
Using Flex development tools Flex provides the following tools to help you test, debug, and tune your applications during the development process. The following table describes the Flex development tools: Tool Description Flex Builder Flex Builder is an integrated development environment (IDE) for developing applications using the Flex 2 SDK.
-
CHAPTER 4 4 Building a Flex Data Services Application When you use Flex Data Services to develop applications, you take advantage of its enhanced data services architecture. This topic contains an overview of Flex Data Services. Contents About Flex Data Services . . . . . . . . . . . . . . . . . . . . . . . . . . . . . . . . . . . . . . . . . . . . . . . . . . .71 About Flex Data Management Service . . . . . . . . . . . . . . . . . . . . . . . . . . . . . . . . . . . . . . 72 About RPC services. . . . .
-
About Flex Data Management Service The Flex Data Management Service is a Flex Data Services feature that lets you create applications that work with distributed data. This feature lets you build applications that provide data synchronization, data replication, and occasionally connected application services. Additionally, you can manage large collections of data and nested data relationships, such as one-to-one and one-to-many relationships, and use data adapters to integrate with data sources.
-
About the Flex Message Service The Flex Message Service is based on established messaging standards and terminology. The Flex Message Service provides a client-side API and a corresponding server-side message service for creating Flex messaging applications. The Message Service also enables participation in Java Message Service (JMS) messaging. Messaging systems let separate applications communicate asynchronously as peers by passing packets of data called messages back and forth through a message service.
-
Publish-subscribe messaging Flex supports publish-subscribe messaging, also known as topic-based messaging. In Flex Message Service, a topic is synonymous with a message service destination. In publishsubscribe messaging, each message can have multiple consumers. You use this type of messaging when you want more than one consumer to receive the same message.
-
Using RPC service components with the Flex 2 SDK only You can use Flex 2 SDK without Flex Data Services to create applications that call HTTP services or web services directly without going through a server-side proxy service. You cannot use RemoteObject components without Flex Data Services. By default, Flash Player does not allow an application to receive data from a domain other than the domain from which the application was served.
-
The directory structure of a typical Flex-enabled web application looks like the following: Directory Description web_app Contains the WEB-INF directory and all files that must be accessible by the user’s web browser, such as MXML files, JSPs, HTML pages, Cascading Style Sheets, images, and JavaScript files. You can place these files directly in the web application root directory or in arbitrary subdirectories that do not use the reserved name WEB-INF.
-
CHAPTER 5 5 Using Flex Charting Components The ability to display data in a chart or graph can make data interpretation much easier for Flex application users. Rather than present a simple table of numeric data, you can display a bar, pie, line, or other type of chart using colors, captions, and a two-dimensional representation of your data. This topic introduces Flex charts, carting data, and the types of charts that you can create in Flex.
-
A simple chart shows a single data series, where a series is a group of related data points. For example, a data series might be monthly sales revenues, or daily occupancy rates for a hotel. The following chart shows a single data series that corresponds to sales revenue over six months: Another chart might add a second data series. For example, you might include the profits over the same six months.
-
Defining chart data The chart controls all take a dataProvider property that defines the data for the chart. A data provider is a collection of objects, similar to an array. The chart components use a flat, or list-based, data provider, similar to a one-dimensional array. A data provider consists of two parts: a collection of data objects and an API. The data provider API is a set of methods and properties that a class must implement so that a Flex component recognizes it as a data provider.
-
Bar charts You use the BarChart control to represent data as a series of horizontal bars whose length is determined by values in the data. You can use the BarChart control to represent a variety of chart variations, including clustered bars, overlaid stacked, 100% stacked, and high-low areas. A bar chart is essentially a column chart rotated 90 degrees clockwise; therefore, bar charts and column charts share many of the same characteristics. For more information, see “Column charts” on page 81.
-
The following shows an example of a CandlestickChart chart: Column charts The ColumnChart control represents data as a series of vertical columns whose height is determined by values in the data. You can use the ColumnChart control to create several variations of column charts, including simple columns, clustered columns, overlaid stacked, 100% stacked, and high-low. A simple chart shows a single data series, where a series is a group of related data points.
-
HighLowOpenClose charts The HLOCChart control represents financial data as a series of lines representing the high, low, opening, and closing values of a data series. The top and bottom of the vertical line represent the high and low values for the data point, while the left tick mark represents the opening values and the right tick mark represents the closing values. The HLOCChart control does not require a data point that represents the opening value.
-
Pie charts You use the PieChart control to define a standard pie chart. The data for the data provider determines the size of each wedge in the pie chart relative to the other wedges. The following figure shows an example of a pie chart: Flex lets you create doughnut charts out of PieChart controls. Doughnut charts are identical to pie charts, except that they have hollow centers and resemble wheels rather than filled circles.
-
Plot charts You use the PlotChart control to represent data in Cartesian coordinates where each data point has one value that determines its position along the x-axis, and one value that determines its position along the y-axis. You can define the shape that Flex displays at each data point with the data series’ renderer.
-
CHAPTER 6 Using MXML 6 MXML is an XML language that you use to lay out the user-interface for Adobe Flex applications. You also use MXML to declaratively define nonvisual aspects of an application, such as access to server-side data sources and data bindings between user-interface components and server-side data sources. This topic introduces MXML and describes how MXML relates to existing programming standards. Contents Using MXML . . . . . . . . . . . . . . . . . . . . . . . . . . . . . . . . . . . .
-
Writing a simple application Because MXML files are ordinary XML files, you have a wide choice of development environments. You can write MXML code in a simple text editor, a dedicated XML editor, or an integrated development environment (IDE) that supports text editing. Adobe supplies a dedicated IDE called Flex Builder that you can use to develop your applications.
-
About XML encoding The first line of the document specifies an optional declaration of the XML version. It is good practice to include encoding information that specifies how the MXML file is encoded. Many editors let you select from a range of file encoding options. On North American operating systems, ISO-8859-1 is the dominant encoding format, and most programs use that format by default. You can use the UTF-8 encoding format to ensure maximum platform compatibility.
-
MXML tags correspond to ActionScript classes or properties of classes. Flex parses MXML tags and compiles a SWF file that contains the corresponding ActionScript objects. For example, Flex provides the ActionScript Button class that defines the Flex Button control. In MXML, you create a Button control using the following MXML statement: When you declare a control using an MXML tag, you create an instance object of that class.
-
XML standards You write Flex applications in XML documents. XML documents use tags to define pieces of structured information and the relationships between them. In MXML, the tag defines the root of an application. You define the parts of the application in child tags of the tag.
-
HTTP standards Flex provides MXML tags for making standard HTTP GET and POST requests, and working with data returned in HTTP responses. Graphics standards Flex provides MXML tags for using JPEG, GIF, and PNG images in an application. Flex also provides tags for importing SWF files and Scalable Vector Graphics (SVG) files into an application. Cascading Style Sheets standards MXML styles are defined and used according to the W3C Cascading Style Sheets (CSS) standard.
-
CHAPTER 7 Using ActionScript 7 Adobe Flex developers can use ActionScript to extend the functionality of their Flex applications. ActionScript provides flow control and object manipulation features that are not available in strict MXML. This chapter introduces ActionScript and explains how to use ActionScript in an MXML application. For more information on ActionScript, see Programming ActionScript 3.0. Contents About ActionScript . . . . . . . . . . . . . . . . . . . . . . . . . . . . . . . . . . . . .
-
Comparing ActionScript and ECMAScript (JavaScript) ActionScript 3.0 features a full implementation of ECMAScript for XML (E4X), recently standardized as the ECMA-357 specification. Using Flex Builder with ActionScript Flex Builder includes a code editor that is the focal point for Adobe Flex application development in Flex Builder.
-
ActionScript compilation The logic of your Flex application can consist of ActionScript classes, MXML files, SWF files, and external components in the form of SWC components, MXML files, or ActionScript files. The end result of all the input files is a SWF file that is downloaded by Flash Player and played on the client’s machine. You can use ActionScript in code fragments within your MXML files. The Flex compiler transforms the main MXML file and its child files into a single ActionScript class.
-
Using ActionScript in Flex applications When you write a Flex application, you use MXML to lay out the user interface of your application, and you use ActionScript to handle the user interactions with the application. You can use a variety of methods to mix ActionScript and MXML. You can include inline ActionScript in MXML, or supplement a codeless MXML document with an external ActionScript controller class.
-
The following example declares a variable and a function: Using special characters in ActionScript Special characters are any characters that might confuse the XML parser.
Referring to Flex components in ActionScript When you refer to Flex components in ActionScript, the component must have an id property set. You then use the id to refer to that component. For example, you can define a TextArea control in MXML using the tag. To access that component’s methods or properties, use dot syntax. The following example sets the value of the text property of the TextArea named ta1: PAGE 97Creating ActionScript components You create reusable components using ActionScript, and reference these components in your Flex applications as MXML tags. Components created in ActionScript can contain graphical elements, define custom business logic, or extend existing Flex components. They can inherit from any components available in Flex. Defining your own components in ActionScript has several benefits.
In this example, you first define the cmp namespace that defines the location of your custom component in the application’s directory structure. You then reference the component as an MXML tag using the namespace prefix. For more information, see Creating and Extending Flex 2 Components.
3 PART 3 Lessons This part contains an a series of lessons designed to teach you the fundamentals of Flex. You can do all of the lessons, or only the ones that interest you. Chapter 8: Create Your First Application . . . . . . . . . . . . . . . . . . . . 101 Chapter 9: Retrieve and Display Data . . . . . . . . . . . . . . . . . . . . . . . 107 Chapter 10: Create a Constraint-based Layout . . . . . . . . . . . . . . . 121 Chapter 11: Use List-based Form Controls . . . . . . . . . . . . . . . . . . .
CHAPTER 8 8 Create Your First Application This lesson shows you how to compile and run a simple Flex application with Adobe Flex Builder. This lesson also introduces you to the concept of Flex Builder projects and shows you how to create projects. In Flex Builder, all Flex applications are contained within projects. In this tutorial, you’ll complete the following tasks: Create the Lessons project . . . . . . . . . . . . . . . . . . . . . . . . . . . . . . . . . . . . . . . . . . . . . . . .
4. In the Project Contents area, make sure the Use Default Location option is selected. The default location for your project files is in the following folder: Windows: C:\Documents and Settings\user_name\My Documents\Flex Builder 2 Macintosh: \Users\user_name\Documents\Flex Builder 2 Flex Builder will create the Lessons folder in that location for you. The following example shows the New Flex Project wizard: 5. Click Finish. Flex Builder creates a new project and displays it in the Navigator view.
The New Flex Project wizard automatically generates project configuration files, the output (bin) folder where your compiled SWF file will be placed, and the main application file, Lessons.mxml. 6. Ensure that the automatic build option is enabled in Flex Builder. This option is enabled by default in the standalone configuration of Flex Builder but not in the plug-in configuration. To enable it, select Project > Build Automatically.
When you create a project, Flex Builder creates a main application file and names it based on the project name. An application file is an MXML file with an parent tag. Your project can have several application files, but the main application file is the file Flex Builder compiles into the application SWF file during builds. You can designate another application file as the main application file to be built, but it’s good practice to have only one application file per project.
The final application should look like the following: TIP 5. You can preview your layout by clicking the Design button in the document toolbar (see the image in step 2). Save the file.
A browser opens and runs the application. N OT E 7. The browser must have Flash Player 9 installed to run the application. You have the option of installing Flash Player 9 in selected browsers when you install Flex Builder. To switch to a browser with Flash Player 9, in Flex Builder select Window > Preferences > General > Web Browser. Click the “Welcome to Flex!” text to see the WipeRight effect.
CHAPTER 9 9 Retrieve and Display Data To provide data to your application, Adobe Flex includes components designed specifically for interacting with HTTP servers, web services, or remote object services (Java objects). These components are called remote procedure call (RPC) service components. Unlike web applications built with Adobe ColdFusion, PHP, or similar server technologies, Flex applications cannot connect directly to a database. They interact with data using services.
Set up your project Before you begin this lesson, perform the following tasks: ■ If you have not already done so, create the Lessons project in Adobe Flex Builder. For more information, see “Create the Lessons project” on page 101. ■ Ensure that the automatic build option is enabled in Flex Builder. This option is enabled by default in the standalone configuration of Flex Builder but not in the plug-in configuration. To enable it, select Project > Build Automatically.
1. With your Lessons project selected in the Navigator view, select File > New > MXML Application and create an application file called BlogReader.mxml. NO T E For the purpose of these lessons, several application files are used in a single Flex Builder project. However, it’s good practice to have only one MXML application file per project. 2. Designate the BlogReader.
■ Y: 225 The layout should look like the following: 9. Switch to the editor’s Source mode by clicking the Source button in the editor’s toolbar. The BlogReader.mxml file should contain the following MXML code: PAGE 11110. Save the file, wait until Flex Builder finishes compiling the application, and then click the Run button in the toolbar to start the application. If you’re using the plug-in configuration of Flex Builder, select Run > Run As > Flex Application. A browser opens and runs the application. NO T E The browser must have Flash Player 9 installed to run the application. You have the option of installing Flash Player 9 in selected browsers when you install Flex Builder.
Insert a HTTPService component For the blog reader in this lesson, you retrieve posts from Matt Chotin’s blog at http:// www.adobe.com/go/mchotinblog on a news aggregator website. Matt is a product manager on the Flex team and writes about Flex in his blog. You can use the HTTPService component to access the blog’s XML feed and retrieve information about recent posts. The component lets you send an HTTP GET or POST request, and then retrieve the data returned in the response. 1.
3. In the tag, replace the value of the title property (“Blog Reader”) with the following binding expression (in bold): title="{feedRequest.lastResult.rss.channel.title}" This expression binds the title field to the Panel control. The expression reflects the structure of the XML. When XML is returned to a HTTPService component, the component parses it into an ActionScript object named lastResult. The structure of the lastResult object mirrors the structure of the XML document.
Some nodes have child nodes containing data, including the “title” child node of the channel node. The lastResult object of the HTTPService component (feedRequest.lastResult) reflects this structure: feedRequest.lastResult.rss.channel.title Your code should look like the following example: PAGE 115Populate a DataGrid control In your application, you want the DataGrid control to display the titles of recent posts and the dates they were posted. 1. In Source mode, enter the following dataProvider property (in bold) in the tag: You want the XML node named item to provide data to the DataGrid control. This node is repeated in the XML, so it will be repeated in the DataGrid. 2.
The final application should look as follows: PAGE 117A browser opens and runs the application. Blog titles and dates should appear in the DataGrid control, confirming that the application successfully retrieved data from the RSS feed and populated the control. Display a selected item When the user selects a post in the DataGrid control, you want the application to display the first few lines of the post in the TextArea control. In the item node of the XML feed, this information is contained in a field called description. 1.
For each selected item in the DataGrid component (named dgPosts), the value of the description field is used for the value of the htmlText property. The htmlText property lets you display HTML formatted text. 2. Save the file, wait until Flex Builder finishes compiling the application, and click the Run button in the toolbar. A browser opens and runs the application. Click items in the DataGrid control. The first few lines of each post should appear in the TextArea control.
You decide to create a dynamic link that opens a browser and displays the full content of the post selected in the DataGrid. 1. In Source mode, change the click property in the tag so that the application source looks like the following: PAGE 1202. Save the file, wait until Flex Builder finishes compiling the application, and click the Run button. A browser opens and runs the application. Click an item in the DataGrid control and then click the Read Full Post link. A new browser window should open and display the blog page with the full post. In this lesson, you used an RPC service component called HTTPService to retrieve data from an RSS feed, and then you bound the data to a Label, DataGrid, TextArea, and LinkButton control.
CHAPTER 10 10 Create a Constraint-based Layout This lesson shows you how to create a constraint-based layout with Adobe Flex Builder. A constraint-based layout ensures that the components in your user interface adjust automatically when a user resizes the application window. NO T E You can achieve the same behavior using nested layout containers. For more information, see Chapter 15, “Using Layout Containers” in Flex 2 Developer’s Guide.
Learn about constraint-based layouts in Flex When a user resizes a Flex application window, you want the components in your layout to adjust automatically. A constraint-based layout adjusts the size and position of components when the user resizes the application window. To create a constraint-based layout, you must use a container with a layout property set to absolute (layout="absolute").
2. Designate the Layout.mxml file as the default file to be compiled by right-clicking (Control-click on Macintosh) the file in the Navigator view and selecting Set As Default Application from the context menu. 3. In the MXML editor’s Design mode, add a Label and TextInput control to the Layout.mxml file by dragging them from the Components view (Window > Components).
4. Use the pointer to position the Label and TextInput controls side-by-side about 60 pixels (two centimeters) from the top of the container. 5. In the Flex Properties view, expand the Common and the Layout categories of properties. TI P You may need to collapse the States view to see the Layout category. Options for setting the common and layout properties appear. If you see a table of properties instead of the previous view, click the Standard View button in the view’s toolbar.
6. 7. 8. Select the Label control in the layout and set the following Label properties in the Flex Properties view: ■ Text: Email ■ X: 20 ■ Y: 60 Select the TextInput control in the layout, and set the following TextInput properties: ■ X: 90 ■ Y: 60 ■ Width: 300 Switch to the MXML editor’s Source mode by clicking the Source button in the document toolbar. The Layout.mxml file should contain the following MXML code: PAGE 126You can preview the layout by clicking the Design button in the toolbar. The layout should look similar to the following example: 10. Save the file. Flex Builder compiles the application.
11. Click the Run button in the toolbar. If you’re using the plug-in configuration of Flex Builder, select Run > Run As > Flex Application. A browser opens and runs your small Flex application. N OT E The browser must have Flash Player 9 installed to run the application. You have the option of installing Flash Player 9 in selected browsers when you install Flex Builder. To switch to a browser with Flash Player 9 in Flex Builder, select Window > Preferences > General > Web Browser.
12. Drag the edges of the browser window to make the application bigger and smaller. The components maintain their position relative to the left and top edges of the window, but they don’t stretch or compress as you resize the browser window. For example, if you make the window too narrow, the Send button disappears, and the TextInput and TextArea controls are clipped. NO TE When content is clipped, Flex automatically provides users with a vertical or horizontal scrollbar to access the content.
2. In the Flex Properties view, ensure that the Layout category of properties is expanded. The Layout category contains options for setting anchors. 3. Define the layout constraints for the TextInput control by selecting the left and right anchor check boxes in the view, and then specifying 90 as the distance to maintain from the left window edge and 60 as the distance to maintain from the right edge, as follows: The two check boxes anchor the TextInput control to the left and right edges of the window.
These constraints are expressed as follows in the MXML code: 4. In the editor’s Design mode, select the TextArea control in the layout and, in the Flex Properties view, select the four corner check boxes and specify the following distances to maintain from the edges: ■ Left: 90 ■ Right: 60 ■ Top: 90 ■ Bottom: 190 The Layout category in the Flex Properties view for the TextArea control should look as follows: 5.
6. Save the file, wait until Flex Builder finishes compiling the application, and then click the Run button in the toolbar. A browser opens and runs your small Flex application. 7. Drag the edges of the browser window to make the application bigger and smaller. For example, if you make the window narrower, the Send button moves to the left and the TextInput and TextArea text boxes become narrower.
If you make the browser window wider, the Send button moves to the right and the TextInput and TextArea text boxes become wider. If you make the window taller, the Send button moves down and the TextArea becomes taller.
In this lesson, you learned how to create a constraint-based layout with Flex Builder. The following table summarizes the anchors to set for obtaining certain layout effects when the user resizes the application window.
Create a Constraint-based Layout
CHAPTER 11 11 Use List-based Form Controls You can use list-based form controls such as a ComboBox, List, or HorizontalList in your Adobe Flex applications. After inserting this kind of control, you must populate it with items to display and values to submit for processing. In Flex, the controls are populated by data providers, which are collections of objects similar to arrays. This lesson shows you how to populate list-based form controls with items to display and values to process.
1. With your Lessons project selected in the Navigator view, select File > New > MXML Application and create an application file called ListControl.mxml. NO T E For the purpose of these lessons, several application files are used in a single Flex Builder project. However, it’s good practice to have only one MXML application file per project. 2. Designate the ListControl.
The layout should look like the following example in Design mode: 7. Switch to the editor’s Source mode by clicking the Source button in the document toolbar. The ListControl.mxml file should contain the following MXML code: PAGE 138A browser opens and runs your small Flex application. N OT E 9. The browser must have Flash Player 9 installed to run the application. You have the option of installing Flash Player 9 in selected browsers when you install Flex Builder. To switch to a browser with Flash Player 9, in Flex Builder select Window > Preferences > General > Web Browser. Click the ComboBox control in the browser. The control doesn’t list any items because you haven’t defined its data provider yet.
1. In the editor’s Source mode, enter the tag between the opening and closing tag, as the following example shows: PAGE 140If you want to access the value of the selected item in the ComboBox control, you can use the following expression in your code: cbxRating.value In this example, the value property of the ComboBox control (cbxRating.value) could contain Satisfied, Neutral, or Dissatisfied. 4. To test the control, insert the following tag after the tag in the ListControl.mxml file: The resulting application should look like the following:
To do this, you populate the ComboBox control with an array of Object components. The tag lets you define a label property that contains the string to display in the ComboBox, and a data property that contains the data that you want to associate with the label. 1. In the editor’s Source mode, replace the three tags with tags, as the following example shows: PAGE 142Use List-based Form Controls
CHAPTER 12 12 Use an Event Listener When you develop Adobe Flex applications, event handling is one of the most basic and important tasks. Events let you know when something happens within a Flex application. They can be generated by user devices such as the mouse and keyboard, or other external input such as the return of a web service call.
Set up your project Before you begin this lesson, ensure that you perform the following tasks: ■ If you have not already done so, create the Lessons project in Adobe Flex Builder. For more information, see “Create the Lessons project” on page 101. ■ Ensure that the automatic build option is enabled in Flex Builder. This option is enabled by default in the standalone configuration of Flex Builder but not in the plug-in configuration. To enable it, select Project > Build Automatically.
5. Arrange the controls so that the layout is similar to the following example: 6. Select the first Label control and enter Price in Dollars as the value of its text property in the Flex Properties view. 7. Select the TextInput control and enter txtPrice as the value of its id property. 8. Select the Button control and set the following properties: 9.
11. Switch to Source mode and examine the code generated by Flex Builder. Your code should look as follows (your coordinate values may vary): PAGE 147The keyword public specifies the function’s scope. In this case, the function is available throughout your code. The keyword void specifies the function’s return type. All ActionScript functions should specify a return type. The convertCurrency function returns no value. The price entered by the user, txtPrice.text, is cast as a number and then validated to make sure the user entered a number.
2. Save the file, wait until Flex Builder compiles the application, and click Run in the toolbar. If you’re using the plug-in configuration of Flex Builder, select Run > Run As > Flex Application. A browser opens and runs the application. 3. Enter a price and click the Convert to Yen button. The Label control below the TextInput control displays the price in yen.
4. Enter the following function immediately before the convertCurrency function in the tag: public function createListener():void { btnConvert.addEventListener(MouseEvent.CLICK, convertCurrency); } When the user clicks the btnConvert button, the convertCurrency event listener is notified that a triggering event has occurred. The listener function performs the currency calculation and displays the results. The script block should look as follows:
-
The final application should look like the following:
-
CHAPTER 13 13 Use Behaviors Adobe Flex behaviors let you add animation and motion to your application in response to user or programmatic action. A behavior is a combination of a trigger paired with an effect. A trigger is an action, such as a mouse click on a component, a component getting focus, or a component becoming visible. An effect is a visible or audible change to the target component that occurs over a period of time, measured in milliseconds.
-
Create a behavior You decide to create a behavior so that a button glows when a user clicks it. You want the glow to be green, last one and a half seconds, and leave the button a pale green to indicate it was clicked. 1. With your Lessons project selected in the Navigator view, select File > New > MXML Application and create an application file called Behaviors.mxml. NO TE For the purpose of these lessons, several application files are used in a single Flex Builder project.
-
6. In the Properties view, click the Category View button in the toolbar to view the properties as a table, and then locate the Effects category of properties. This category lists the triggers for the Button control. 7. Assign your Glow effect to the mouseUpEffect trigger by entering the effect’s ID in curly braces as the value of the trigger, as follows: ■ mouseUpEffect: {buttonGlow} The curly braces ({ }) are necessary because effects are assigned to their triggers using data binding.
-
Flex Builder compiles the application. 9. Click the Run button in the toolbar. If you’re using the plug-in configuration of Flex Builder, select Run > Run As > Flex Application. A browser opens and runs your small Flex application. Click the View button. It should emit a green glow that gradually diminishes in intensity until it becomes a pale green. Invoke an effect from a different component Instead of component triggers, you can use Flex events to invoke effects.
-
2. ■ X: 40 ■ Y: 100 Switch to Source mode and define your Blur effect by entering the following tag after the tag: The tag properties specify the starting and ending amounts of vertical and horizontal blur. 3. In the tag, specify the Label control called myLabel as the target of the effect (in bold): PAGE 156
The Behaviors.mxml file should contain the following MXML code: PAGE 157
Create a composite effect You can make the Label component move down by 20 pixels while the numbers come into focus. In other words, you can combine your Blur effect with a Move effect. Flex supports combining more than one effect to create a composite effect. You define a composite effect with either the tag or the tag, depending on whether you want the combined effects to play in parallel or sequentially.
-
6. Save the file. The final application should look like the following: PAGE 159
CHAPTER 14 14 Use View States and Transitions You can use view states and transitions in Adobe Flex to create richer, more interactive user experiences. For example, you can use view states to create a user interface that changes its appearance based on the task the user is performing. A view state is a named layout that you define for a single MXML application or component.
-
Set up your project Before you begin this lesson, ensure that you perform the following tasks: ■ If you have not already done so, create the Lessons project in Adobe Flex Builder. See “Create the Lessons project” on page 101. ■ Ensure that the automatic build option is enabled in Flex Builder. This option is enabled by default in the standalone configuration of Flex Builder but not in the plug-in configuration. To enable it, select Project > Build Automatically.
-
5. 6. 7. 8. 9.
-
The layout should look similar to the following example: 10. Switch to the editor’s Source mode by clicking the Source button in the document toolbar. The ViewStates.mxml file should contain the following MXML code: PAGE 163
11. Save the file, wait until Flex Builder compiles the application, and click the Run button in the toolbar. If you’re using the plug-in configuration of Flex Builder, select Run > Run As > Flex Application. A browser opens and runs the application. N OT E The browser must have Flash Player 9 installed to run the application. You have the option of installing Flash Player 9 in selected browsers when you install Flex Builder.
-
Design a view state The sample application provides a simple search mechanism that meets the needs of most users. However, some users might prefer to have more search options. You can use view states to provide these options on request. 1. In Design mode, click the New State button in the States view (Window > States). The New State dialog box appears. 2. Enter Advanced in the Name text box and click OK. The new state appears in the States view.
-
You can use the layout tools in Flex Builder to make changes to the appearance of the new state. You can modify, add, or delete components. As you work, the changes describing the new state are recorded in the MXML code. 3. 4.
-
8. Switch to Source mode and examine the code. Flex Builder inserted a tag after the opening tag, so that the application appears as follows: PAGE 167
9. Save the file, wait until Flex Builder compiles the application, and click Run in the toolbar. A browser opens and runs the application. Your application does not display the controls you inserted in the new view state. By default, Flex applications display only the base state. You must define how users can switch view states, typically by clicking specific controls.
-
Define how users switch view states You want to design your application so that when the user clicks the Advanced Options link, the layout switches to the Advanced view state with the extra search options. When the user clicks the link again, the layout switches back to the base state and hides the options. To do this, you need to define click event handlers to switch the states. 1. In Design mode, select the base state in the list in the States view.
-
4. Select the LinkButton control in the layout of the Advanced view state, and then specify the following click property in the Flex Properties view: currentState='' Specify an empty string (two single quotes with no space between them) as the value of currentState. An empty string specifies the base state, so when the user clicks the LinkButton control in the Advanced view state, the base state is restored. If you change to Source view, you will notice that Flex Builder added an tag to the application.
-
5. Save the file, wait until Flex Builder finishes compiling the application, and click the Run button in the toolbar. A browser opens and runs the application. 6. Click the LinkButton control to view the advanced search options. The application displays the three check boxes you defined in the Advanced view state. The check boxes immediately appear on the screen. 7. 170 Click the LinkButton control again to restore the base state, which hides the advanced search options.
-
Create a transition When you change the view states in your application, the check boxes immediately appear on the screen. You can define a Flex transition that uses the WipeDown and Dissolve effects, which make the check boxes appear gradually rather than immediately. 1.
-
The completed application should look like the following example: PAGE 173
5. Click the LinkButton control to view the advanced search options. The WipeDown and Dissolve effects play simultaneously, causing the advanced search options to appear gradually from top to bottom. In this lesson, you used view states and transitions to create a more flexible user interface that provides users with more options on request.
-
Use View States and Transitions
-
CHAPTER 15 15 Create a Custom Component Creating custom MXML components can simplify the process of building complex applications. By breaking down the application into manageable chunks, you can write and test each component independently from the others. You can also reuse a component in the same application or in other applications, which saves development time. This lesson shows you how to build an MXML component visually with Adobe Flex Builder and then how to insert it in an MXML application file.
-
Create a test file for the custom component You decide to build a login box as a custom MXML component. Before you start, however, you need to create an MXML application file to test it. An MXML application file is an MXML file that contains the root tag. You can’t compile and run an MXML component on its own; you must instead compile and run an MXML application file that uses the component. In this section, you create an MXML application file to test your custom component. 1.
-
The layout should look similar to the following: 5. Save the file. Now you can build and test your custom component. Create the custom component file The first step to building a custom MXML component is to create the file. Most custom components are derived from existing components. For your new login box component, you decide to extend the MXML Panel component because it provides a basic user interface for a login form.
-
3. With the myComponents folder still selected in the Navigator view, select File > New > MXML Component. The New MXML Component dialog box appears with the Lessons/myComponents folder set as the default folder for new custom components. 4. In the File Name text box, enter LoginBox. The filename also defines the component name. 5. In the Based On pop-up menu, select Panel. You want to extend the Panel component. 6. In the Layout pop-up menu, make sure Absolute is selected (it should be the default).
-
If you switch to Design mode, the component also appears in the Custom category of the Components view: If you save a custom component file in the current project or in the source path of the current project, Flex Builder displays the component in the Components view so that you can rapidly insert it in your applications. N OT E The Components view only lists visible custom components (components that inherit from UIComponent). For more information, see the Adobe Flex 2 Language Reference.
-
6. Select the second Label control and enter Password as the value of its text property. 7. Select the first TextInput control and enter txtUID as the value of its id property. 8. Select the second TextInput control and enter txtPwd as the value of the ID text box and true as the value of the Display As Password text box. 9. Insert a Button control below the second TextInput control and enter Login as the value of its label property. 10.
-
This section describes how to define a simple event listener for the Login button. An event listener is also known as an event handler. For a lesson on event listeners, see Chapter 12, “Use an Event Listener,” on page 143. NO TE Developing the user authentication logic for the listener is outside the scope of this lesson. First, you insert and modify a Label control to test that the event listener is called properly. 1.
-
6. Enter the following code in the CDATA construct: private function handleLoginEvent():void { lblTest.text = "logging in..."; //login logic } In a real application, the handleLoginEvent function would reference or contain the logic for validating and submitting the login entries for authentication. Developing the logic for the handler is outside the scope of this lesson. The keyword private specifies the function’s scope. In this case, the function is available only within the component.
-
2. Locate the LoginBox component in the Custom category of the Components view. 3. Drag the LoginBox component into the panel in the layout. Flex Builder inserts and renders the custom component in your layout like any other component. 4. With the LoginBox component still selected in the layout, set the following properties in the Properties view: ■ X: 20 ■ Y: 20 Flex Builder displays the properties of the custom component in the Properties view like any other component.
-
The layout should look similar to the following example: 5. Switch to MXML editor’s Source mode by clicking the Source button in the editor’s toolbar. Flex Builder inserted code in your application so that it looks like the following: PAGE 185
A browser opens and runs the application. The application displays the LoginBox component you inserted in the main application file. You can reuse the same component in multiple MXML files. Click the Login button to verify that the event listener is called properly. The string “logging in...” should appear to the left of the Login button. In this lesson, you created a custom MXML component visually, and then used it in an MXML application file.
-
Create a Custom Component
-
CHAPTER 16 16 Use the Code Editor This tutorial walks you through some of the essential code editing features in Adobe Flex Builder 2. Most of these features are available in both the MXML and ActionScript editors and learning how to use them will help to streamline your application development in Flex Builder. For detailed information about the Flex Builder code editing features, see Chapter 9, “Code Editing in Flex Builder” in Using Flex Builder 2.
-
Set up your project Before you begin this lesson, perform the following tasks: ■ If you haven’t already done so, create the Lessons project in Flex Builder. For more information, see “Create the Lessons project” on page 101. ■ Ensure that the automatic build option is enabled in Flex Builder. This option is enabled by default in the standalone configuration of Flex Builder but not in the plug-in configuration. To enable it, select Project > Build Automatically.
-
When you begin entering an MXML tag, code hints are immediately displayed, as shown here: 2. Type the word panel and you’ll see that the list of options is reduced to display only those that contain the characters you have typed. Once you’ve entered the word panel, the Panel component is the only option displayed and you can press Enter to add it to your code. 3. To add attributes to the Panel component, press the Spacebar and code hints are once again displayed.
-
Show line numbers To more easily locate lines of code, you can display line numbers in the editor. ■ With the CodeEditor.mxml file open in the editor, right-click (Control-click on Macintosh) in the left margin of the editor and select Show Line Numbers, as shown here: Line numbers are displayed in the editor. Add a code comment You can quickly add a comment or convert a block of your code into a comment, using a code editor keyboard shortcut. 1.
-
Use the Outline view You use the Outline view to inspect the structure of and navigate to elements of your code. 1. Select and open the CodeEditor.
-
4. A quick way to locate and navigate to elements in the Outline view is to select the view and begin typing the name of an MXML component. Switch to the MXML view and then type button. The Button component is highlighted in the view and in the code editor. Use the Quick Outline view in the code editor Within the code editor itself, you can use the Quick Outline view, which you can access as you’re entering code in the editor. ■ Place the cursor anywhere within the code editor and press Control+O.
-
Open a code definition To help simplify navigating to, inspecting, and modifying the various elements of your code that are located outside the document you are currently editing, you can open the source of an external code definition from where it is referred to in your code. 1. In the sample code contained in the CodeEditor.mxml file, select the Label component and press F3. 2.
-
Use the Code Editor
-
CHAPTER 17 17 Debug an Application This lesson shows you the basic steps of debugging your applications in Adobe Flex Builder. The debugging tools help you to monitor the state of your application when errors occur. You can then step line by line through your code, executing each line to inspect and change the value of local variables, method parameters, and component properties. In this lesson, you’ll complete the following tasks: Set up your project . . . . . . . . . . . . . . . . . . . . . . . . . . .
-
Set up your project Before you begin this lesson, perform the following tasks: ■ If you haven’t already done so, create the Lessons project in Flex Builder. For more information, see “Create the Lessons project” on page 101. ■ Ensure that the automatic build option is enabled in Flex Builder. This option is enabled by default in the standalone configuration of Flex Builder but not in the plug-in configuration. To enable it, select Project > Build Automatically.
-
Preview the application in design view The sample code you entered creates a simple currency converter that demonstrates the basic features of debugging applications in Flex Builder. To see what the sample application looks like, select the code editor’s Design mode. This simple application will calculate the exchange rate from one currency to another and display the conversion value.
-
Add a calculation function An ActionScript function is used to capture the input from these controls, and calculate the exchange rate. 1. In the MXML editor's Source mode, enter the following public variable and function, so that your application looks like the following: PAGE 199
This code sample purposely contains a logic error, which will help demonstrate how debugging works. Run and test the application Once you’ve entered the sample code, you can run and test the application. 1. Save the file and then click the Run command ( opens in a web browser. ) on the main toolbar. The application 2. To test the application, enter 100 as the amount, select US Dollars from the combo box control and then click the Calculate button.
-
Set a breakpoint To debug the problem, you can set a breakpoint on the line of code to suspend the application so that you can inspect the function. Hitting a breakpoint activates the debugging perspective. 1. In the code editor, locate the line of code that contains the Button control. You’ll see that the Button control’s Click event is bound to the calculate function. Since this is where the function is called, this is where you set the breakpoint.
-
Debug the sample application Debugging an application means that you are running it in debug mode. This allows you to suspend the application when a breakpoint is encountered, inspect and modify the code, and then resume the application to continue debugging. 1. Click the Debug command ( ) on the main toolbar, or press F11. 2. Repeat the steps that created the error the first time you tested the application. Enter 100 as the amount, select Euro from the combo box, and then click the Calculate button 3.
-
4. To begin debugging, you need to step into the function that is called by the button’s click event. Select the Step Into command ( ) from the Debug view toolbar. The function is highlighted in the code editor, as shown here: Looking at the function you see that the troublesome section of code comes after the else statement, where the calculation from euros into US dollars occurs. if 5. Click the Step Into command again to step into the function.
-
Like the variables contained within the function, you can monitor the Text component’s text property as you debug the application. 1. In the Variables view, select the txt_B text component (you may need to expand the this icon) and expand it to display its properties (which of course are variables in this context). Scroll down until you locate the text variable and select it. 2. Right-click (Control-click on Macintosh) to display the context menu and select Watch Variable. 3.
-
Debug an Application
-
CHAPTER 18 18 Use Web Services To provide data to your application, Adobe Flex includes components designed specifically for interacting with web services, HTTP servers, or remote object services (Java objects). These components are called remote procedure call (RPC) service components. In this lesson, you create a simple reporting application for a blog aggregator that lists the most popular posts in the last 30 days. You decide to let the users determine the number of posts to list.
-
Set up your project Before you begin this lesson, perform the following tasks: ■ If you have not already done so, create the Lessons project in Adobe Flex Builder. For more information, see “Create the Lessons project” on page 101. ■ Ensure that the automatic build option is enabled in Flex Builder. This option is enabled by default in the standalone configuration of Flex Builder but not in the plug-in configuration. To enable it, select Project > Build Automatically.
-
The documentation describes a method called getMostPopularPosts. The method returns a number of posts with the most clicks in the last 30 days. For each post returned, the following information is provided: postId, clicks, dateTimeAggregated, feedId, feedName, postTitle, postExcerpt, postLink. The method takes two required numeric parameters: ■ daysBack ■ limit specifies the number of days you want to go back. specifies the total number of posts you want returned; the number can’t exceed 50.
-
4. In Design mode, drag the following controls into the Panel container from the Components view: ■ ComboBox ■ DataGrid ■ LinkButton 5. Use the mouse to arrange the controls on the Canvas in a vertical, left-aligned column similar to the following: 6. Select the ComboBox control and enter cbxNumPosts as the value of its id property in the Flex Properties view. The ComboBox control doesn’t list any items. You populate the list next. 7.
-
8. 9. Switch back to Design mode, select the DataGrid component, and specify the following properties in the Flex Properties view: ■ ID: dgTopPosts ■ Width: 400 Select the LinkButton control and enter Select an item and click here for full post as the value of its label property.
-
10. Switch to Source mode. The Services.mxml file should contain the following MXML code (your coordinate values may vary): PAGE 211
The wsdl property specifies the location of the WSDL file for the web service. As of this writing, the location was still valid, but you should check to make sure it hasn’t changed. You can find the latest WSDL file location on the developers page at www.adobe.com/go/ mxna_developers, under Web Services. NO TE If you want, you can also use the following alias in the component: http:// www.adobe.com/go/flex_mxna_wsdl. The useProxy property specifies that you don’t want to use a proxy on a server.
-
The final application code should look like the following: 30 {cbxNumPosts.
-
Populate the DataGrid component You want to use the DataGrid control to display the data returned by the web service. Specifically, you want to display the titles of the most popular posts and the number of clicks each has received. 1. In Source mode, enter the following dataProvider property in the tag (in bold): PAGE 214
5. Save the file, wait until Flex Builder finishes compiling the application, and then click the Run button in the toolbar to test the application. If you’re using the plug-in configuration of Flex Builder, select Run > Run As > Flex Application. A browser opens and runs the application. You find a problem in the application’s default state. The ComboBox reads Top 5 but the DataGrid does not display any information.
-
The final application code should look like the following: 30 {cbxNumPosts.
-
Blog titles and click statistics should appear in the DataGrid control after the application starts, confirming that the application successfully retrieved data from the web service and populated the control. NO TE There may be a delay of a few seconds before the data appears while the application is contacting the server. Select another option from the ComboBox control to send a request to the web service and retrieve a longer or shorter list of posts.
-
1. In Source mode, enter the following click property in the tag (in bold): The value of the link field of the selected item in the DataGrid control, dgTopPosts.selectedItem.postLink, is specified in the argument to the navigateToURL() method, which is called when the user clicks the LinkButton control.
-
Use Web Services
-
CHAPTER 19 19 Use the Data Management Service The Adobe Flex Data Management Service feature is a Flex Data Services feature that spans the client, network, and server tiers to provide distributed data in Flex applications. This tutorial provides two lessons about using the Data Management Service.
-
Before you begin Before you begin this tutorial, perform the following tasks: ■ Ensure that you have installed Flex Data Services and that you can run the applications in the samples web application. Installation instructions are available at the following URL: www.adobe.com/go/flex2_installation ■ Create a DSLessons directory that is a subdirectory of the samples directory of the samples web application.
-
2. Directly above the text , make sure the following destination definition exists. Create the destination definition if it isn’t there, and save the file. 3. Start the application server that contains the samples web application.
-
2. Save the file. If you are not using Flex Builder, open the following URL in a browser window: http://localhost:port/samples/DSLessons/lesson1.mxml If you are using Flex Builder, run the application from Flex Builder. The following application appears in the browser window: Import the required ActionScript classes In this section, you create a script block and import a set of classes that you will use within the script block. 1.
-
Create variables In this section, in the script block you declare variables for objects that you will use.
-
4. Add the boldface text to the tag to call the initApp() method when the contact application is initialized: Send notes In this section, you write an event listener method that sends text to the notes destination when you click the Send button. You then assign that method to the click event of the Send button. 1.
-
Verify that your code is correct Your code should match the following code example. Verify that the content is correct and save the lesson1.mxml file.
-
Run the completed notes application In this section, you run the completed notes application in two browser windows to see automatic updates in one window when data is changed in the other. 1. Run the application in two browser windows. 2. Make sure both instances of the application look like those in the following example. Resize the browser windows so that you can see both instances of the application at the same time. . 3.
-
In this lesson, you used the Data Management Service feature with the ActionScript object adapter to create a distributed data application that automatically synchronized data among multiple clients and a server-side data resource. You built the client-side part of the application, and took a look at the server-side components of the application.
-
Copy the following destination definition after the last destination in the samples/WEB-INF/ flex/data-management-config.xml file: samples.contact.
-
View the samples.contact.Contact class The following example shows the code of the Contact.as file that is in the DSLessons/ samples/contact directory. The [RemoteClass] metadata tag maps this class to a corresponding Java class on the server. The [Managed] metadata tag ensures that the managed Contact object supports the proper change events to propagate changes between the clientbased object and the server-based object. package samples.contact { [Managed] [RemoteClass(alias="samples.contact.
-
1. Create a three-column editable DataGrid control by adding the following MXML code after the beginning tag in the lesson2.mxml file. Set the editable property of the first column to false. 2.
-
2. Directly below the
-
1. Add the following method declaration directly under the variable declarations to create an event listener: public function initApp():void { } 2. Add the boldface text to the initApp() method to create a DataService component and an ArrayCollection object when the initApp() method is called. The ds DataService connects to the server-side contact Data Management Service destination, which is specified in its one argument.
-
Verify that your code is correct Your code should match the following code example. Verify that the content is correct and save the lesson2.mxml file.
-
2. Ensure that both instances of the application look like the following example. Resize the browser windows so that you can see both instances of the application at the same time. . 3. In one of the browser windows, click a DataGrid cell in the First Name column, and change the name. 4. Tab to the Last Name column of the DataGrid. Your change should automatically update the application that is running in the other browser window.
-
View the server-side Data Management Service destination The lesson2.mxml file contains a DataService component that takes the name of a server-side Data Management Service destination named contact as an argument in its constructor. This reference to the contact destination is the only thing the client application needs to communicate with the destination. The contact destination is defined in the datamanagement-config.xml file in the WEB_INF/flex directory of the samples web application.
-
The previous example calls out the following elements of the contact destination definition: Destination section Description adapter References the Java object adapter configuration that the contact destination uses. This is also defined in the data-managementconfig.xml file. The Java object adapter lets you interact with a Java object to obtain data and commit data to a server-side data resource.
-
View the assembler class The contact destination uses the Java adapter. This is one of several types of Data Management Service adapters that Flex Data Services provides. As previously noted, the contact destination specifies an assembler class, which is a custom Java class that gets data from a data resource and handles the synchronization of data among clients and the data resource. An assembler must have a zero-argument constructor.
-
View the fill methods A fill method of the assembler class is called as a result of the client-side DataService’s fill() method being called. The following code example shows the two methods that are specified as fill methods in the contact destination definition. The methods have the same name but different signatures, yet both return a List object that contains Contact objects. One method takes no arguments, while the other takes a name of type String as an argument.
-
The following example shows the flow of a fill() method call from the client-side contact application: tutorial2.mxml fill() method call data-management-config.xml fill-method mapping ContactAssembler.java fill methods ContactDAO.
-
View the sync method The sync method of an assembler class lets you handle data changes sent from client-side DataService components. A sync method accepts one input parameter, which is a java.util.List object that contains a list of data changes of type flex.data.ChangeObject. The list of changes can include new data items, updates, and deletions. Depending on whether a change is an add, update, or delete, the sync method calls the class’s doCreate(), doUpdate(), or doDelete() method.
-
The following example shows the assembler class’s doCreate(), doUpdate(), and doDelete() methods: private ChangeObject doCreate(ChangeObject co) { ContactDAO dao = new ContactDAO(); Contact contact = dao.create((Contact) co.getNewVersion()); co.setNewVersion(contact); return co; } private void doUpdate(ChangeObject co) { ContactDAO dao = new ContactDAO(); try { dao.update((Contact) co.getNewVersion(), (Contact) co.getPreviousVersion()); } catch (ConcurrencyException e) { System.err.
-
In this lesson, you used the Data Management Service feature with the Java adapter to create a distributed data application that automatically synchronized data among multiple clients and a server-side data resource. You built the client-side part of the application, and took a look at the server-side components of the application.
-
CHAPTER 20 20 Use ColdFusion Event Gateway Adapter This tutorial shows you how to create a Flex application to send a message to a ColdFusion application and a ColdFusion component to send a message to a Flex application. The sample application does not take advantage of capabilities that are unique to Adobe Flex, instead, it describes the communication with ColdFusion applications that the ColdFusion Event Gateway Adapter enables.
-
Set up your development environment The ColdFusion Event Gateway Adapter lets you create applications in which Flex Data Services and Macromedia® ColdFusion® MX 7.0.2 communicate. Flex Data Services includes the ColdFusion Event Gateway Adapter. ColdFusion MX 7.0.2 includes the Flex Messaging event gateway. To complete this tutorial, you must have the following products installed: ■ Flex Data Services ■ ColdFusion MX 7.0.
-
To ensure that Flex Data Services recognizes the ColdFusion Event Gateway Adapter, you edit the messaging-config.xml file, which is located in the C:\fds2\jrun4\servers\default\samples\WEB-INF\flex directory if you installed Flex Data Services using the default settings. To enable communication through the Flex Messaging event gateway: 1. Copy the section in which id="cfgateway" appears from the sample messaging-config.
-
Create the Flex application The Flex application in this tutorial is a simple form in which you specify the elements of an e-mail message, including the recipient, the sender, the subject, and the message body. Create a new MXML file In this section, you create an MXML file in which the layout of user interface elements is exactly as you specify them, or absolute. 1. In an MXML editor, create a file that contains the following text: PAGE 247
Import the required ActionScript classes In this section, you create a script block and import a set of classes that you will use. 1. Create a script block for ActionScript code directly below the tag: 2. Directly below the
Send a message to ColdFusion In this section, you create a function to send a message through the Flex Messaging event gateway to a ColdFusion application. You then create a structure, named msg, that contains the gateway ID, and the information necessary to send an e-mail message. The gateway ID is the ID you assign when you create the gateway instance in ColdFusion MX Administrator. Finally, you send the message to ColdFusion. 1.
click="sendMessage();"/> Create the ColdFusion application The ColdFusion application puts the information received from the Flex application in a structure. It then sends an e-mail message by using elements of the structure. A ColdFusion application can handle data sent from a Flex application in either the header or the body of the message.
2. Save the file handleemail.cfc in the C:\CFusionMX7\wwwroot\flexgatewayexamples folder. Test the application To test the sample application, you must set up the testing environment, run the Flex application, and then view your e-mail client to ensure that the application sent the e-mail message successfully. Set up the testing environment Before testing the sample application, do the following: ■ Ensure that Flex Data Services 2 is running. ■ Ensure that ColdFusion is running.
Check e-mail messages To ensure that the application executed successfully, check the e-mail messages of the recipient specified in the Flex application. An e-mail message from the sender should be there, with the subject and body that you specified in the Flex application.
Index A ActionScript about 91 compiling 93 creating components 97 custom components 97 defining components 97 identifiers 96 importing files 96 in MXML 92, 94 including and importing 96 including files 96 script blocks 96 Script tag 96 using 62, 94 Application container, about 87 applications appearance 65 AreaChart control 79 ASP, and Flex coding 67 doughnut charts 83 LineChart control 82 PieChart control 83 PlotChart control 84 ColdFusion, moving to Flex 69 ColumnChart control about 81 command-line debu
dataProvider property charts 79 deployment models 25 development environment, Flex 75 doughnut charts 83 Flex development tools command-line debugger 70 compc 70 Flash Debug Player 70 mxmlc 70 E G event model, standards in MXML 89 graphics, standards in MXML 90 F H features, summary 30 Flash Debug Player about 25 using 25 Flash Player 25 Flex about 17 ActionScript and 62 application examples 24 application framework 58 application model 53 benefits 23 class library 58 components 53 containers 53 con
MXML syntax data binding 65 Script tag 96 mxmlc 70 P PieChart control about 83 PlotChart control 84 S Script tag about 94 in MXML 96 with ActionScript 96 skins 65 standards, in MXML 88 styles about 65 W web services, standards in MXML 89 255