Installing ADOBE COLDFUSION 9 ® ®
© 2009 Adobe Systems Incorporated. All rights reserved. Copyright Installing Adobe® ColdFusion® 9 This user guide is protected under copyright law, furnished for informational use only, is subject to change without notice, and should not be construed as a commitment by Adobe Systems Incorporated. Adobe Systems Incorporated assumes no responsibility or liability for any errors or inaccuracies that may appear in the informational content contained in this guide.
iii Contents Chapter 1: Preparing to Install ColdFusion About the ColdFusion installation . . . . . . . . . . . . . . . . . . . . . . . . . . . . . . . . . . . . . . . . . . . . . . . . . . . . . . . . . . . . . . . . . . . . . . . . . . . . . . . . . . . . . . 1 Installing ColdFusion 9 ................................................................................................ 1 Installing ColdFusion 9 Update 1 .......................................................................................
iv INSTALLING COLDFUSION 9 Contents Chapter 6: Configuring Your System Overview of configuration tasks . . . . . . . . . . . . . . . . . . . . . . . . . . . . . . . . . . . . . . . . . . . . . . . . . . . . . . . . . . . . . . . . . . . . . . . . . . . . . . . . . . . . . . . 58 Managing ColdFusion services in Windows . . . . . . . . . . . . . . . . . . . . . . . . . . . . . . . . . . . . . . . . . . . . . . . . . . . . . . . . . . . . . . . . . . . . . . . . . . . .
1 Chapter 1: Preparing to Install ColdFusion Before installing Adobe ColdFusion 9, review the ColdFusion product editions, system requirements, and other highlevel considerations. About the ColdFusion installation ColdFusion provides a powerful and flexible installation and upgrade process. The ColdFusion installation process includes the following phases: 1 Plan the installation by determining your installation, configuration, and upgrade options. 2 Run the ColdFusion installer.
2 INSTALLING COLDFUSION 9 Preparing to Install ColdFusion System requirements The ColdFusion 9 system requirements are available on the Adobe website. To view the system requirements, including a list of supported J2EE application servers, see www.adobe.com/go/learn_cfu_cfsysreqs_en. Installation considerations Before installing ColdFusion 9, review the considerations for installing or upgrading on your platforms.
3 INSTALLING COLDFUSION 9 Preparing to Install ColdFusion Installation considerations for UNIX The following are installation considerations for UNIX systems only: • For troubleshooting purposes, the installer creates the following log file during an installation or upgrade in UNIX: cf_root/Adobe_ColdFusion_9_InstallLog.log. If you contact AdobeTechnical Support for installation support, send them this file.
4 Chapter 2: Installing the Server Configuration The ColdFusion server configuration contains an embedded copy of Macromedia JRun from Adobe and is most similar to earlier versions of ColdFusion. Note: The cf_root directory refers to your installation directory. By default, this directory is C:\ColdFusion9 in Windows, and /opt/coldfusion9 in UNIX.
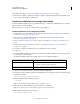
5 INSTALLING COLDFUSION 9 Installing the Server Configuration Question Answer Configuration directory? (Apache and SunONE) ___________________________________________________ Path to server binary? (Apache) ___________________________________________________ ColdFusion Administrator password? ___________________________________________________ Whether to enable RDS? ___ Yes ___ No Note: RDS allows the server to interact with remotely connected developers.
6 INSTALLING COLDFUSION 9 Installing the Server Configuration 12 Configure and manage your system, as described in “Configuring Your System” on page 58. 13 To learn about ColdFusion, read the documentation, which is accessible through the Documentation link on the Resources page of the ColdFusion Administrator. Installing the ColdFusion server configuration in UNIX By default, ColdFusion installs into the /opt/coldfusion9 directory.
7 INSTALLING COLDFUSION 9 Installing the Server Configuration If you specified the use of an external web server when you ran the installer, ColdFusion automatically runs the cf_root/bin/cfmx-connectors.sh script when it starts the first time. This shell script runs the Web Server Configuration Tool by using the settings that you specified during the installation.
8 INSTALLING COLDFUSION 9 Installing the Server Configuration Directory Description runtime Programs and supporting files for the ColdFusion runtime. In Windows, the files for the bundled JRE are in runtime\jre. runtime/jre Files for the Java Runtime Environment (JRE) that is bundled with ColdFusion. uninstall Files to uninstall ColdFusion. verity Verity collections, configurations, and services directories. solr Solr configurations and Jetty.
9 INSTALLING COLDFUSION 9 Installing the Server Configuration 8500 * false ... Note: Ensure that the deactivated attribute is set to false. 4 Save the file, and then restart ColdFusion.
10 INSTALLING COLDFUSION 9 Installing the Server Configuration Updating from an earlier version If you have skipped the migration or you have to make modifications to the previous installation that has to be migrated, do the following: 1 Stop the server. 2 Save settings by copying the files cf_webapp_root/WEB-INF/cfusion/lib/neo-*.
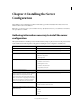
11 Chapter 3: Installing the Multiserver Configuration The multiserver configuration deploys and configures ColdFusion on its own JRun server. Gathering information necessary to install the multiserver configuration Although the ColdFusion 9 installer provides an intuitive interface, it helps to plan your answers to the questions asked by the installer. Use the following tables to help plan for installing the multiserver configuration of ColdFusion 9.
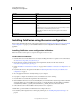
12 INSTALLING COLDFUSION 9 Installing the Multiserver Configuration Question Answer ColdFusion Administrator password? ___________________________________________________ Whether to enable RDS? ___ Yes ___ No Note: RDS allows the server to interact with remotely connected developers. Adobe recommends that you disable RDS for production servers. Disabling RDS also disables the directory browsing applets in the ColdFusion Administrator.
13 INSTALLING COLDFUSION 9 Installing the Multiserver Configuration During the multiserver installation procedure, the installation wizard performs the following actions: • Installs JRun 4. • Creates a JRun server named cfusion (in addition to the admin and samples JRun servers). • (Windows) Creates and starts Windows services for the admin and cfusion JRun servers. • Configures the jrun_root/bin/jvm.config file, as appropriate for the platform.
14 INSTALLING COLDFUSION 9 Installing the Multiserver Configuration 14 Code CFM pages. If you configured an external web server, store CFM pages under your web root directory. If you are using the builtin web server, store CFM pages under the web application root (jrun_root/servers/cfusion/cfusion-ear/cfusionwar) and access these pages using a URL of the form http://hostname:8300/context-root/filename.cfm, as follows: • hostname The machine name, IP address, or localhost.
15 INSTALLING COLDFUSION 9 Installing the Multiserver Configuration 10 When the installation completes successfully, start the JRun cfusion server: jrun_root/bin/jrun -start cfusion 11 If you specified external web server settings when you ran the installation wizard, run the jrun_root/bin/cfmx- connectors.sh shell script. The script runs the Web Server Configuration Tool, which configures the web server for use with ColdFusion. The web server should also be running.
16 INSTALLING COLDFUSION 9 Installing the Multiserver Configuration Updating from an earlier version If you have skipped the migration or you have to make modifications to the previous installation that has to be migrated, do the following: 1 Stop the server. 2 Save settings by copying the files cf_webapp_root/WEB-INF/cfusion/lib/neo-*.
17 Chapter 4: Installing the J2EE Configuration Gathering information necessary to install the J2EE configuration Although the ColdFusion 9 installer provides an intuitive interface, it helps to plan your answers to the questions asked by the installer. Use the following tables to help plan for installing the J2EE configuration of ColdFusion 9.
18 INSTALLING COLDFUSION 9 Installing the J2EE Configuration Question Answer ColdFusion Administrator password? ___________________________________________________ Whether to enable RDS? ___ Yes ___ No Note: RDS allows the server to interact with remotely connected developers. Adobe recommends that you disable RDS for production servers. Disabling RDS also disables the directory browsing applets in the ColdFusion Administrator.
19 INSTALLING COLDFUSION 9 Installing the J2EE Configuration cfusion-ear META-INF application.xml cfusion-war WEB-INF web.xml CFIDE cfdocs rds.war WEB-INF web.xml If your J2EE application server supports enterprise applications, install and deploy the EAR file. For more information, see “Installing an EAR file or WAR files” on page 20.
20 INSTALLING COLDFUSION 9 Installing the J2EE Configuration servers easier; however, you can also configure ColdFusion on multiple servers manually by deploying EAR files and WAR files on multiple server instances. Platforms Full ColdFusion functionality is available for Windows, Macintosh, Linux, and Solaris, except that the following are Windows-specific: COM, .NET, and ODBC Services.
21 INSTALLING COLDFUSION 9 Installing the J2EE Configuration Installing an EAR file or WAR files in Windows You can install the ColdFusion J2EE configuration in Windows. If you are updating an existing deployment of ColdFusion MX, ColdFusion MX 6.1, or ColdFusion MX 7 for J2EE, see “Updating from an earlier version for J2EE” on page 24 before you continue. Note: The Windows installer requires a computer that supports at least 256 colors.
22 INSTALLING COLDFUSION 9 Installing the J2EE Configuration • filename: The directory path and file to display. The path is relative to the cfusion-war directory. For example, to display a CFM file located at C:\JRun4\servers\myserver\cfusion-ear\cfusionwar\eisapp\index.cfm using the built-in JRun web server and a context root of cf9, specify the URL as http://localhost:8100/cf9/eisapp/index.cfm. Installing an EAR file or WAR files in UNIX You can install the ColdFusion J2EE configuration in UNIX.
23 INSTALLING COLDFUSION 9 Installing the J2EE Configuration Note: For security reasons, it is crucial that you do not use root for the run-time user. Instead, use a nonprivileged user that does not have a login shell, such as the default user account nobody, which exists for this type of situation. 11 Deploy ColdFusion and configure Java settings, as required by your application server. For more information, see “ColdFusion J2EE deployment and configuration” on page 25. Note: If you deployed the rds.
24 INSTALLING COLDFUSION 9 Installing the J2EE Configuration 7 Copy the installation file that is appropriate for your platform and locale from the DVD or Adobe website, and save it to a directory on your local disk. The following installation files are those for supported J2EE configuration platforms: • ColdFusion_9_WWE_osx10.zip - To install in Mac OS X 32-bit systems • ColdFusion_9_WWE_osx10-64.
25 INSTALLING COLDFUSION 9 Installing the J2EE Configuration 2 (Windows only) If you installed the SequelLink ODBC Agent, stop the ODBC services before you start the installation wizard. 3 Copy application files to a backup directory. 4 Save settings by copying the files cf_webapp_root/WEB-INF/cfusion/lib/neo-*.xml to a backup directory. 5 Before you deploy ColdFusion 9, undeploy the previous ColdFusion application using your application-server- specific undeploy functionality.
26 INSTALLING COLDFUSION 9 Installing the J2EE Configuration Directory Description cfdocs Documentation for ColdFusion. CFIDE Files for the ColdFusion Administrator. WEB-INF/cfclasses Compiled ColdFusion templates in your ColdFusion applications. WEB-INF/cfc-skeletons Support for ColdFusion components that are exported as web services. WEB-INF/cfform Files that support Flash forms. WEB-INF/cftags Templates for ColdFusion. WEB-ING/flex Configuration and files for LiveCycle Data Services ES.
27 INSTALLING COLDFUSION 9 Installing the J2EE Configuration cd cfusion-ear java_home/bin/jar -xvf ../cfusion.ear This expands the cfusion.ear file into cfusion.war and rds.war (rds.war is not included if you specified a context root of / when you ran the installation wizard). c In cfusion-ear, make a new directory named cfusion-war. md cfusion-war (mkdir cfusion-war on UNIX) d Change to the cfusion-war directory and expand the cfusion.
28 INSTALLING COLDFUSION 9 Installing the J2EE Configuration 6 Click the server in the left pane. 7 Click the cfusion Web Application. 8 Change the context path to / (instead of /cfusion). 9 Click Apply. 10 Restart the JRun server that is running ColdFusion. You must deploy the rds.war file to a context root of /CFIDE (all uppercase). When deploying on JRun, this means that you should expand the rds.war file into a directory named CFIDE.
29 INSTALLING COLDFUSION 9 Installing the J2EE Configuration and specify com.gp.java2d.ExHeadlessGraphicsEnvironment instead of com.gp.java2d.ExGraphicsEnvironment. 10 In addition to enabling sandbox security in the ColdFusion Administrator, the application server must be running a security manager (java.lang.SecurityManager) and you must define the following JVM arguments: -Djava.security.manager -Djava.security.policy="cf_webapp_root/WEB-INF/cfusion/lib/coldfusion.policy" -Djava.security.auth.
30 INSTALLING COLDFUSION 9 Installing the J2EE Configuration cd cfusion-ear java_home/bin/jar -xvf ../cfusion.ear This expands the cfusion.ear file into cfusion.war and rds.war (rds.war is not included if you specified a context root of / when you ran the installation wizard). 3 In cfusion-ear, make a new directory named cfusion-war. md cfusion-war (mkdir cfusion-war on UNIX) 4 Change to the cfusion-war directory and expand the cfusion.
31 INSTALLING COLDFUSION 9 Installing the J2EE Configuration If you are running the Administrative console from a browser that is not on the same system on which WebSphere is running, that is, not from localhost, use the Remote file system option ( Server Path on WebSphere 5.1), which enables directory browsing on the server file system. 5 Leave the Context Root box empty and click Next.
32 INSTALLING COLDFUSION 9 Installing the J2EE Configuration 8 If you selected to install LiveCycle Data Services ES , the Map Resource References to resources panel appears. Enter wm/default as the target for the resource wm/MessagingWorkManager. 9 When the Map Virtual Hosts for Web Modules panel appears, select the virtual host or hosts in which to install the ColdFusion 9 application and Remote Development Services (RDS) support, and then click Next.
33 INSTALLING COLDFUSION 9 Installing the J2EE Configuration 3 Add the CF_APPS_PATH variable to the WAS_CLASSPATH by appending the following text to the path statement: ;%CF_APPS_PATH% The WAS_CLASSPATH line should look similar to the following: SET WAS_CLASSPATH=%WAS_HOME%/properties;%WAS_HOME%/lib/bootstrap.jar;%WAS_HOME%/lib/j2ee.jar;% WAS_HOME%/lib/lmproxy.jar;%WAS_HOME%/lib/urlprotocols.jar;%CF_APPS_PATH% 4 Save the file.
34 INSTALLING COLDFUSION 9 Installing the J2EE Configuration Configure search path 1 Make a backup copy of the startServer.sh file, which is located in the websphere_root/AppServer/bin directory. The path specifications in these instructions assume that you deployed ColdFusion using the standard application name (Adobe ColdFusion 9) and did not rename the application.
35 INSTALLING COLDFUSION 9 Installing the J2EE Configuration If you disable RDS, the following ColdFusion 9 features do not work: • The Browse Server button in the ColdFusion Administrator (for example, on the ColdFusion Mappings page) • The Query Builder and charting in the ColdFusion Report Builder To disable RDS on UNIX, 1 Stop ColdFusion. 2 In the WebSphere Administrative Console, select the Applications > Enterprise Applications panel, select the Adobe ColdFusion 9 application, and then click Stop.
36 INSTALLING COLDFUSION 9 Installing the J2EE Configuration Enable web services To enable web services, copy the tools.jar file from the websphere/appserver/java/lib directory to the cfusion/lib directory. Apply application server configuration To apply application server configuration, restart the application server.
37 INSTALLING COLDFUSION 9 Installing the J2EE Configuration Install ColdFusion 9 on WebLogic 1 Run the ColdFusion installation wizard, choosing the J2EE configuration. The installation wizard places the WAR files in the install directory. 2 Determine the WebLogic domain in which to deploy ColdFusion 9. Optionally, create a domain. 3 Because ColdFusion 9 must run from an expanded directory structure, expand the cfusion.war and rds.
38 INSTALLING COLDFUSION 9 Installing the J2EE Configuration 10 Configure and manage your system, as described in “Configuring Your System” on page 58. 11 To learn about ColdFusion, read the documentation, which is accessible through the Documentation link on the Resources page of the ColdFusion Administrator. Note: You must copy the version of tools.jar that the application server uses to the cfusion/lib directory.
39 INSTALLING COLDFUSION 9 Installing the J2EE Configuration CF_WEB_INF=cf_webapp_root/WEB-INF CF_SHARED_LIB=${CF_WEB_INF}/cfusion/lib 5 Save the startup script and restart the WebLogic Server. Enable access to Verity binary files in UNIX 1 Open the startup script for the WebLogic domain, which is typically the startWebLogic.sh file, which is located in the wldomain_root\bin directory.
40 INSTALLING COLDFUSION 9 Installing the J2EE Configuration Enable ColdFusion security and graphing support in UNIX 1 Open the startup script for the WebLogic domain, which is typically the startWebLogic.sh file, which is located in the wldomain_root\bin directory.
41 INSTALLING COLDFUSION 9 Installing the J2EE Configuration 2 Open a Windows command prompt and go to the oracle_root/dcm/bin directory. 3 Deploy the ColdFusion 9 application by using the command-line tool dcmctl.bat, as follows: Dcmctl deployapplication -application cf_app -file c:\ColdFusion_J2ee\cfusion.ear component oc4j_instance 4 Edit the oracle_root/j2ee/oc4j_instance/config/java2.policy file by adding the following to the end of the file: grant { permission java.security.
42 INSTALLING COLDFUSION 9 Installing the J2EE Configuration 3 Add $ORACLE_HOME\j2ee\oc4j_instance\applications\cf_app\cfusion\WEBINF\cfusion\jintegra\bin; $ORACLE_HOME\j2ee\oc4j_instance\applications\cf_app \cfusion\WEB-INF\cfusion\jintegra\bin\international as the value. 4 Ensure that the Append option is enabled. 5 Select Apply. 6 When the Enterprise Manager prompts you to restart, select the restart option.
43 INSTALLING COLDFUSION 9 Installing the J2EE Configuration Deploying ColdFusion 9 on JBoss Application Server ColdFusion 9 supports JBoss with the following specifications: • JBoss 4.2/5.0.1 (uses Tomcat 6.0.x Server Container) • Sun JDK 1.5 and Sun JDK 1.
44 INSTALLING COLDFUSION 9 Installing the J2EE Configuration 9 Copy or move the TEMP_LOCATION\cfusion.ear folder into the JBOSS_DEPLOY_DIR folder The resulting directory structure should appear as follows: JBoss 4.2.0 or JBoss 5.01 server default deploy cfusion.ear cfusion.war META-INF rds.war 10 (Windows) Edit the JBOSS_HOME\bin\run.bat file by doing the following: a If not present, add the JVM (-Xmx512m) parameter to JAVA_OPTS.
45 INSTALLING COLDFUSION 9 Installing the J2EE Configuration 3 Edit the run.bat file that is located in the JBOSS_DEPLOY_DIR by doing the following: a Locate the following text: @echo off rem ----------------------------------------------rem JBoss Bootstrap Script for Win32 rem ----------------------------------------------- 4 Below this text, insert three lines and paste. set CF_LIB_PATH=JBOSS_DEPLOY_DIR\cfusion.ear\cfusion.
46 INSTALLING COLDFUSION 9 Installing the J2EE Configuration