Adobe ColdFusion Documentation This PDF is auto-generated from the Wiki pages 1. Installing Adobe ColdFusion 10 __________________________________________________________________________ 2 1.1 Preparing to Install ColdFusion ______________________________________________________________________ 2 1.2 Installing the Server Configuration ____________________________________________________________________ 4 1.
Installing Adobe ColdFusion 10 Installing ColdFusion is intended for anyone who has to installing, configuring, and troubleshooting their Adobe® ColdFusion® server and the integrated technologies.
manage new ColdFusion instances. For information on installing the server configuration, see Installing the Server Configuration. Note ColdFusion 10 does not offer a separate multi-server mode of installation. J2EE configuration (Enterprise Edition only) Lets you deploy ColdFusion 10 as a Java application running on a Java 2 Enterprise Edition (J2EE) application server, using a third-party J2EE server, such as IBM WebSphere or Oracle WebLogic.
server from applications such as Server Manager, Instance Manager in ColdFusion Administrator, or ColdFusion Builder. J2EE deployment of ColdFusion EAR or WAR on JRun is not supported. The EWS.jar }}must be present in the {{systemclasspath while deploying on a J2EE server.
Using the built-in web server Change the port of the built-in web server Configuring the built-in web server (Tomcat) Starting, stopping, and restarting ColdFusion On Windows Editing the JVM settings Creating and editing a new ColdFusion instance Registering a remote instance Adding start and stop functionality to a remote instance over HTTPS Setting up remote start and stop functionality using HTTPS in Server Manager Setting up remote start and stop functionality using HTTP in Server Manager Managing clust
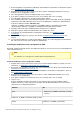
Configure web server or use built-in web server? ___ Configure web server for ColdFusion ___ Enable ColdFusion built-in web server Web server to configure? (Only if you do not use the built-in web server.) ___ IIS___ Apache ___ SunJWS___ Other Configuration directory? (Apache and Sun Java Web Server) _________________________________________ __________ Enable Secure Profile __Yes__No Identify a list of IP addresses that will have access to the ColdFusion Administrator.
3. Review Installation considerations for Windows and Installation considerations for all platforms (Refer to the Installing Adobe ColdFusion 10). 4. Determine the answers to the questions in the above table in "Gathering information necessary to install the server configuration" section. 5. Close any applications that are currently running on your computer. 6. If you plan to configure an external web server, ensure that the web server is running. 7.
1. Using the cd command, go to the directory that contains the installation file. 2. Ensure that you have executable permission for the installation file. You can change permissions on the file by using the following command: chmod 777 ColdFusion_10_WWEJ_solaris64.bin 3. Start the installation with the following command: ./ Note To run the Linux installer in GUI mode, type ./ -i gui. 4. Follow the prompts in the installation program, and let it run to completion.
Directory Description cfusion Contains the following directories: © 2013 Adobe Systems Incorporated and its licensors. All rights reserved.
bin: Programs for starting, stopping, and viewing information for ColdFusion, and to run Crystal Reports (Windows only). It also contains the password reset scripts for server administrator and Admin Component for remote server start and stop. cache: Repository for temporary files from ColdFusion. cfx: Sample C++ and Java CFX files with their supporting files. You can also store your CFX files in this directory (although you can put them in any location that is defined in your classpath).
config Contains instances.xml and connector configuration files. Also, contains cluster configuration file, clust er.xml. jre Java runtime files. uninstall Files to uninstall ColdFusion.
3. 4. Save the file and then restart ColdFusion. #back to top Configuring the built-in web server (Tomcat) While installing, if you have configured ColdFusion on an external web server, do the following to configure ColdFusion on in-built Tomcat: 1. Open the cfroot\cfusion\runtime\conf\server.xml file. 2. Search for internal webserver start.
Note As possible in previous versions of ColdFusion, you can also use the cfstart script to start/stop the ColdFusion sever. Note The -console argument is optional. If it is not provided, the logs are saved in the cfroot\cfusion\logs directory. On UNIX/Linux/Solaris/MAC OSX 1. At prompt, go to the directory cfroot\cfusion\bin and run the following command: ./coldfusion start}}To stop ColdFusion, use the command ./{{coldfusion stop. }}To restart, use the command {{./coldfusion restart.
6. Click the Edit icon to edit the instance manager. 7. Edit the internal webserver port and load balancing factor.Load balancing factor represents the load the instance takes up. Load balancing factor is applicable only if the instance is part of the cluster.For example, the load balancing factor for the first instance is 1 and that of the second instance is 2. The second instance receives two times more requests. 8. Click Submit.
cfroot\jre\bin\keytool -genkeypair -alias certificatekey -keyalg RSA -validity 7 -keystore keystore.jks b. Export the certificate. You can have a self-signed certificate or a certificate from a Certificate Authority. cfroot\jre\bin\keytool -export -alias certificatekey -keystore keystore.jks -rfc -file selfsignedcert.cer c. Copy the jks file created in the jetty\etc directory. d. Open the jetty\etc\jetty.xml file. e.
c. gistering a remote instance section in this document. d. In the Register Remote Instance page, enter the admin component port, admin component user name, and admin component password (user name and password. These details you specified while installing the Remote Instance Administrator). The default https port is 8443. e. Select the HTTPS check box. f. Click Submit.
i. Note If the remote server is running on Windows Vista, Windows 7, or Windows Server 2008, start the jetty sever with admin privileges. 2. Do the following in the local host from where you add remote instance: a. Copy the .cer file created in the remote host to any of the locations. b. Import the certificate. cfroot\jre\bin\keytool.exe -importcert -keystore "cfroot\jre\lib\security\cacerts" -file selfsignedcert.cer -storepass password 3. 4. 5. 6. 7. Open wwwroot\CFIDE\ServerManager\ServerManager.
ColdFusion Version: For ColdFusion 10, the value 10. Admin Server Port: Default https port is 8985. Port of the Jetty server. Context Root: Value is AdminServlet. 7. Click Apply. #back to top Managing clusters Manage clusters using the ColdFusion Administrator. 1. 2. 3. 4. In the ColdFusion Administrator, click Enterprise Manager > Cluster Manager. Enter a cluster name and then click Add. Click the cluster name and move the servers to the cluster based on the requirement.
PAGE 207. Restart all the instances. Note When adding a remote instance in a cluster, ensure that you comment out in content.xml file located in \runtime\conf directory. #back to top Configuring other web servers Use the Web Server Configuration Tool to configure other web servers. 1. Run cfroot\runtime\bin\wsconfig.exe. You can also configure web servers using the command-line interface as follows. Configuring IIS wsconfig.exe -ws iis -site or wsconfig.
(Windows only) wsconfig.exe -ws apache dir -cluster (Linux or MAC only) ./wsconfig -ws apache dir -cluster Configuring Sun Java Web Server (Windows only) wsconfig.exe ws SunJWS dir (Linux or MAC only) ./wsconfig ws SunJWS dir Configuring cluster (Windows only) wsconfig.exe -ws SunJWS dir -cluster (Linux or MAC only) .
Unconfiguring all webservers ./wsconfig -uninstall Seeing the list of webservers ./wsconfig -list #back to top Configuring Secured Socket Layer (SSL) SSL allows the browser and the server to communicate over a secured connection. Data that is sent is encrypted at one side, transmitted, and then decrypted at the other end. For more information about SSL configuration on Tomcat, see http://tomcat.apache.org/tomcat-7.0-doc/ssl-howto.html.
Do the following to change the virtual directory and doc root: 1. 2. 3. 4. Open CFInstallation\cfusion\runtime\conf\server.xml. Under host block, search for the string, "To add virtual directory." Uncomment the entry context path below.
Enabling Secure Profile *New for ColdFusion 10* ColdFusion allows you to secure ColdFusion server furthermore by enabling or disabling certain settings. When installing ColdFusion, you can enable Secure Profile by selecting the option when prompted on the Secure Profile screen. Further, you could provide a comma separate list of IP addresses that may be allowed to access the ColdFusion Administrator.
3. rd and the {{migratecf}}X (in which X is the earlier version of ColdFusion) switch to true. 4. Restart the ColdFusion 10 application. 5. Browse to ColdFusion Administrator to run the migration wizard. #back to top Uninstalling ColdFusion Uninstalling ColdFusion deletes all program files and related components from your computer. Uninstall ColdFusion from Windows 1. 2. 3. 4. Select Start > Settings > Control Panel > Add/Remove Programs > Adobe ColdFusion 10. Click Change/Remove.
Install ColdFusion in UNIX (J2EE configuration) Installing an EAR file or WAR files in Mac OS X Install ColdFusion in Mac OS X (J2EE configuration) Updating from an earlier version for J2EE ColdFusion J2EE deployment and configuration J2EE directory structure Deploying ColdFusion 10 on IBM WebSphere Expand the EAR file Deploy ColdFusion 10 on WebSphere 7 or 8 (AS) Deploy ColdFusion 10 on WebSphere 7 or 8 (ND) Enable sandbox security Configure operating system-specific binary support in Windows Configure sea
Although the ColdFusion 10 installer provides an intuitive interface, it helps to plan your answers to the questions asked by the installer. Use the following tables to help plan for installing the J2EE configuration of ColdFusion 10.
You can deploy ColdFusion in the J2EE configuration by using a J2EE application server, such IBM WebSphere. When you use the J2EE configuration, you can use an existing J2EE application server; the installation wizard creates a web application archive (WAR) or enterprise application archive (EAR) file, which you then deploy by using the tools provided by your application server.
J2EE web applications running in a server are each rooted at a unique base URL, called a context root (or context path). The J2EE application server uses this initial portion of the URL (that is, the portion immediately following http://_hostname_) to determine which web application services an incoming request. For example, if you are running ColdFusion with a context root of cf10, you display the ColdFusion Administrator using the URL http://localhost/_cf10_/CFIDE/administrator/index.cfm.
The ColdFusion J2EE configuration must run from an expanded directory structure. Different J2EE application servers have different functionality with regard to deployment and an expanded directory structure, as follows: Deploy compressed archive to working directory. On some J2EE application servers (such as IBM WebSphere), the deployment process expands the EAR/WAR file into a working directory and, from that point forward, the expanded directory is considered to be the application.
contextroot: The context root for the ColdFusion web application. For more information, see Con text root section in this page. filename: The directory path and file to display. The path is relative to the cfusion-war directory. Installing an EAR file or WAR files in UNIX You can install the ColdFusion J2EE configuration in UNIX. If you are updating an existing deployment of ColdFusion for J2EE, see Updating from an earlier version for J2EE section of this document before you continue.
Note To run the Linux installer in GUI mode, type ./ -i gui. 3. Follow the prompts, and let the installation program run to completion. Note For security reasons, it is crucial that you do not use root for the run-time user. Instead, use a nonprivileged user that does not have a login shell, such as the default user account nobody, which exists for this type of situation. 4. Deploy ColdFusion and configure Java settings, as required by your application server.
7. supported J2EE configuration platforms: ColdFusion_10_WWEJ_osx10.dmg - To install in Mac OS X systems 8. Start the installation by double-clicking the installation file on the desktop. The file ColdFusion 10 Installer.app is installed in the same directory. Double click this APP file to start the installation in GUI mode. 9. Follow the prompts, and let the installation program run to completion. Note For security reasons, it is crucial that you do not use root for the runtime user.
8. Copy the backed up settings files to the ColdFusion 10 cfusion/lib/cf_X_settings directory. 9. Edit the ColdFusion 10 cfusion/lib/adminconfig.xml file by setting the value of the runmigrationwiza rd and the migratecfX (in which X is the earlier version of ColdFusion) switch to true. 10. Restart the ColdFusion 10 application. 11. Browse to ColdFusion Administrator to run the migration wizard. Note The migration wizard supports only the migration of settings from ColdFusion 9.
WEB-INF/cfclasses Compiled ColdFusion templates in your ColdFusion applications. WEB-INF/cfc-skeletons Support for ColdFusion components that are exported as web services. WEB-INF/cfform Files that support Flash forms. WEB-INF/cftags Templates for ColdFusion. WEB-ING/flex Configuration and files for LiveCycle Data Services ES. WEB-INF/gateway Files that support event gateways. WEB-INF/cfusion/bin Executable files used by ColdFusion. WEB-INF/cfusion/cfx CFX tag include file and examples.
The following instructions tell you how to deploy ColdFusion 10 on IBM WebSphere Application Server (AS) and Network Deployment (ND). The following terms refer to WebSphere and ColdFusion directories: websphere_root The directory in which IBM WebSphere Application Server is installed; for example, C:\Program Files\WebSphere in Windows, and /opt/WebSphere in UNIX.
cd rds-war java_root/bin/jar -xvf ../rds.war This expands rds.war. 7. Go up one level to the cfusion-ear file, and delete the cfusion.war and rds.war files: cd .. del cfusion.war (rm cfusion.war on UNIX) del rds.war (rm rds.war on UNIX) 8. Open the cfusion-ear/META-INF/application.xml file in a text editor. 9. Change the web-uri element from cfusion.war to cfusion-war (or the name of the directory that contains the expanded cfusion.war file). Change the web-uri element for rds.war to rds-war.
Deploy ColdFusion 10 on WebSphere 7 or 8 (ND) 1. 2. 3. 4. 5. 6. 7. 8. 9. 10. 11. 12. Start the IBM WebSphere Application Server, if it is not running. Open the IBM WebSphere Administrative Console, if it is not running. Select Applications > Install New Application. When the Preparing for the Application Installation page appears, in the text box for the local file system, enter the path to the EAR file that you installed when you installed ColdFusion; for example, C:\ColdFusion10\cfusion.ear.
grant { permission java.security.AllPermission; }; Configure operating system-specific binary support in Windows This process is required to support the following features that use binaries that are specific to your operating system: CFX tags written in C++ Microsoft Access driver with Unicode supportYou do this by configuring the search paths to find the required binary files, which are located in the cf_webapp_root\WEB-INF\cfusion\lib directory. Configure search paths 1.
5. SET WAS_PATH=%WAS_HOME%\bin;%JAVA_HOME%\bin;%JAVA_HOME%\jre\bin;%PATH%;C:\Pro gram Files\IBM\WebSphere MQ\bin;C:\Program Files\IBM\WebSphere MQ\java\bin;C:/Program Files/IBM/WebSphere MQ/WEMPS\bin;%CF_APPS_PATH%; 6. Save the file. Enable COM support for Windows You enable Component Object Model (COM) support in Windows after installing ColdFusion 10 so that you can use the cfreport tag with Crystal Reports.
2. Open the original file, and in the PLATFORM case block, just above the LD_LIBRARY_PATH or LIBPATH line, add the following entry on a single, long line: On Solaris: CFUSION_APPS_PATH=cf_webapp_root/WEB-INF/cfusion/lib Replace cf_webapp_rootwith the path to your web application root directory; for example: CF_APPS_PATH="$WAS_HOME"/installedApps/"$WAS_CELL"/ Adobe_ColdFusion_10.ear/cfusion.
Disable RDS For security reasons, Adobe recommends that you disable RDS on a production server. If you enable RDS when you install ColdFusion 10, you can disable it at a later time, as the following instructions describe. If you disable RDS, the following ColdFusion 10 features do not work: The Browse Server button in the ColdFusion Administrator (for example, on the ColdFusion Mappings page) The Query Builder and charting in the ColdFusion Report Builder To disable RDS on UNIX, 1. Stop ColdFusion. 2.
9. Stop the Adobe ColdFusion 10 application if it is running. 10. Select Adobe ColdFusion 10 Application, select Manage Modules and then select the check box for ColdFusion RDS application, and then click Remove. Enable web services To enable web services, copy the tools.jar file from Java home that WebSphere uses to the cfusion/lib directory. Apply application server configuration To apply application server configuration, restart the application server.
a. cd cf_install_directory md cfusion (Windows, mkdir cfusion on UNIX) md CFIDE (Windows, mkdir CFIDE on UNIX) b. Change to the cfusion directory and expand the cfusion.war file with the jar command: cd cfusion java_home/bin/jar -xvf ../cfusion.war c. Go up one level to the install directory: cd .. d. Go to the CFIDE directory and expand the rds.war file with the jar command: cd CFIDE java_home/bin/jar -xvf ../rds.war 4. Open the weblogic.policy file.
7. Review the console messages and server log to ensure that ColdFusion 10 deployed successfully. 8. Start the ColdFusion Administrator, which runs the Configuration wizard. 9. To install any other integrated Adobe or third-party technologies, see Installing Integrated Technologies. 10. Configure and manage your system, as described in Configuring your System. 11.
CF_WEB_INF=cf_webapp_root/WEB-INF CF_SHARED_LIB=${CF_WEB_INF}/cfusion/lib 5. Save the startup script and restart the WebLogic Server. Enable ColdFusion security in Windows 1. Open the startup script for the WebLogic domain, which is typically the startWebLogic cmd file, which is located in the wldomain_root\bin directory. 2.
# Security options are only required if enabling sandbox security CF_SECURITY_JVM_OPTIONS="-Djava.security.manager" CF_GRAPHING_JVM_OPTIONS="-Djava.awt.headless=true" # You must append ${CF_SECURITY_JVM_OPTIONS} and ${CF_GRAPHING_JVM_OPTIONS} # to the existing JAVA_OPTIONS value. # JAVA_OPTIONS="default java options ${CF_SECURITY_JVM_OPTIONS} ${CF_GRAPHING_JVM_OPTIONS}" # You must append the following to the MEM_ARGS variable coded # in the server startup file: # "-Xmx512m -XX:MaxPermSize=128m" 3.
Note To enable Livecycle Data Services ES on Oracle AS, specify the following JVM argument in the ColdFusion Administrator: -Doc4j.jmx.security.proxy.off =true You must perform some configuration steps to enable support for CFX tags written in C++, which binary files that are specific to your operating system. Configure operating system-specific binary support for Windows 1. 2. 3. 4. 5. Connect to Oracle AS 11g using Enterprise Manager. Go to oc4j_instance/Administration/Server Properties.
graphing on AIX, Linux, and Solaris systems. This step is not required to enable charting and graphing in Windows. Enable charting and graphing 1. In Oracle AS 11g Enterprise Manager, go to oc4j_instance/Administration/Server Properties. 2. If the following entry does not exist in the Java Option under the Command Line Options category, add it: -Djava.awt.headless=true 3. Select Apply. 4. When the Enterprise Manager prompts you to restart, select the restart option.
Note If you are already using an application with context root of /, use a context root other than / for the cfusion-ear file. If you specified / when you installed ColdFusion, you can change it by opening the cfusion-ear/META-INF/application.xml file in a text editor and modifying the context-root element. After you deploy the cfusion-ear file, you access ColdFusion pages by specifying http://hostname:portnumbe r/contextroot/pagename.cfm.
JBoss 5.1 or 6.x server default deploy cfusion.ear cfusion.war META-INF rds.war JBoss 7.x standalone deployments cfusion.ear cfusion.war META-INF rds.war cfusion.ear.dodeploy 9. (Windows)Edit the JBOSS_HOME\bin\run.bat file for JBoss 5.1 and 6.x and JBOSS_HOME\standalone.bat for JBoss 7.x by doing the following: a. If not present, add the JVM (-Xmx512m) parameter to JAVA_OPTS. b. Ensure that the permanent generation heap size is set by adding -XX:MaxPermSize=128m to JAVA_OPTS.
Note (JBoss 7.x only) If cfusion.ear is not deployed before JBoss times out for deployment, you can change the deployment timeout of JBoss in JBOSS_HOME\standalone\configuration\standalone.xml file.{{ }} Note (JBoss 7.x only) After CF is deployed in JBoss 7.x, web services will not function.
@echo off rem ----------------------------------------------rem JBoss Bootstrap Script for Win32 rem ----------------------------------------------- 4. Below this text, insert three lines and paste. set CF_LIB_PATH=JBOSS_DEPLOY_DIR\cfusion.ear\cfusion.war\WEB-INF\cfusion\lib set PATH=%PATH%;%CF_LIB_PATH% 5. Save the file and start the server. Note You must copy the version of tools.jar that the application server uses to the cfusion/lib directory.
Replace nnn with the value of an unused port. If you try to connect from a LiveCycle Data Services ES server that is running in another JVM server to ColdFusion over RMI, the Flex server must start with the same JVM argument. Disable RDS 1. Stop ColdFusion. 2. Edit JBOSS_DEPLOY_DIR\cfusion.ear\cfusion.war\WEB-INF\web.xml by commenting out the following: